


 I get asked a few times a week about what sort of workstation I use and I thought this year would be a good time to share a bit of my mindset behind building one and how I tackle my workflow needs. First and foremost, I'm a bit outside the norm as I'm sometimes building 1-3 boxes a year, but a decent workstation should be able to last you 2-5 years. In the professional world I exist in and for the work I do a workstation exists as a digital film laboratory and something close to an alchemist's lab. If you are working with Digital Cinema Cameras and the various on set and post production related tasks associated with all of this I consider a mid-level to powerful workstation as a necessity in these digital times. In the above graphic are a fair bit of icons from various manufacturers who have empowered my more recent workflow efforts. Let's jump into my 2018 build and I'll break all that down.
Article Quick Links
- Workflow Needs
- Horsepower & Guts - Motherboard, CPU, RAM, and Power Supply
- Storage Strategy
- Adaptive Workflow
- GPUs - Heavy Graphics Processing
- I/O - Flexibility and Speed
- Selecting a Case and Cooling
- Monitoring
- What's Changed - An Update on My Personal Workflow
- Some Final Thoughts, Thanks, and a Look to the Future
Workflow Needs
Some of my 8K aerial material filmed with RED 8K Cameras
First and foremost it's important to look at your needs when building a system and what you are hoping to get out of a build. In my specific case for the last 3 years I've been primarily filming in 8K resolution with my RED Digital Cinema Cameras and even more recently I've been exploring stitched array workflows with those cameras up to 12K and 16K resolution, which is a rather processing and data intensive task. Often my work is a bit ahead of the trend curve of what the industry as a whole is up to often by 2 or 3 years, and in the case of 16K material likely a bit longer than that even. However my most common task is filming in 8K and finishing to 4K and 8K. So I needed to come up with a build that would be suitable for 8K editing, rendering, and up to 8K realtime playback. I also use this workstation for digital painting, VFX work, and Post Color Correction/Grading. I'm dealing with compressed and uncompressed workflows and pretty large data sets. I also use a massive quantity of software depending on what I need to do, most of these programs run on PCs and Macs, however there's plenty of weird things that are Windows only in my life as well as a few odd programs I've made to help me get certain things done. With that in mind, this build is based on Microsoft's Windows 10 Professional.Outside of my content creation requirements I also have been exploring some of the benefits of newer modern I/O standards to assist with editing and moving around footage as that makes life easier day to day. This workstation at it's core is designed to keep my workflow fast, efficient, and provide a decent user experience when working on projects. Below are what I've chosen for this particular build and why.
Horsepower & Guts - Motherboard, CPU, RAM, and Power Supply

A detail of the Asus X299 SAGE WS Motherboard
A quality motherboard was required for this build. I knew early on I wanted to explore the newer Intel 18-core I9 7980XE processor and I also knew that I would be overclocking it. For this build I chose the newly launched Asus WS X299 SAGE motherboard, in fact I waited on this board to be released before even getting started with this build. This is a pretty forward thinking motherboard which provides the the bandwidth and flexible framework for the processor, storage connectivity, PCI-E lanes, and overclocking that I was aiming at for this build. The processor's high core count assists particularly in rendering and playback depending on which applications I'm using and how they are optimized.

The Fractal Design Celsius S24 covering the Intel i9 18-Core 7980EX surrounded by 128GB of Corsair's Dominator DDR4 RAM
To that point RAM is also utilized differently in each application and I'd say I lean on the side of an aggressive multitasker, it's not uncommon for me to have a few programs running sometimes all even working on the same project or different ones. A large 128GB volume of fast DDR4 memory was my target and I chose Corsair's DDR4 Dominator Platinum range. This quantity of fast RAM also helps with things like RAM frame previewing/buffering for applications that can do that. Interestingly Corsair also just announced their AX1600i Power Supply which would be a useful tool to deliver the power the CPU, storage devices, and expansion cards with a fair bit of over provisioning. That's currently the largest PSU you can get and is extremely efficient, which is nice considering the power draw of this system.
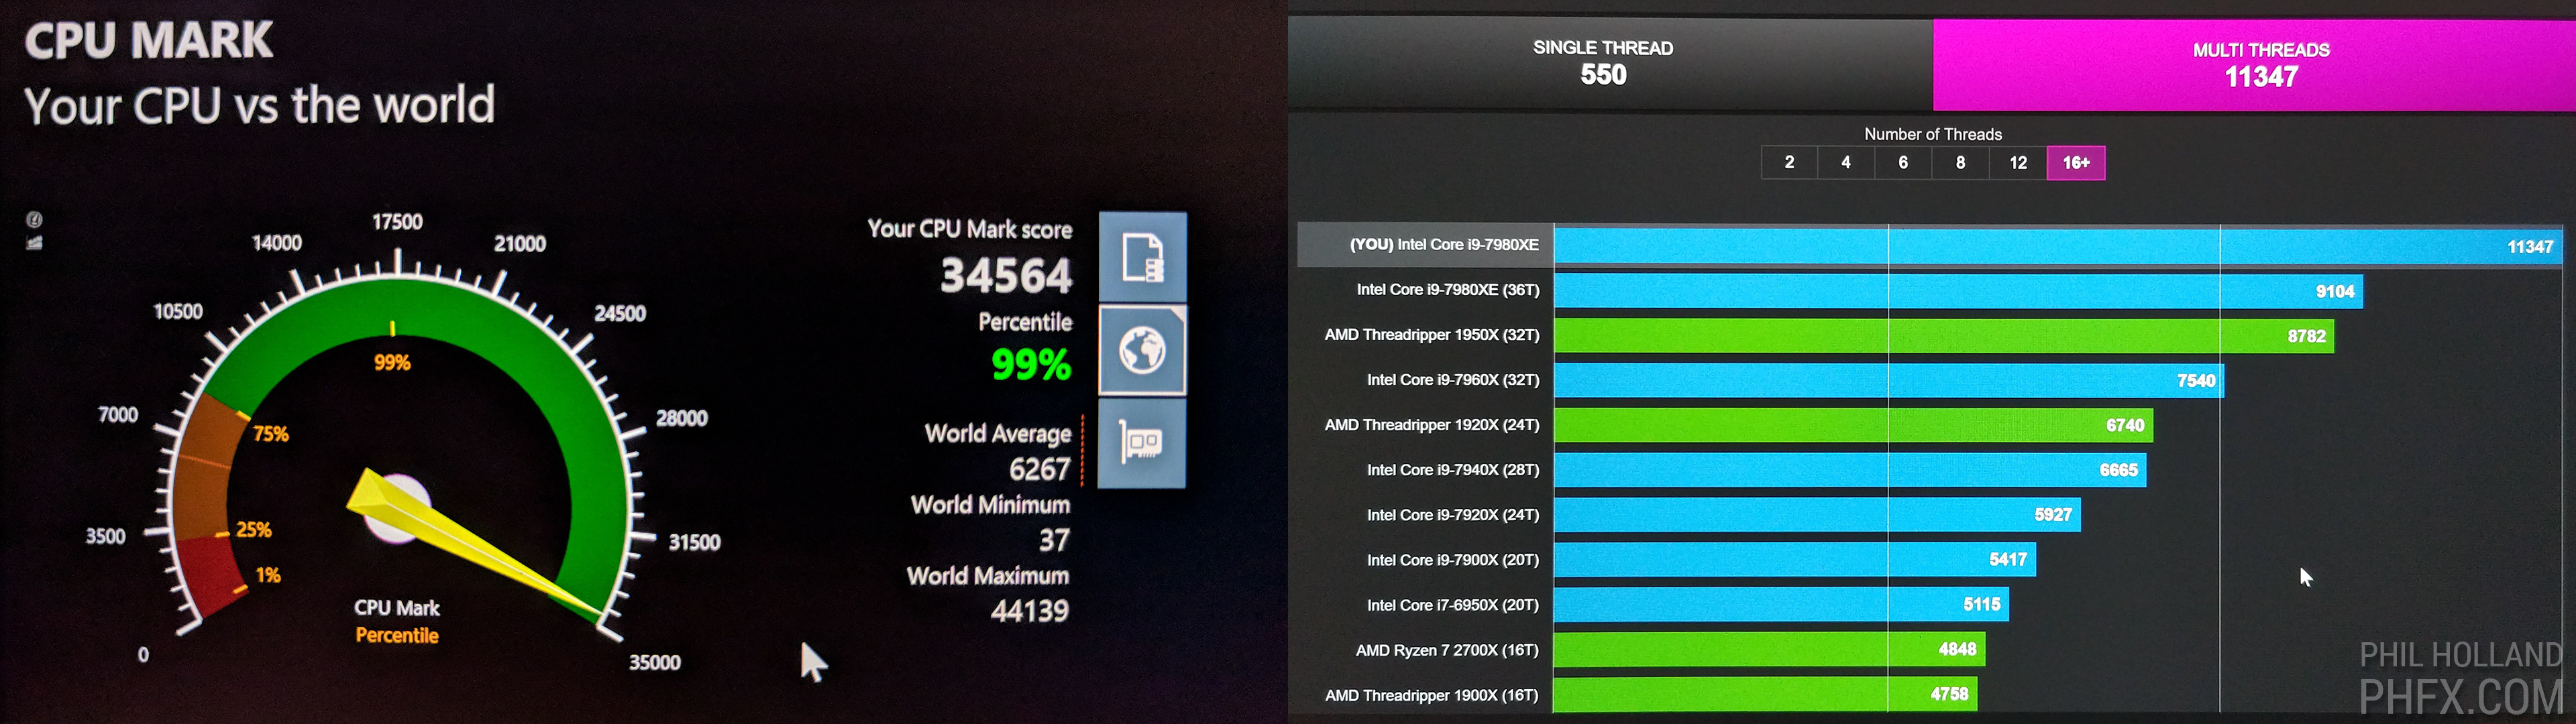
My early overclocked benchmarks were somewhat astonishing
After assembly, I was able to overclock the system rather high at 5.2GHz, but for longevity of the CPU and stability between applications I've settled in the 4.2-4.6GHz range. That extra .6GHz was nice and fairly astonishing, but that additional power draw and heat generation was a bit too extreme for my system cooling design. I use this box everyday and I want it to last a while, I'm also not interested in a truly advanced or labor and maintenance intensive cooling solution. So leaning towards a bit of a more realistic mindset is a good thing here.
Storage Strategy
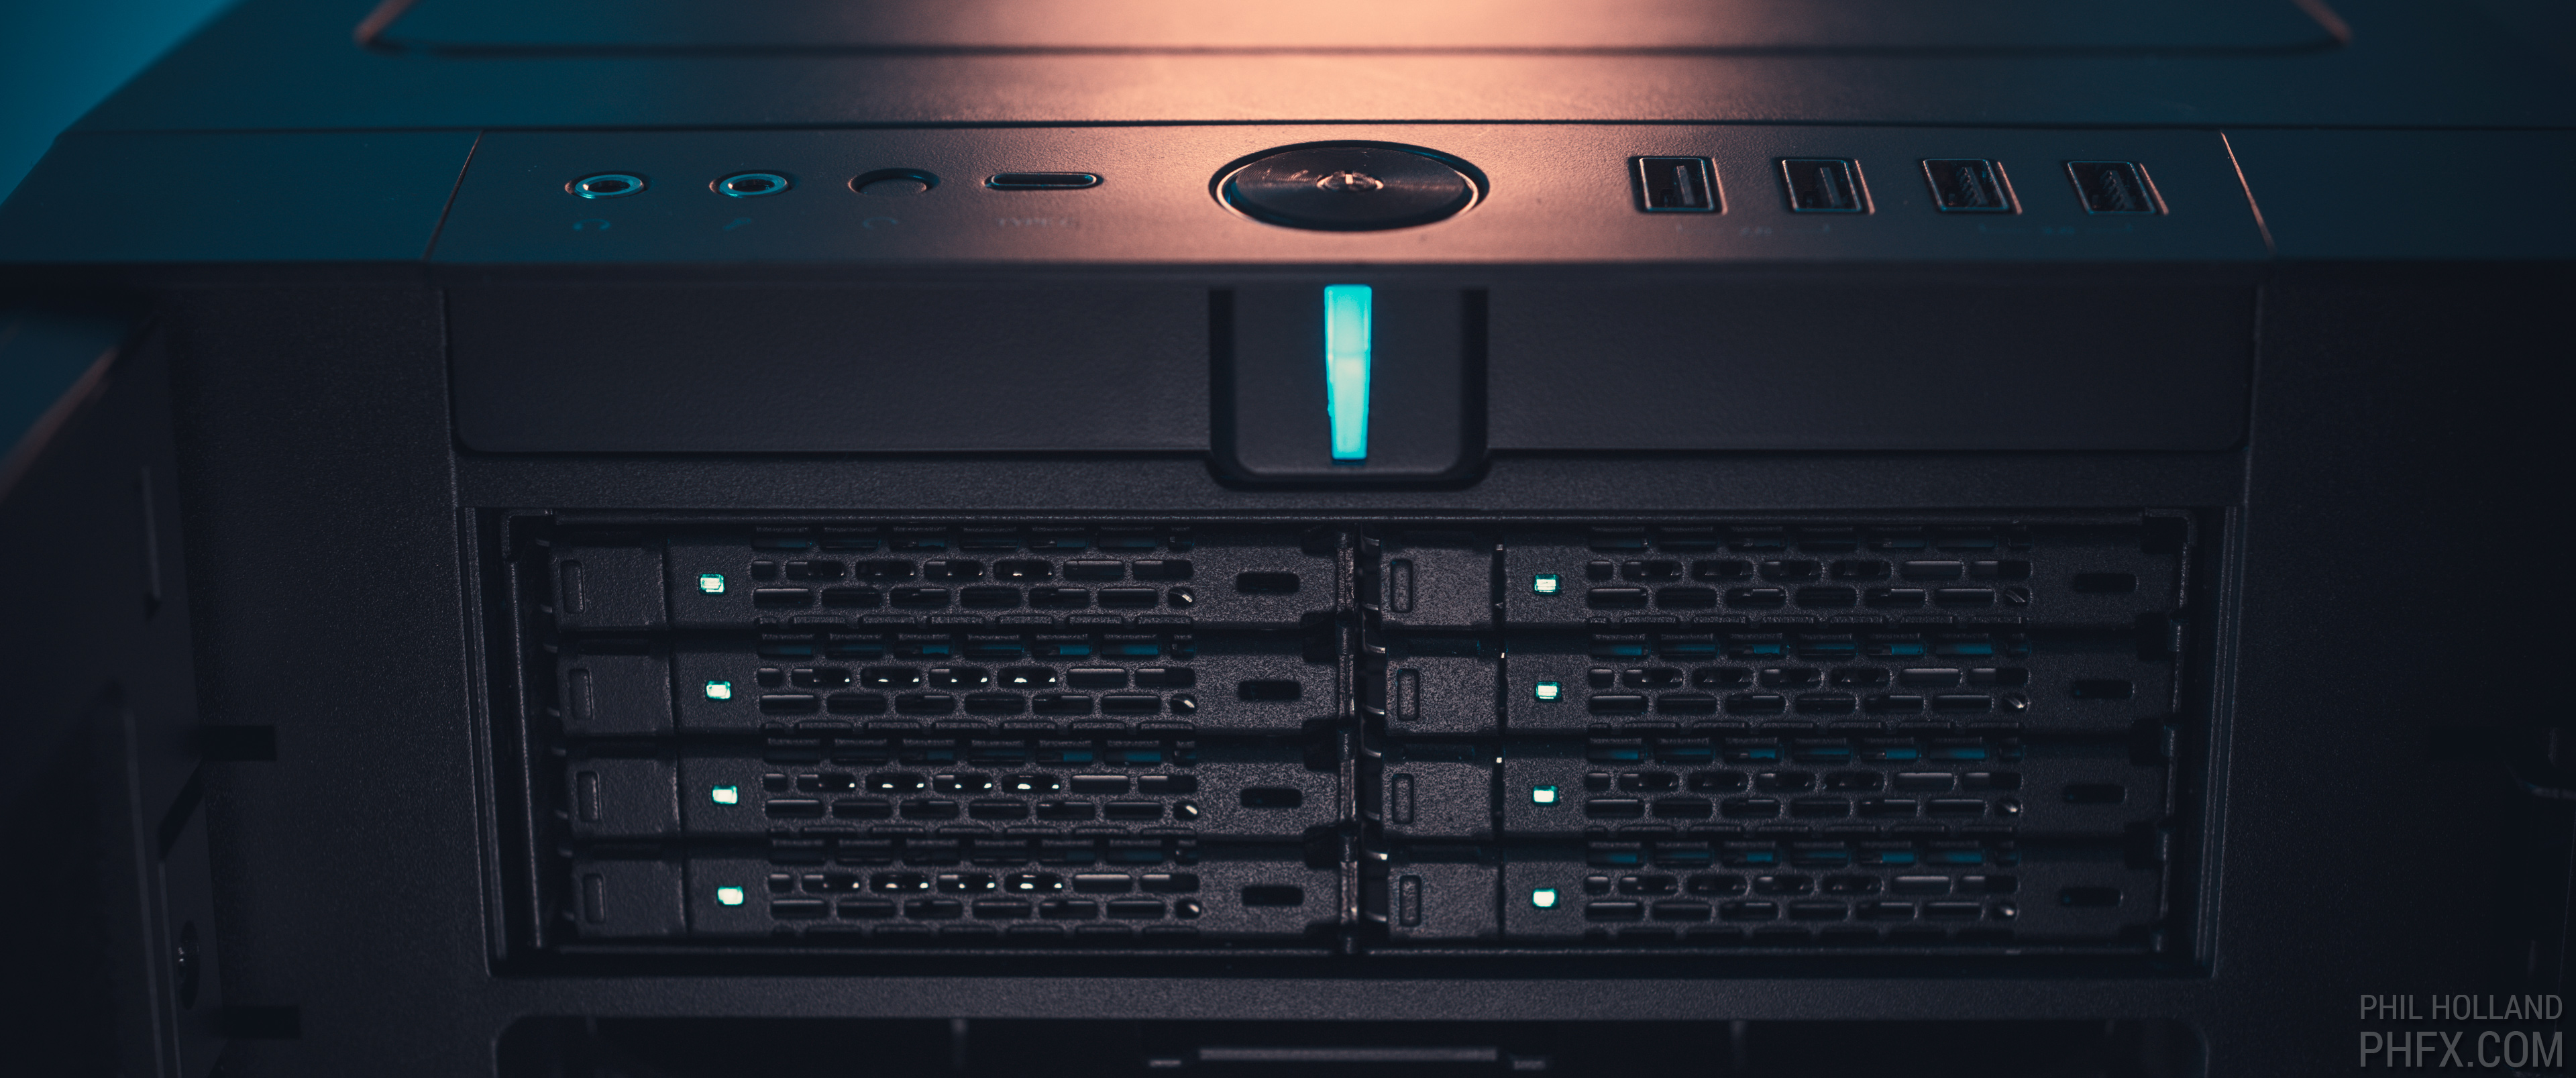
The Icybox 8-bay 2.5 SSD RAID Enclosure fits nicely within a 5.25" bay.
This one is a big one as data is the demon I fight with all year long. One of the key features of this workstation is that the all of the internal storage is solid state based. There are no spinning drives in this particular build and I have very deliberate reasoning behind this. I work with both my native REDCODE RAW footage or 4K proxies depending on project size and scope, also I generate high resolution compressed and uncompressed footage for playback. Because the Asus WS X299 motherboard allows for it, I have been able to explore SATA, M.2, and U.2 SSD storage technology within this build. There is a theme towards how I setup my drives that I've developed over the 2000s up until now that has proven to me to be good formula for most NLE, Color, and 2D and 3D Effects programs. Here's the mindset and tech behind the layout for this build:
Phil's 2018 Workstation Storage Recipe
- M.2 - Operating System and Application Drive (Samsung 970 EVO)
- RAID 0 - Working Volume (SATA SSD based)
- U.2 Extremely Fast Working Volume (Intel P4500)
- U.2 Fast Export/Playback Volume (Intel P4500)
- M.2 Temp/Cache, Fast Asset Drive - (Samsung 970 EVO)
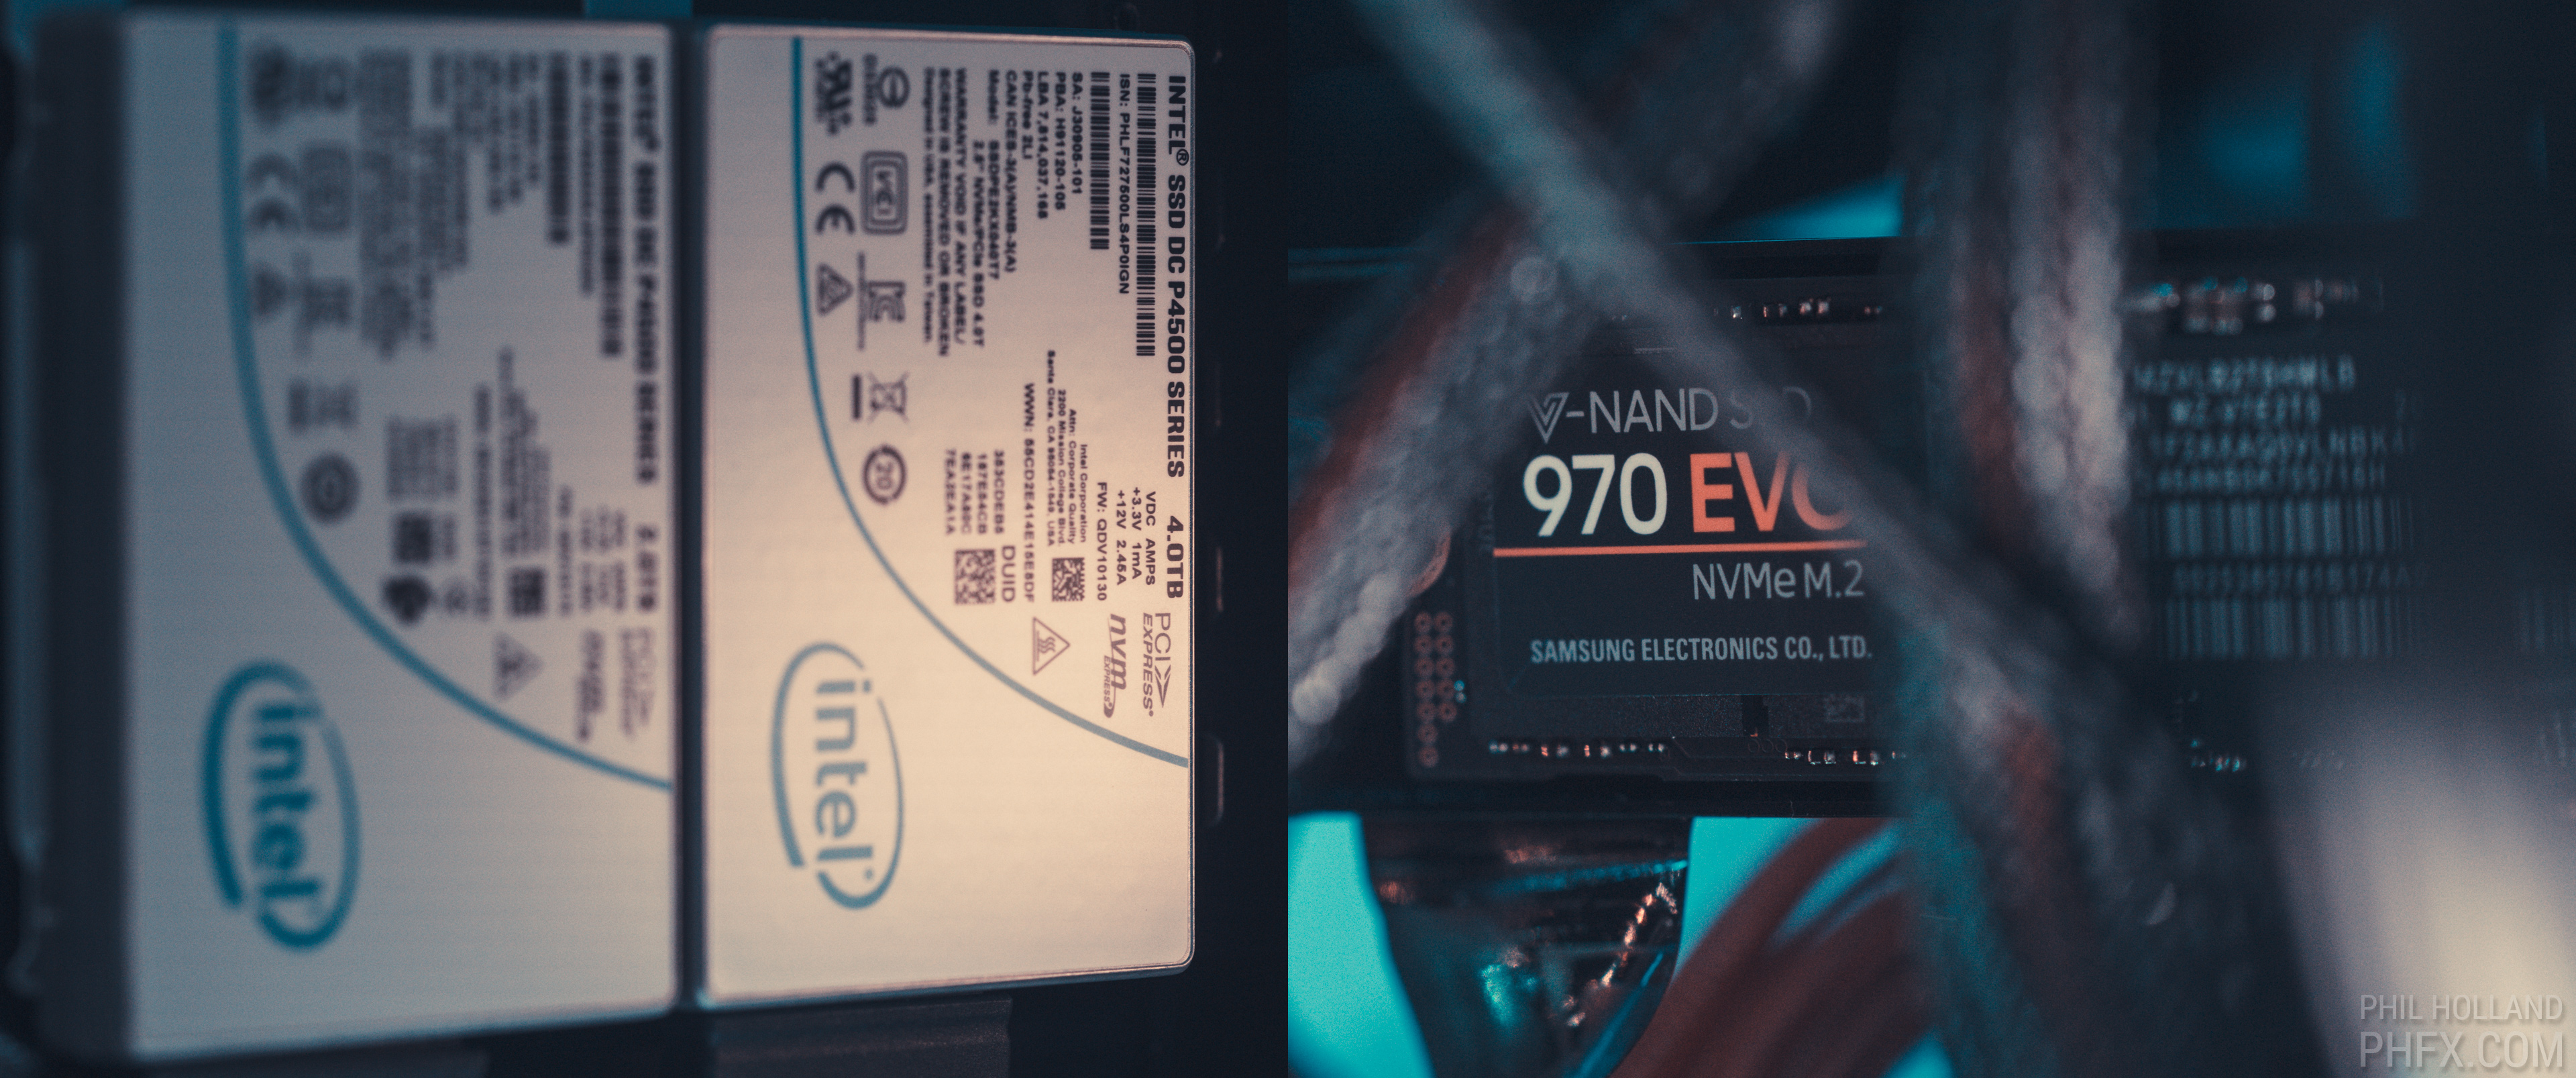
Tapping into the power and speed of NVMe and PCI-e 4X Data Rates with M.2 and U.2 SSD Tech
The one that many will be unfamiliar with there are the U.2 drives as it's not-so-common in most consumer level devices. U.2 is similar to M.2 as it can access 4X PCI-E lanes to keep everything moving really, really fast. For the U.2 drives I chose 2X of Intel's NVMe based 2TB and 4TB P4500 series drives which feature read/write performance of 3200MB/s and 1800MB/s respectively. The 2TB for Operating System and my Applications, and the 4TB as an export volume. For M.2 I needed 2X 2TB drives and with Samsung recently releasing the 970 EVO series I chose those. Those are also NVMe based with similar read and write speeds. I'll use these particular volumes mostly for fast caching and writing of temp files. Also, I have found it useful to have fast access to assets I commonly use on projects. This would be one of those adding to the user experience features that isn't exactly necessary, but very nice to add into the mix. Also, do to M.2's speed I might occasionally use them for a working volume if the project is small enough.
The SATA SSD based RAID 0 volume is meant to be a fast working array. All my footage is backed up in double or triple redundancy and sometimes for studio work even more backups exist than that. So data security isn't the biggest concern here, but a sizable working volume and speed is as the footage is backed up safely elsewhere. As projects go through post and various other files are generated, I back that up on a nearly daily basis if need be. For now I have 8X 2TB Samsung 860 SSDs in there that give me around 4000/MBs reads to produce a 16TB working volume. However I will likely upgrade those to 4TB or upcoming 8TB drives shortly to double/quadruple my working capacity up to 32TB or 64TB, which would be very useful especially compared to the 48TB spinning disk array found in my previous workstation. As a RAID controller I'm going back and forth between the hardware controller found on the Asus motherboard. Shortly I'll be ripping my Areca 1883i dedicated RAID card out of my other workstation and using that in this build. One thing on my mind there is I can have 4 times the drives with that card involved if I ever need to get 100TB+ in a single box. No matter what your specific RAID setup, I'd recommend either the motherboard or dedicated card hardware based RAID to get the best performance out of your build. Software RAID is also good, especially these days, but sometimes you'll be wasting system resources that could otherwise be utilized for rendering or application use.
So to the point as to why this is an all SSD build. I've learned from some of the custom notebooks I've made in the past that feature all SSD builds that NLEs in particular benefit from faster drives with lower latency which helps with not only accessing footage on the timeline, but also populating clips within bins particularly when working with higher resolution material as well as just helping out with the time it takes to fully load larger projects. My software from Adobe, Blackmagic Design, RED, and others all seem to benefit from this.
Adaptive Workflow

Dispatcher, a 15 minute short film, was edited, colored, and finished completely in 8K REDCODE RAW
As I've mentioned above I don't exactly have one workflow. Every project is an oportunity to examine what the best workflow is to keep the pipe flowing smoothly. When I can and when it's suitable I like to stay in my native REDCODE RAW format. This is a compressed raw codec that actually works in most 3rd party applications. This allows me to always have nondestructive access to my footage's metadata. Depending on the job and client's needs I do adapt and work within their pipeline and standards as necessary. Typically this mostly means what filetypes I'm delivering, i.e. ProRes for broadcast, streaming and commercial clients or Uncompressed Frame Sequences for feature films and occasionally commercials. However, it could also mean the general filetypes I'm generating for dailies or even day to day work within an NLE or Color Suite.
For medium to small projects it's actually quicker for me to stay in the native raw codecs
If I had to generally lay down some logic or theory to how I choose which codec to work in, I'd say for short form content around 30 minutes or less I like to stay in raw. For longer projects where I might be dealing with 3,000 or more shots, I'll certainly explore the concept of proxies and smaller resolution and file size mezzanine codecs like ProRes, DnxHR, or even H.264. This is more for ease of juggling thousands of takes and sometimes taking an edit with me to a notebook of the main box. When the project is put through post color, VFX, or finished I link back to the raw source material.
12K and 16K multiple camera array footage represents some of my larger data sets
VFX heavy productions tend to go out to uncompressed 16-bit EXR, DPX, or TIF and those are indeed the largest data sets I deal with typically. For small projects, internal storage works well here, but this is exactly why it's nice to have access to an even larger working volume in the 24-96TB range if possible. On the extreme side, as of late I've been working with arrays feature 8K footage from multiple cameras resulting in 12K or 16K material. That's the beefy stuff and I'm also working in 16-bit uncompressed with each frame landing in the 600-900MB range depending on resolution and aspect ratio. Combined with processing the source footage also out in 16-bit plus the original REDCODE RAW footage that nets up to nearly 2GB a frame. That's the extreme stuff I'm dealing with currently and it's been a fascinating learning experience all year long with that particular workflow.
GPUs - Heavy Graphics Processing
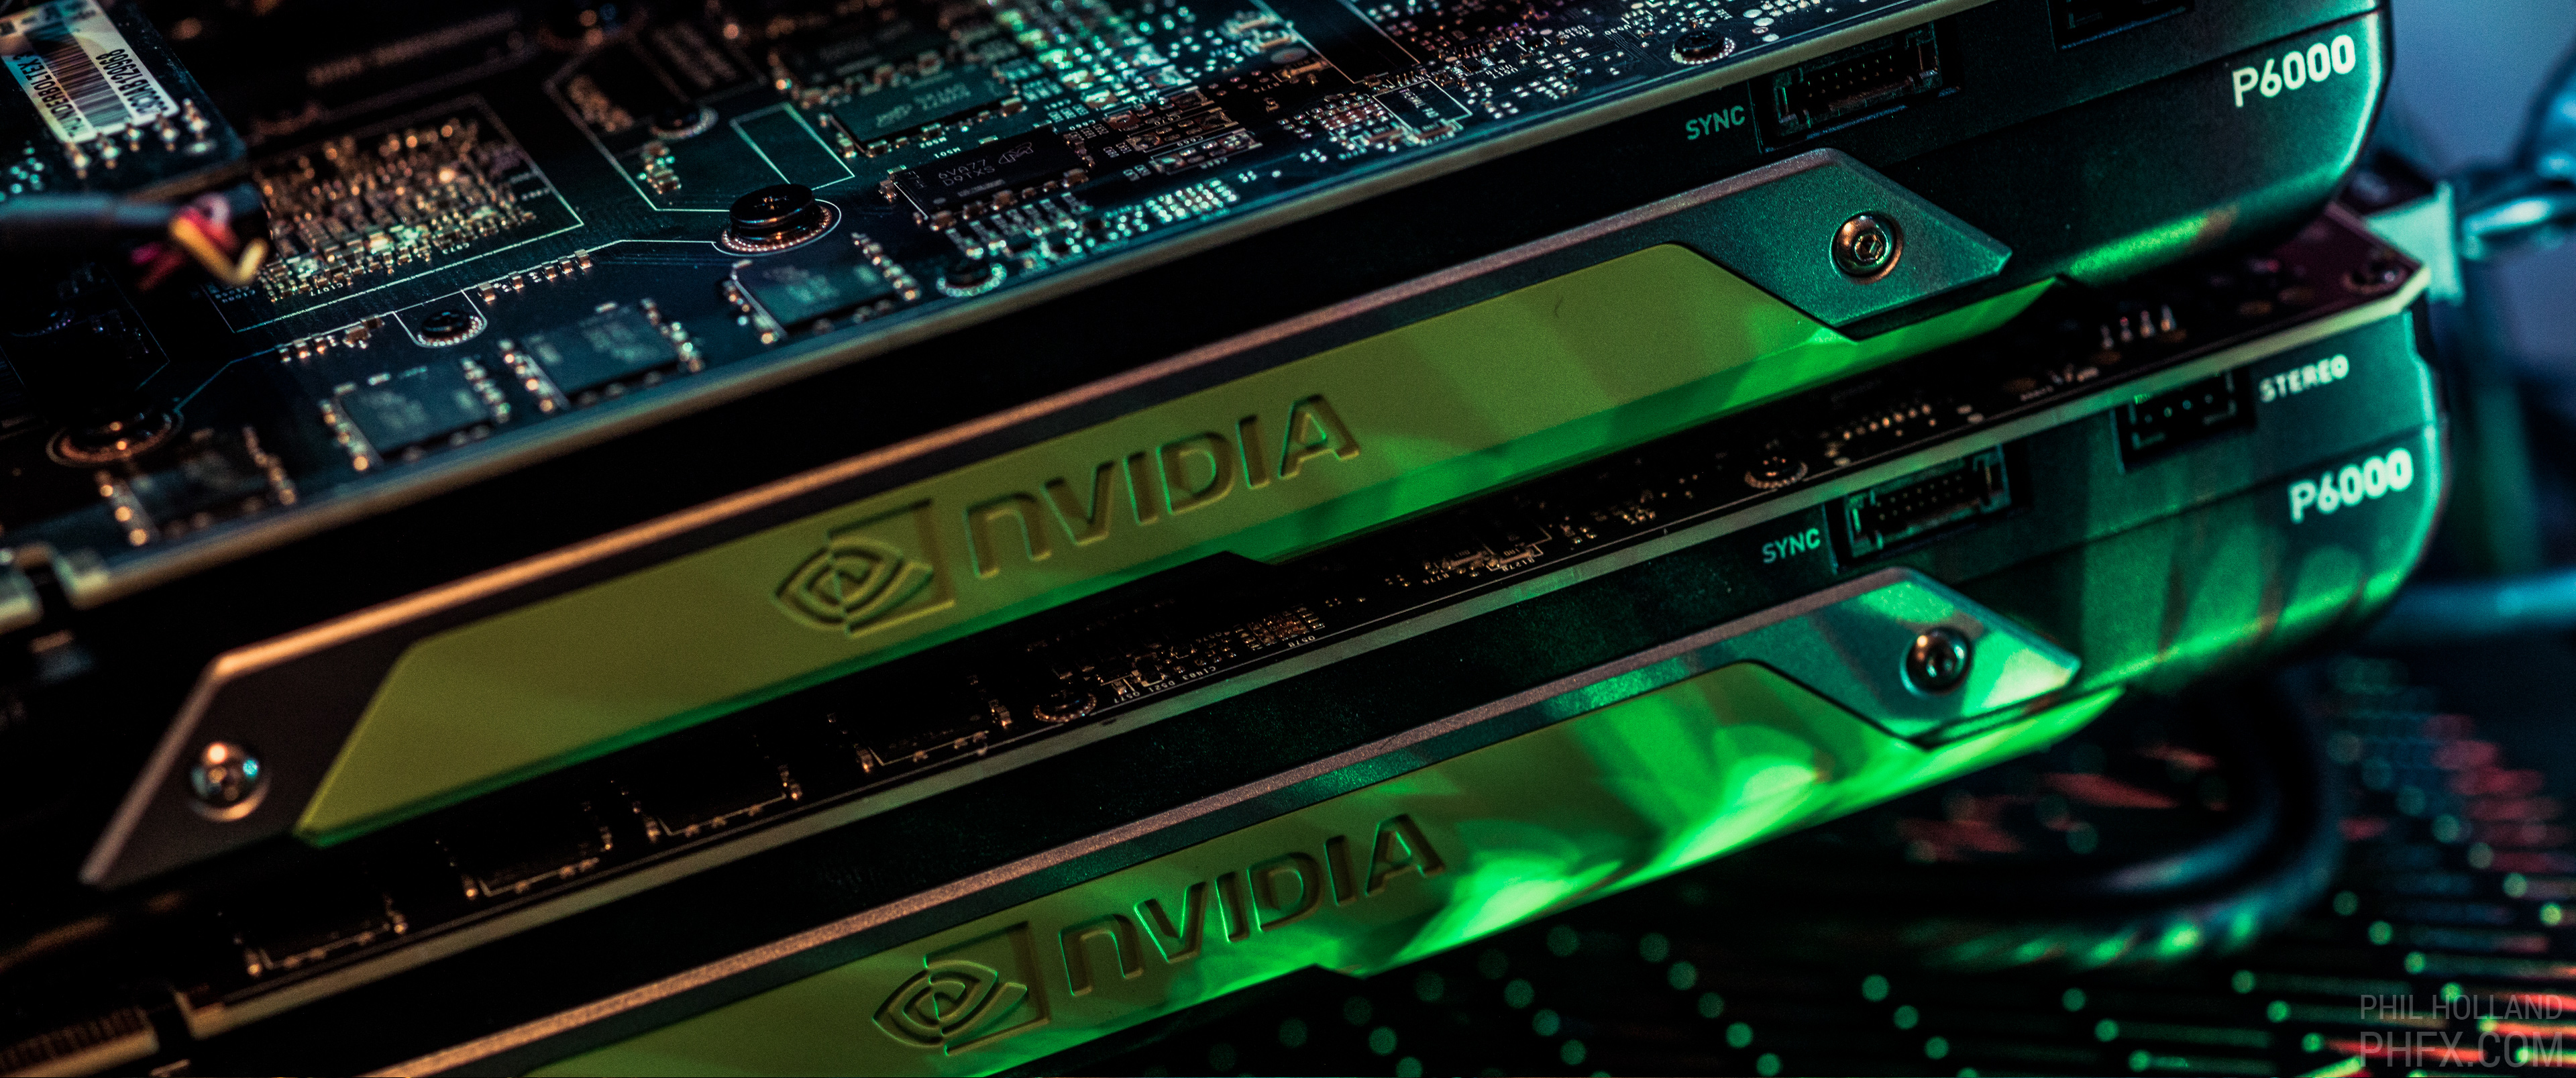
Two NVIDIA Quadro P6000 GPUs handle my heavy image processing
I've said it before, but one of the biggest advancements in motion picture workflows has been creation and optimization of GPU acceleration. Both CUDA and OpenCL have changed the game on this front. For this build I knew I wanted two GPUs with a fair bit of horsepower and RAM due to the resolutions I work with. For this build there are two Nvidia Quadro P6000s GPUs which feature 24GB of RAM each. Plenty of memory to protect me from buffer or frame drawing errors. Most of the applications I use tap into the CUDA cores of 2 GPUs and some use a dedicated GPU to render the application's GUI while the other card accelerates the content. That said, there were benefits in this case to have two big ones in this box to assist with rendering and playback. One other consideration for me is that currently to achieve 8K playback on my 70 Sharp 8K screen I need to connect to that display with 4X DVI to HDMI 2.0 cables. Also, I can have additional displays running from the other GPU to assist with other aspects of workflow like driving the footage from an NLE or Color Grading Application.There is a bit of a look to the future here as Nvidia has it's newer RTX cards and I may put two of those in this box shortly. Additionally, RED and Nvidia are working on something special that will be out 4th quarter 2018 in accelerating my REDCODE RAW footage even further with an upcoming GPU-based decompression, which will greatly help with playback of high resolution footage.
I/O - Flexibility and Speed
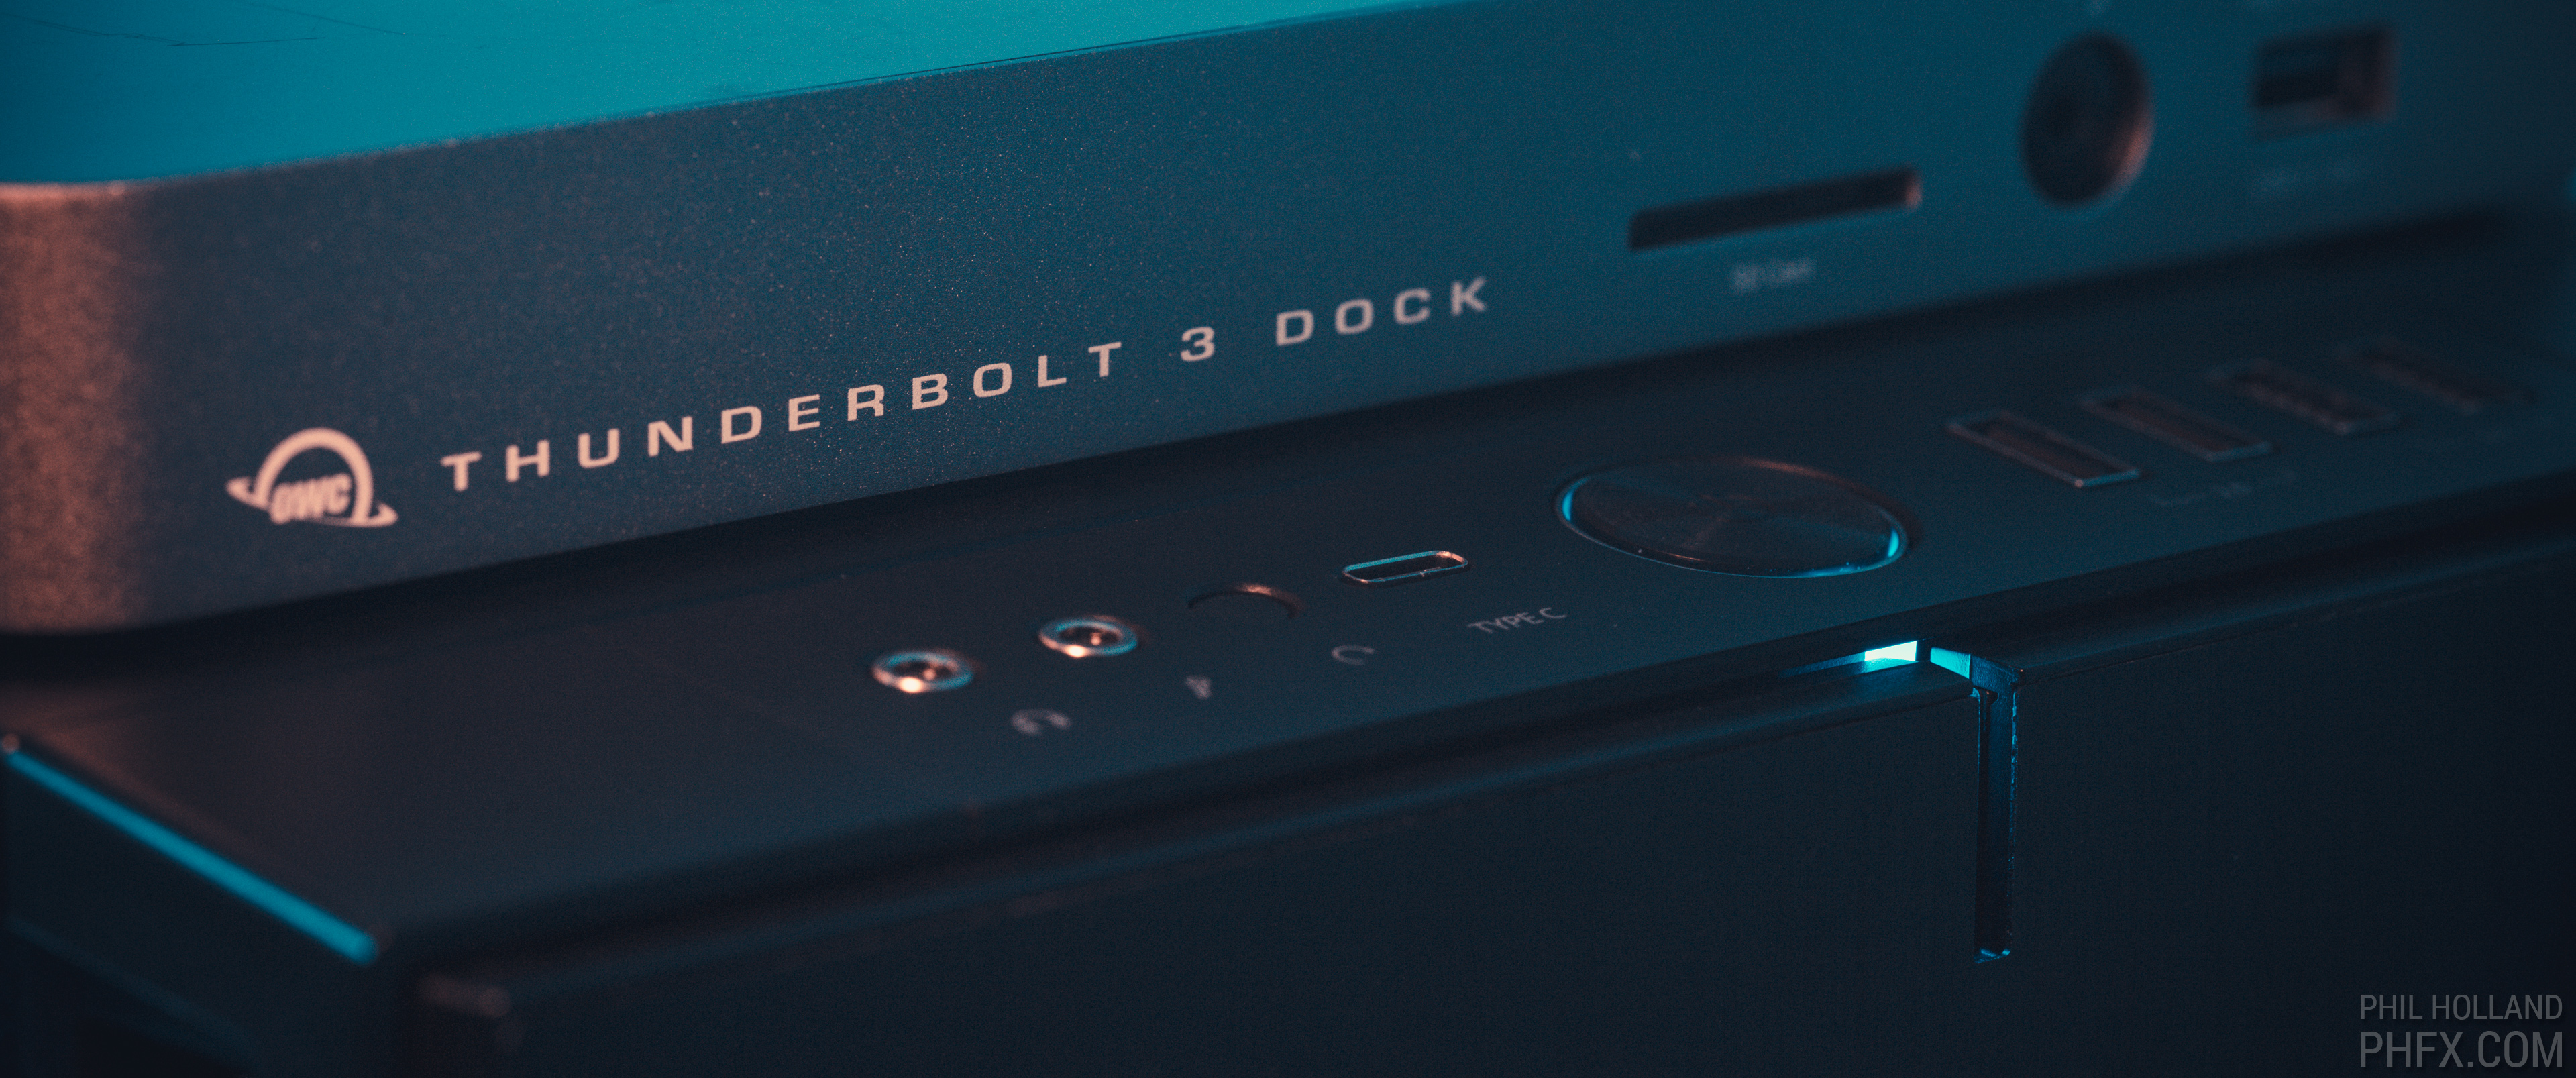
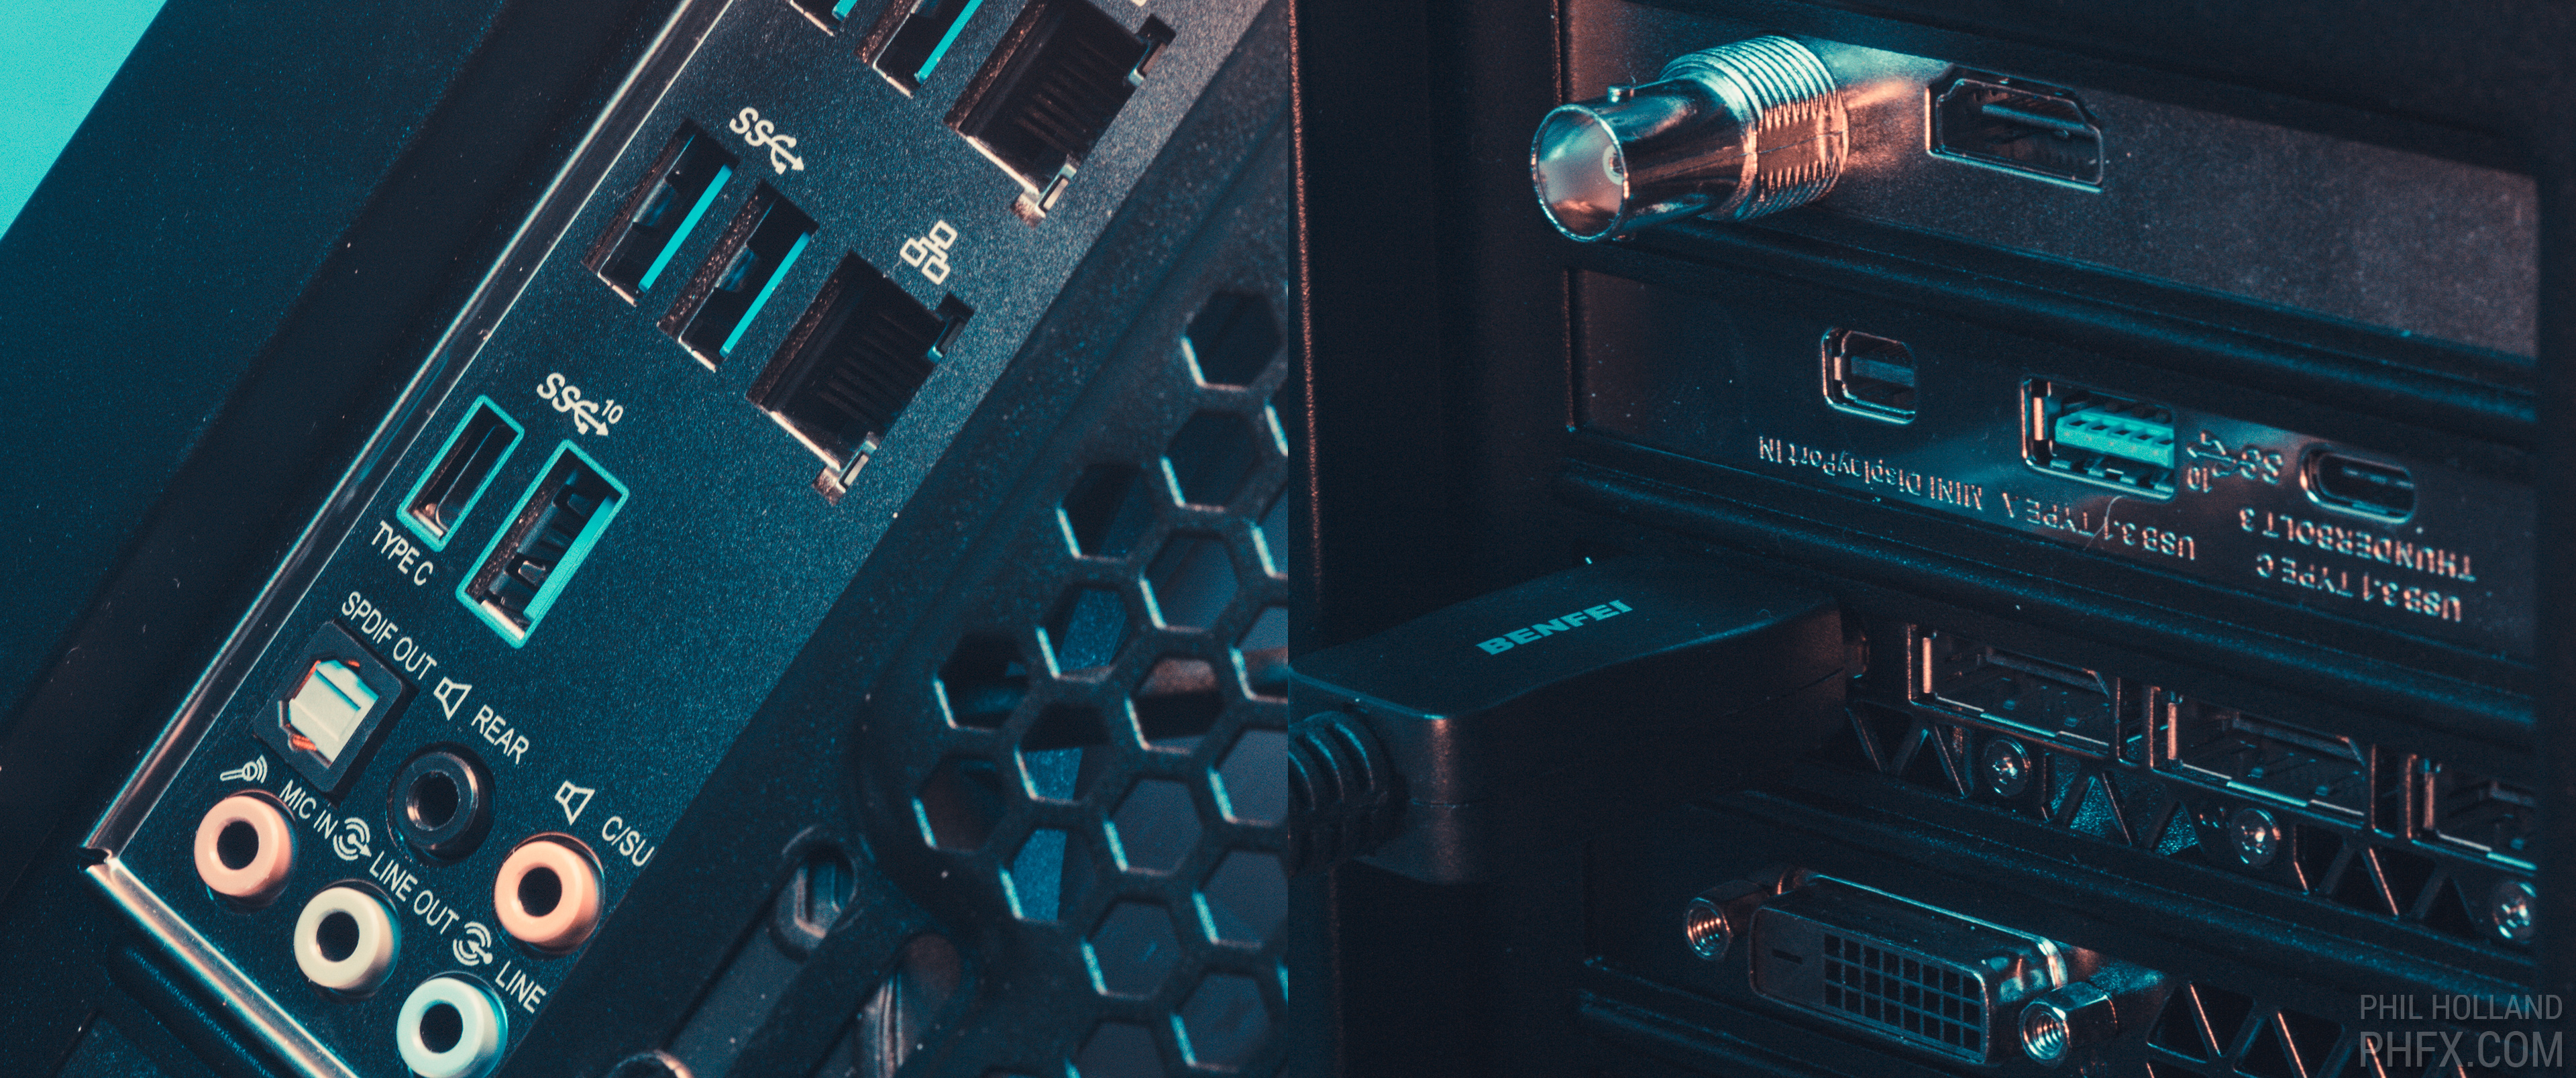
The OWC Thunderbolt 3 Hub provides easy access on top of the case as does the front panel USB 3.1 Gen.2 and Gen.1 Ports
One of the exciting advancements that's been developing over the last few years is the newer USB 3.1 Gen.2 standard as well as the Thunderbolt 3 specification. I've been exploring these early on (there were indeed many growing pains) and for this build I knew moving forward with these higher speed connections helps me in a variety of ways. Specifically for USB 3.1 Gen.2 I can offload my RED Mini-Mags that my cameras use much faster than USB 3.0/3.1 Gen.1 standards. Each of my mags are about 960GB and the difference in speed between the newer USB Gen.2 and the older standard manifests a time savings of about 20-25 minutes per mag offload, which makes a notable difference if you're filling up 1-8 cards a day and because of my bus layout I can actually offload a few mags at once without a speed or data security penalty, which saves a crazy amount of time overall.
Connectivity is one of the main strengths of this build
Total I/O Ports for this build
- 1X Thunderbolt 3 (Great for fast external RAIDs)
- 4X USB 3.1 Gen 2 (Great for Media Readers and External Drives)
- 13X USB 3.1 Gen 1 (Great for various External Drives)
- 6X USB 2.0 (Peripherals, Wacom, Keyboard, Mice, etc)
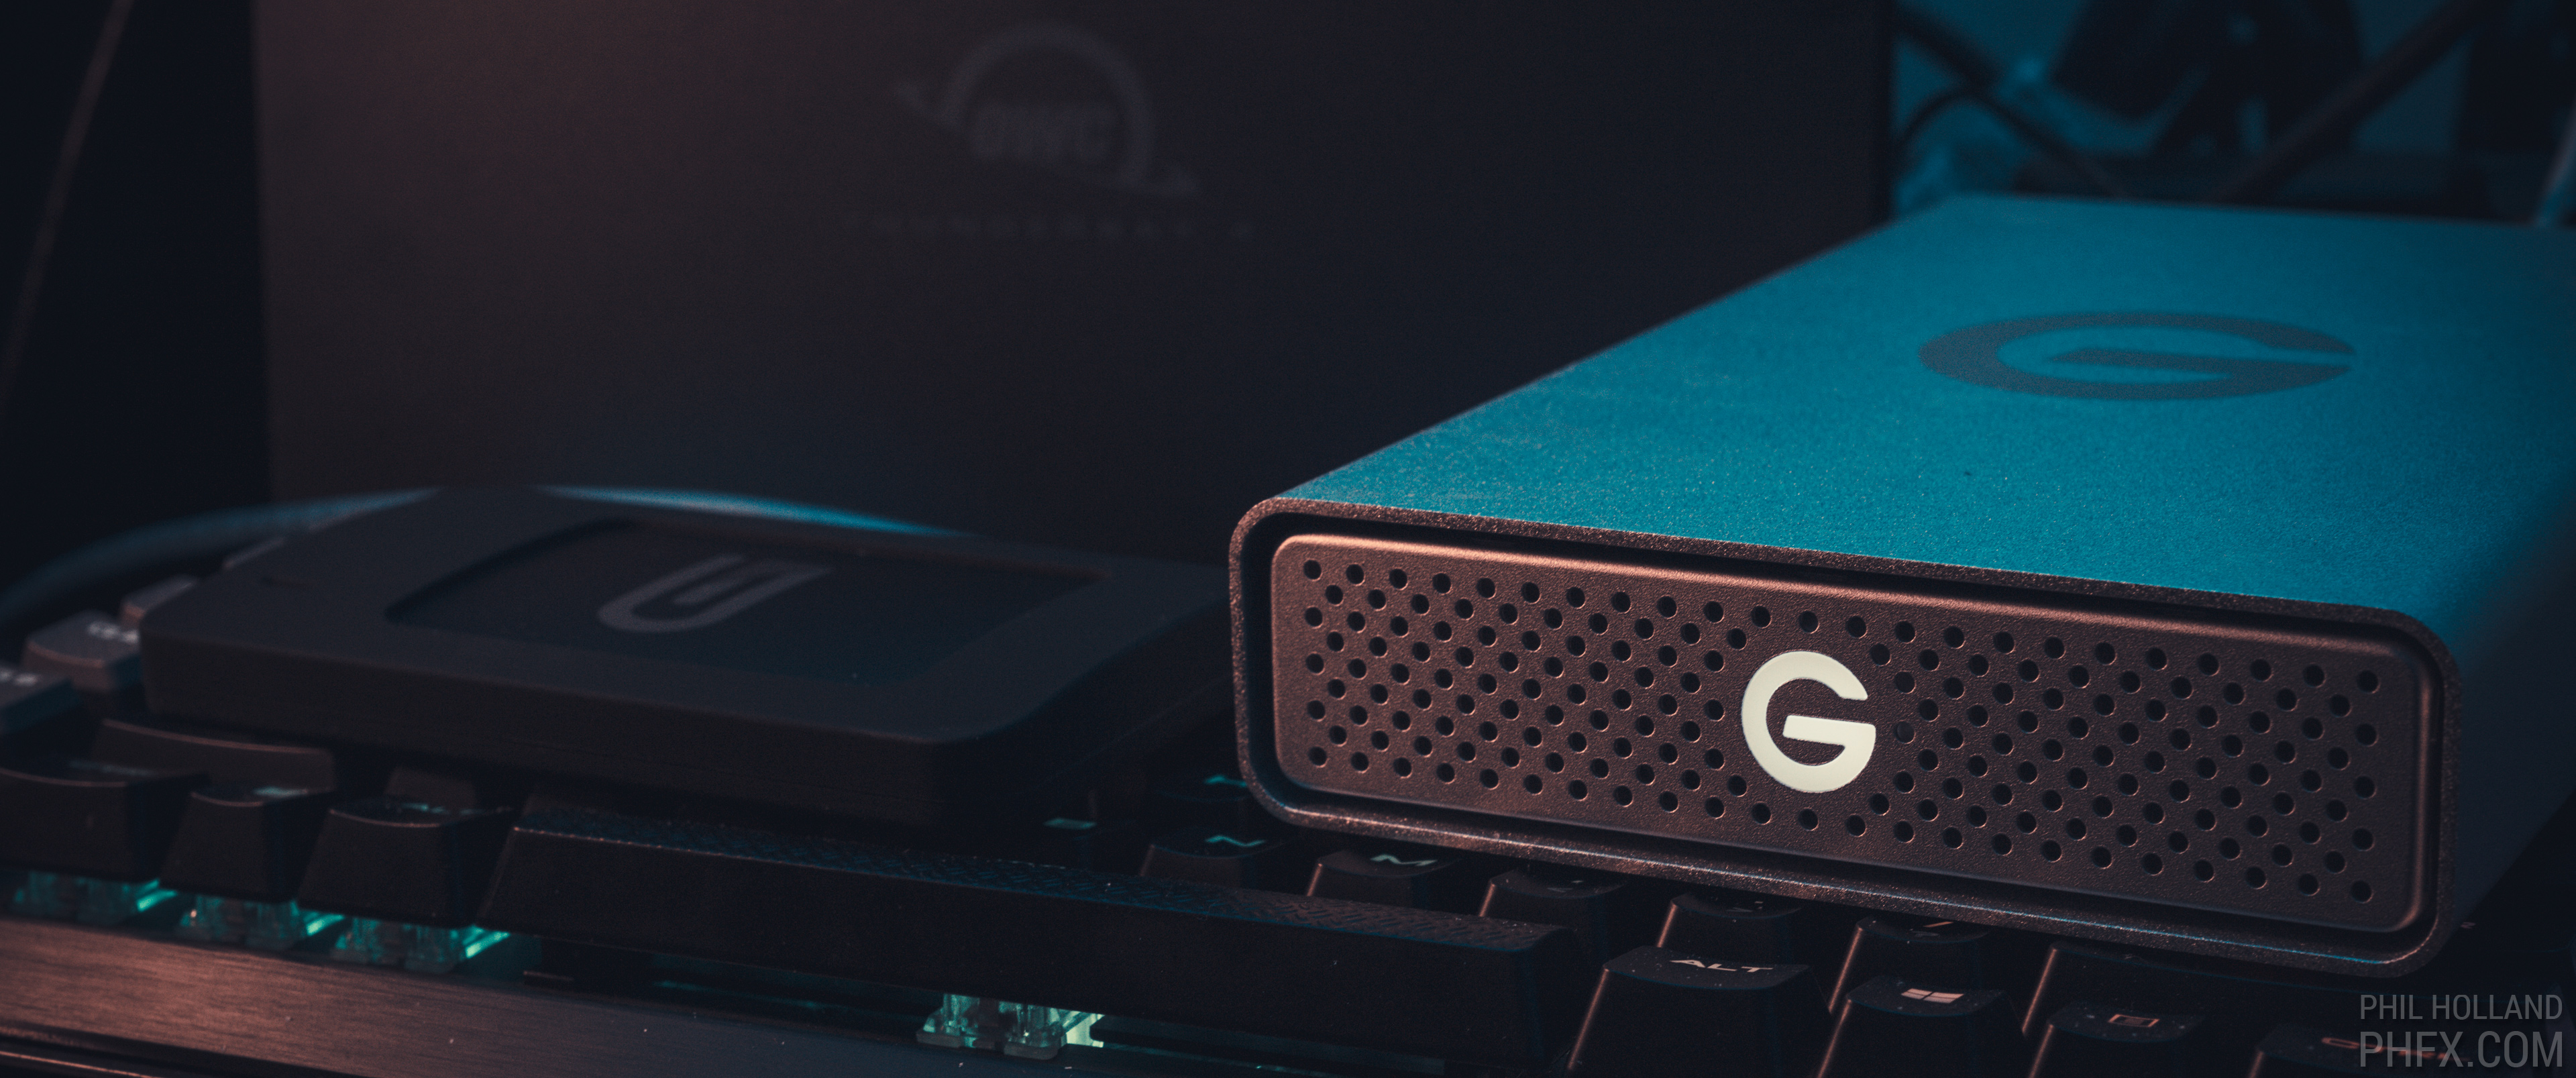
Various External Drives connecting with Thunderbolt 3 and USB 3.1 Gen.2 from OWC, G-Tech, and Glyph
On the same point as ingesting or even working with data from an external source, one key expansion card for me is the Asus ThunderboltEX 3 card which taps into the X299 SAGE's TB3 header and also adds one more welcomed USB 3.1 Gen.2 connection. On top of that, because I still do work on projects that generate a fair amount of footage well outside what my internal SSDs raids can hold, having Thunderbolt 3 for spinning disk arrays used as larger working volumes is empowering. For the last few years I've been using drives from G-Tech, Lacie, and OWC in this way. What's also nice there is having the ability to plug an external volume like that into something like a notebook/laptop which helps with my mobile workflow needs as I do work out of hotel rooms pretty often. On the subject of mobile workflow, I'm about to build a Thunderbolt 3 8TB NVMe RAID with the Asus Hyper 16X card and their XG Station Pro which are more commonly used for eGPUs, but in my case I need faster larger volumes for my notebook computers when working abroad.In total combined with front I/O this system features 1X Thunderbolt 3, 4X USB 3.1 Gen.2, 8X USB 3.1 Gen.1, 4X USB 2.0 ports. This works fantastic for my particular use case as I have 3 card readers plugged in, various input devices, and the need to plug in external drives and components pretty much on a daily basis. Once again, for a multitasker like me, this is a wonderful amount of connectivity without hubs, but even still, yep I have a an OWC TB3 hub that sits on top just in case.
Selecting a Case and Cooling
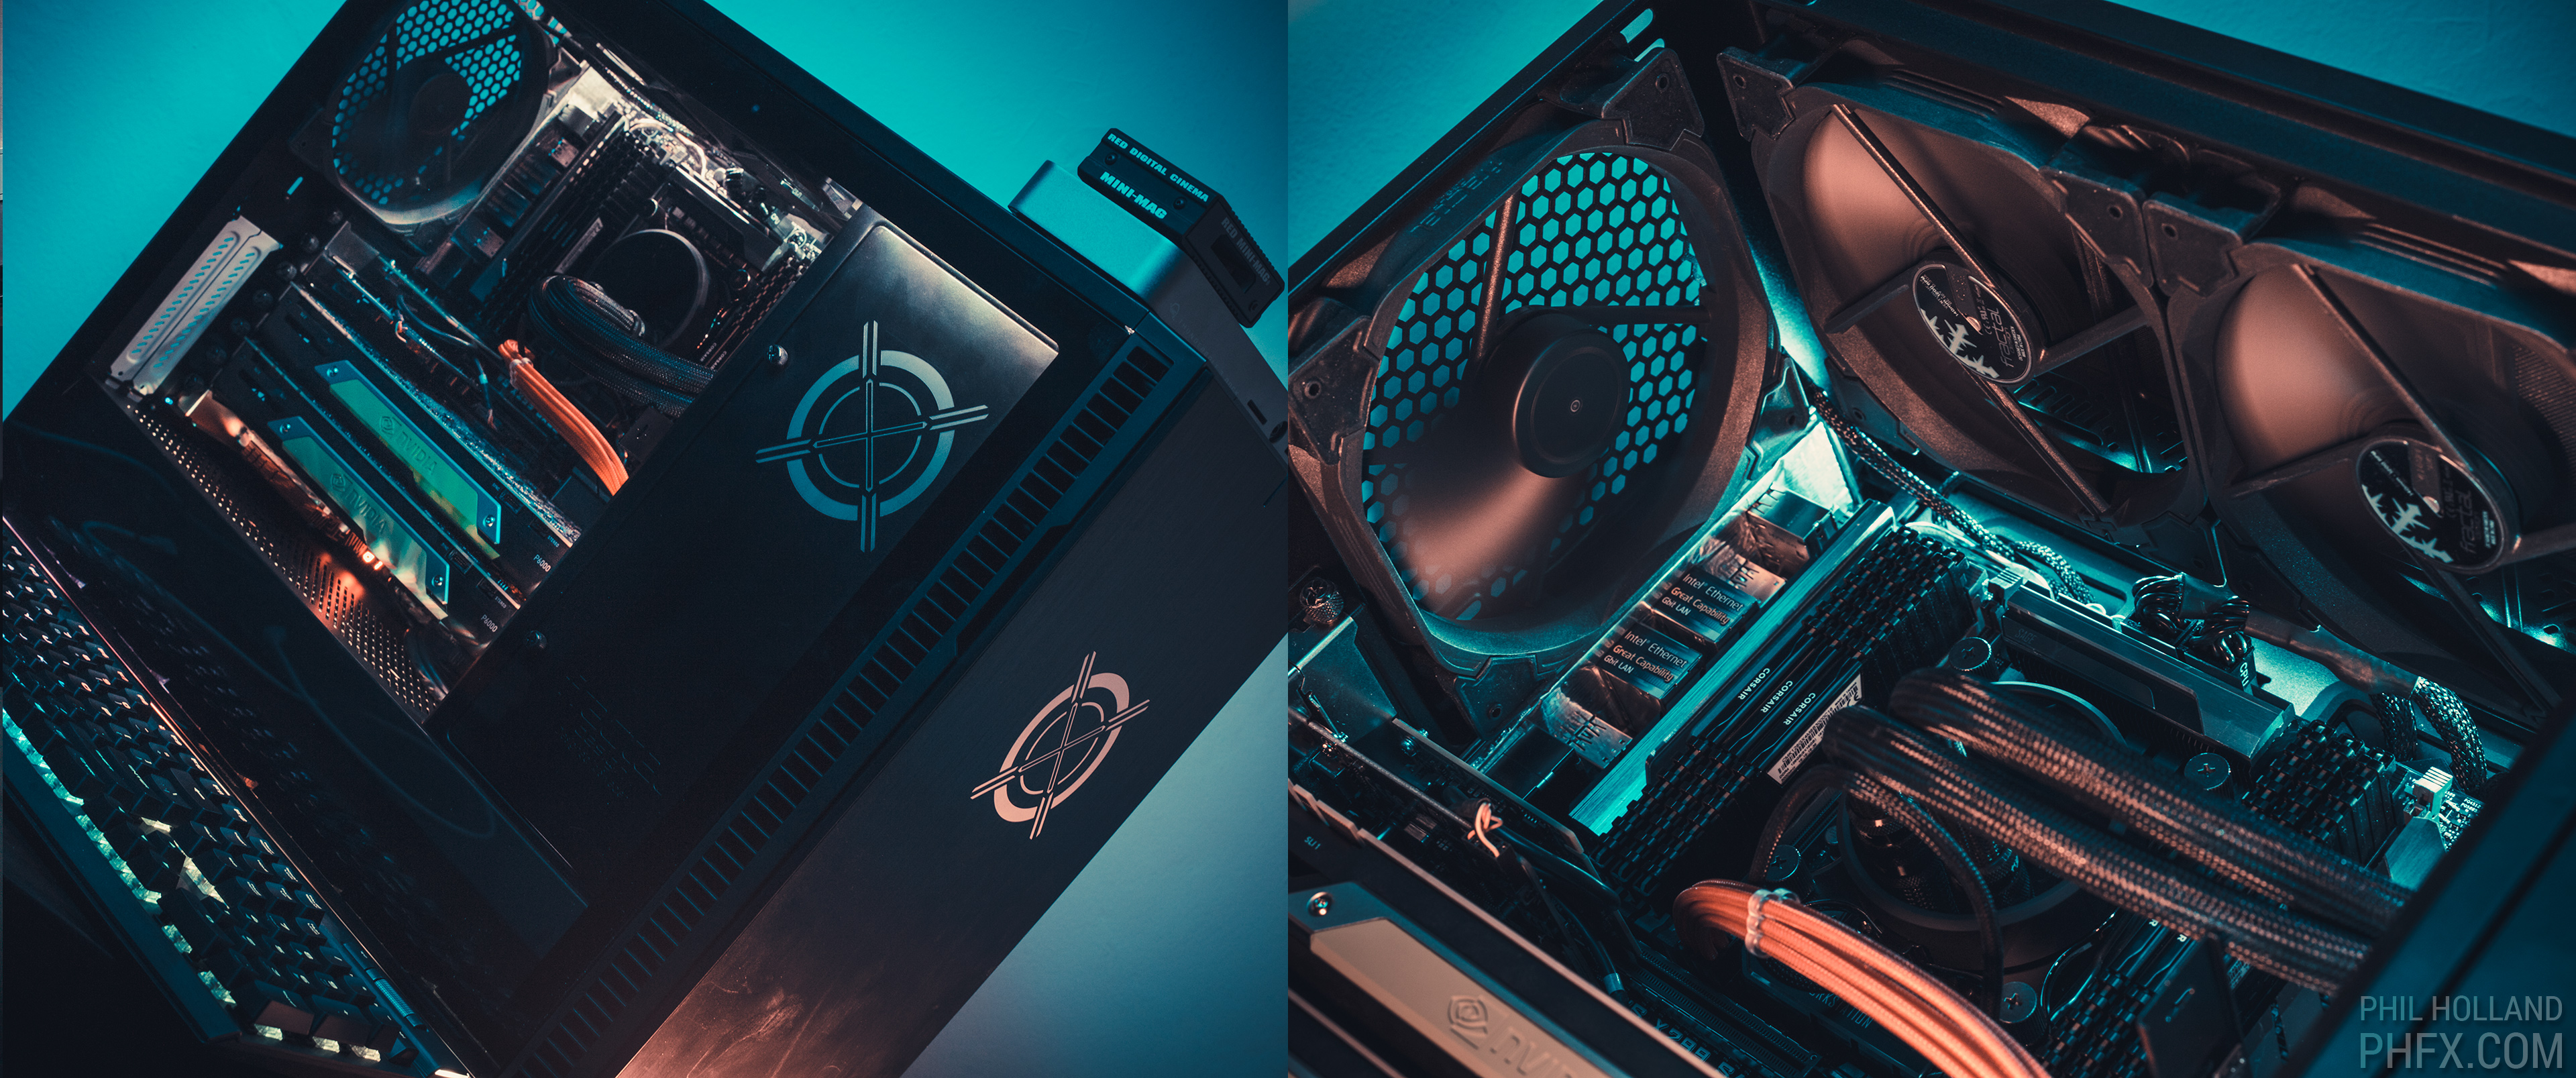
Fractal Design Define R6 with Tempered Glass and their silent Venturi Fans
With all this going on in the system the case was initially a difficult choice, but then it was a suddenly easy one. I've always enjoyed Fractal Design's cases and their design aesthetic. This workstation is indeed in my office and I want it to be on the quieter side of things and not a total eye sore. Their tried and true Define R6 with a tempered glass window was nearly right for me, and finally when they released their Connect D1 panel kit so I can have that additional front mounted USB Type-C 3.1 Gen.2 port the decision was simple. The cool thing is this case has plenty of room for the 5.25" 8X SSD tray from IcyDock I wanted to use for my SATA RAID plus there was space for all the other components and room for a generous cooling setup. Fractal Design also recently released their newer Celsius water cooling solutions. Initially I was building with their larger Celsius S36 water cooling radiator near the top of the case, but after looking at the airflow a bit and my overclocking setup I went with their S24 for a front side intake and I fleshed out the rest of the cooling with Fractal Design's silent Venturi fans placed thoughtfully throughout the reset of the case. This creates an extremely powerful, cool running, and quiet workstation. This is often not the case with so much beefy hardware, but it's certainly impressive something this powerful hums so low.
I did visually "enhance" the system with some RGB lighting using the Asus Aura Sync as well as few cables from Cable Mod, but not a crazy over the top RGB effort here. Mostly internal case illumination and hiding the RGB lights themselves away from eyesight, so it's essentially all ambient lighting, much like most of lighting at home and in the office. I should also shoutout to Duclos Lenses for helping me laser engrave the case with my logo on the front aluminum panel and inside steel panel to help personalize the system further. This was a big build with a lot of effort and time put into it. That personal touch really makes it a bit more memorable. I could probably spend a heartbeat longer on tidying up the cables near the front of the case a bit, but function over form in this case is a bit more important for now.
Monitoring
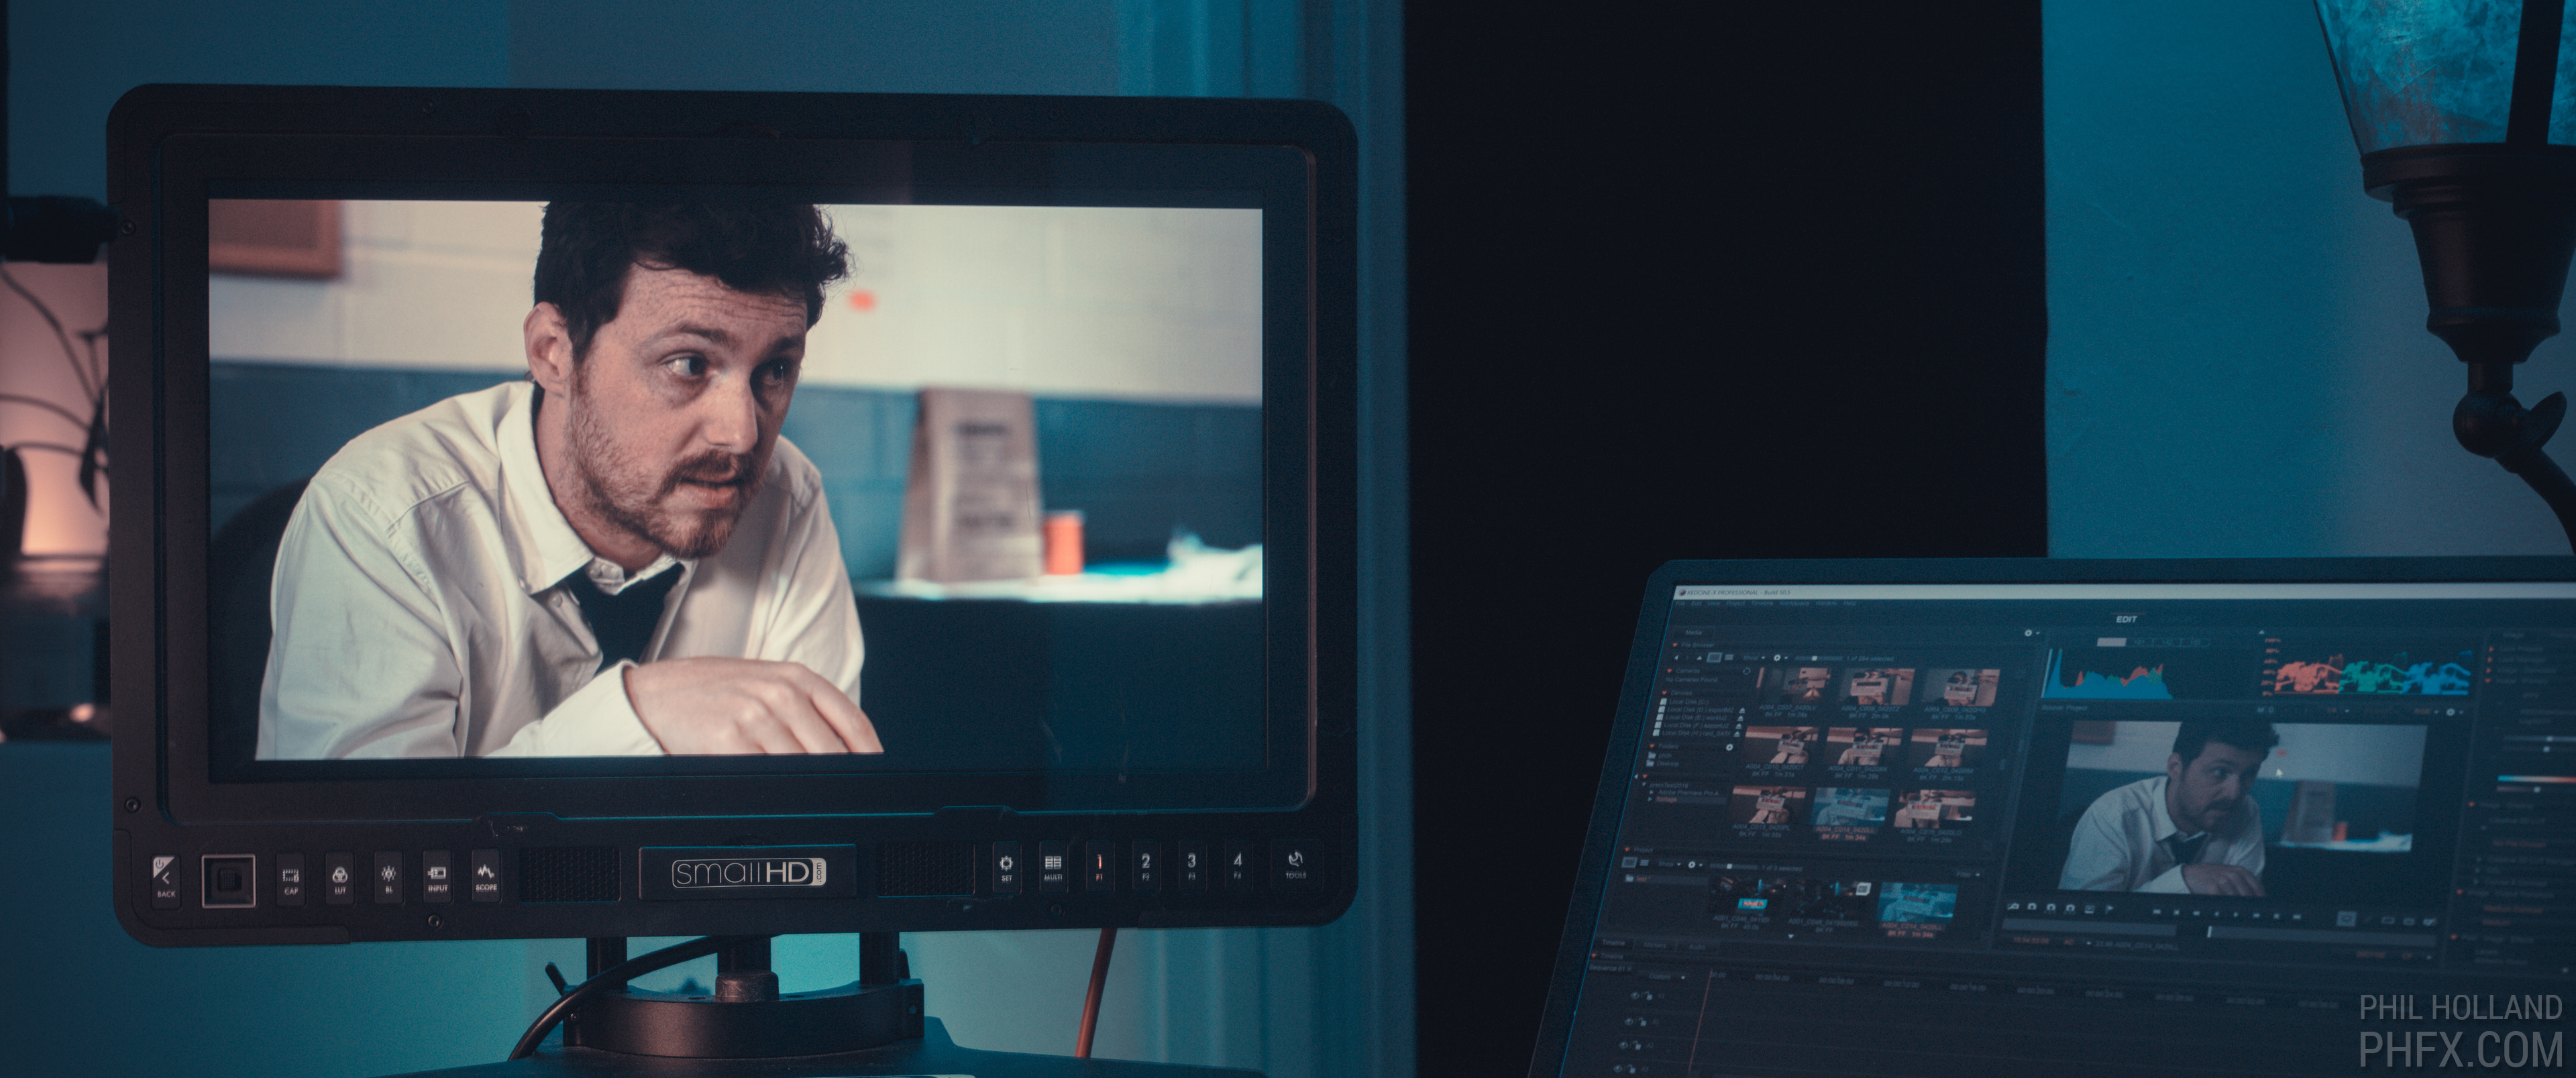
The Blackmagic Design Decklink Mini 4K driving a SmallHD 1703 P3X SDI Monitor
At the moment I have two 4K displays hooked up to the system at any given time. That oddly might expand further as my needs grow, in particular multiple screens really help with larger projects that require editing a great deal of takes. Monitors have been coming in and out of my life quickly lately as HDR is maturing for workstation use, and I'll deep dive on that topic later.One piece that is relevant to my Digital Color workflow is support for the Blackmagic Design SDI monitor output card. I chose one of their Decklink Mini 4K cards to go out to 1080p and 4K displays. At the moment I'm driving a SmallHD 1703 P3X display for HDR grading. Monitoring-wise this workstation is hooked up to 2-4 displays at any given time and for color critical work, this is more of a QC on many screens thing going on here. For monitoring, grading, previewing, and QC having this SDI output is pretty much a requirement for a professional workstation on and off set.
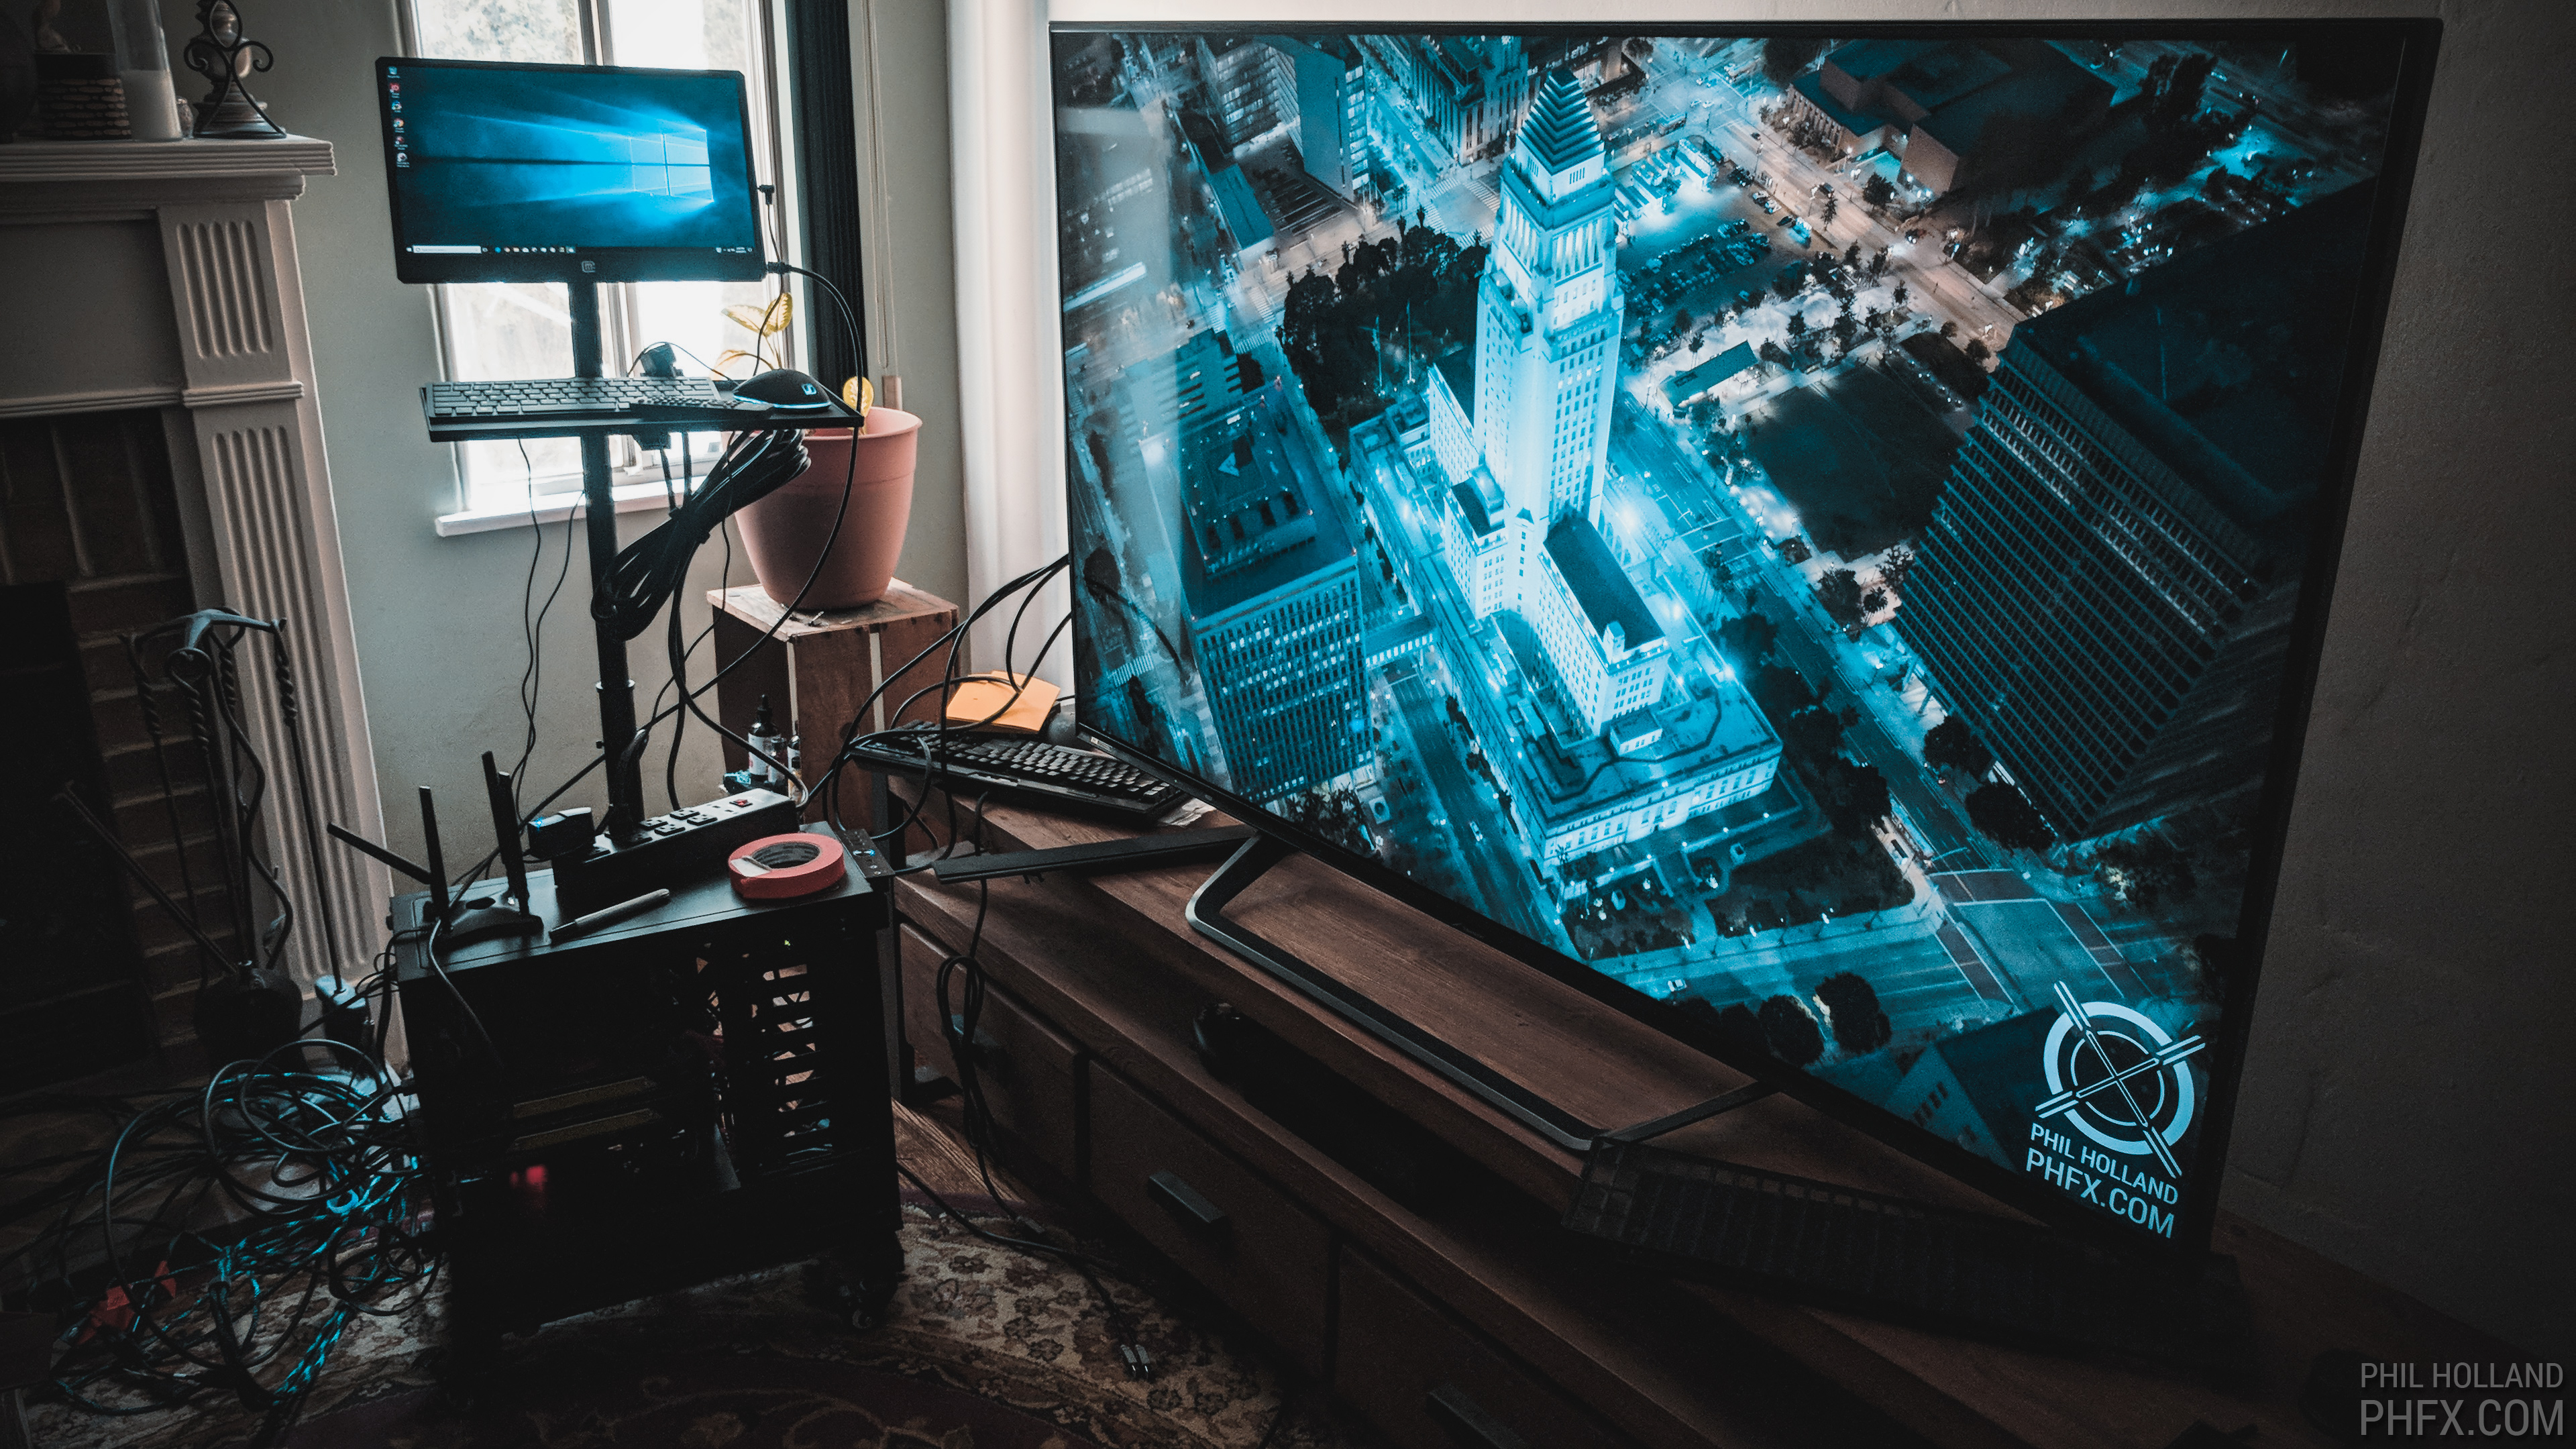
A prototype Sharp 8K television being driven by this workstation
I've also mentioned above I have been driving 8K displays with these GPUs and expect to have another one in my hands shortly for desktop use. This workstation as a platform allows for flexibility with my monitoring, which for whatever reason, is constantly changing at the moment. The above image is of the Sharp 70" prototype UHD 8K television with 1000 nit HDR support. That picture was taken in my living room during some fun experiments of having this workstation live on a mobile cart as I was doing a fair bit of trucking it around for a minute, you can see the rather hairy HDMI cable situation going on there to drive the display from the second Nvidia Quadro P6000, the top screen is a portable 4K display mounted via quick release Vesa Mount. I've had my work on a few 8K displays at this point, but it never ceases to make me stop what I'm doing and take a moment to enjoy the content.
What's Changed - An Update on My Personal Workflow
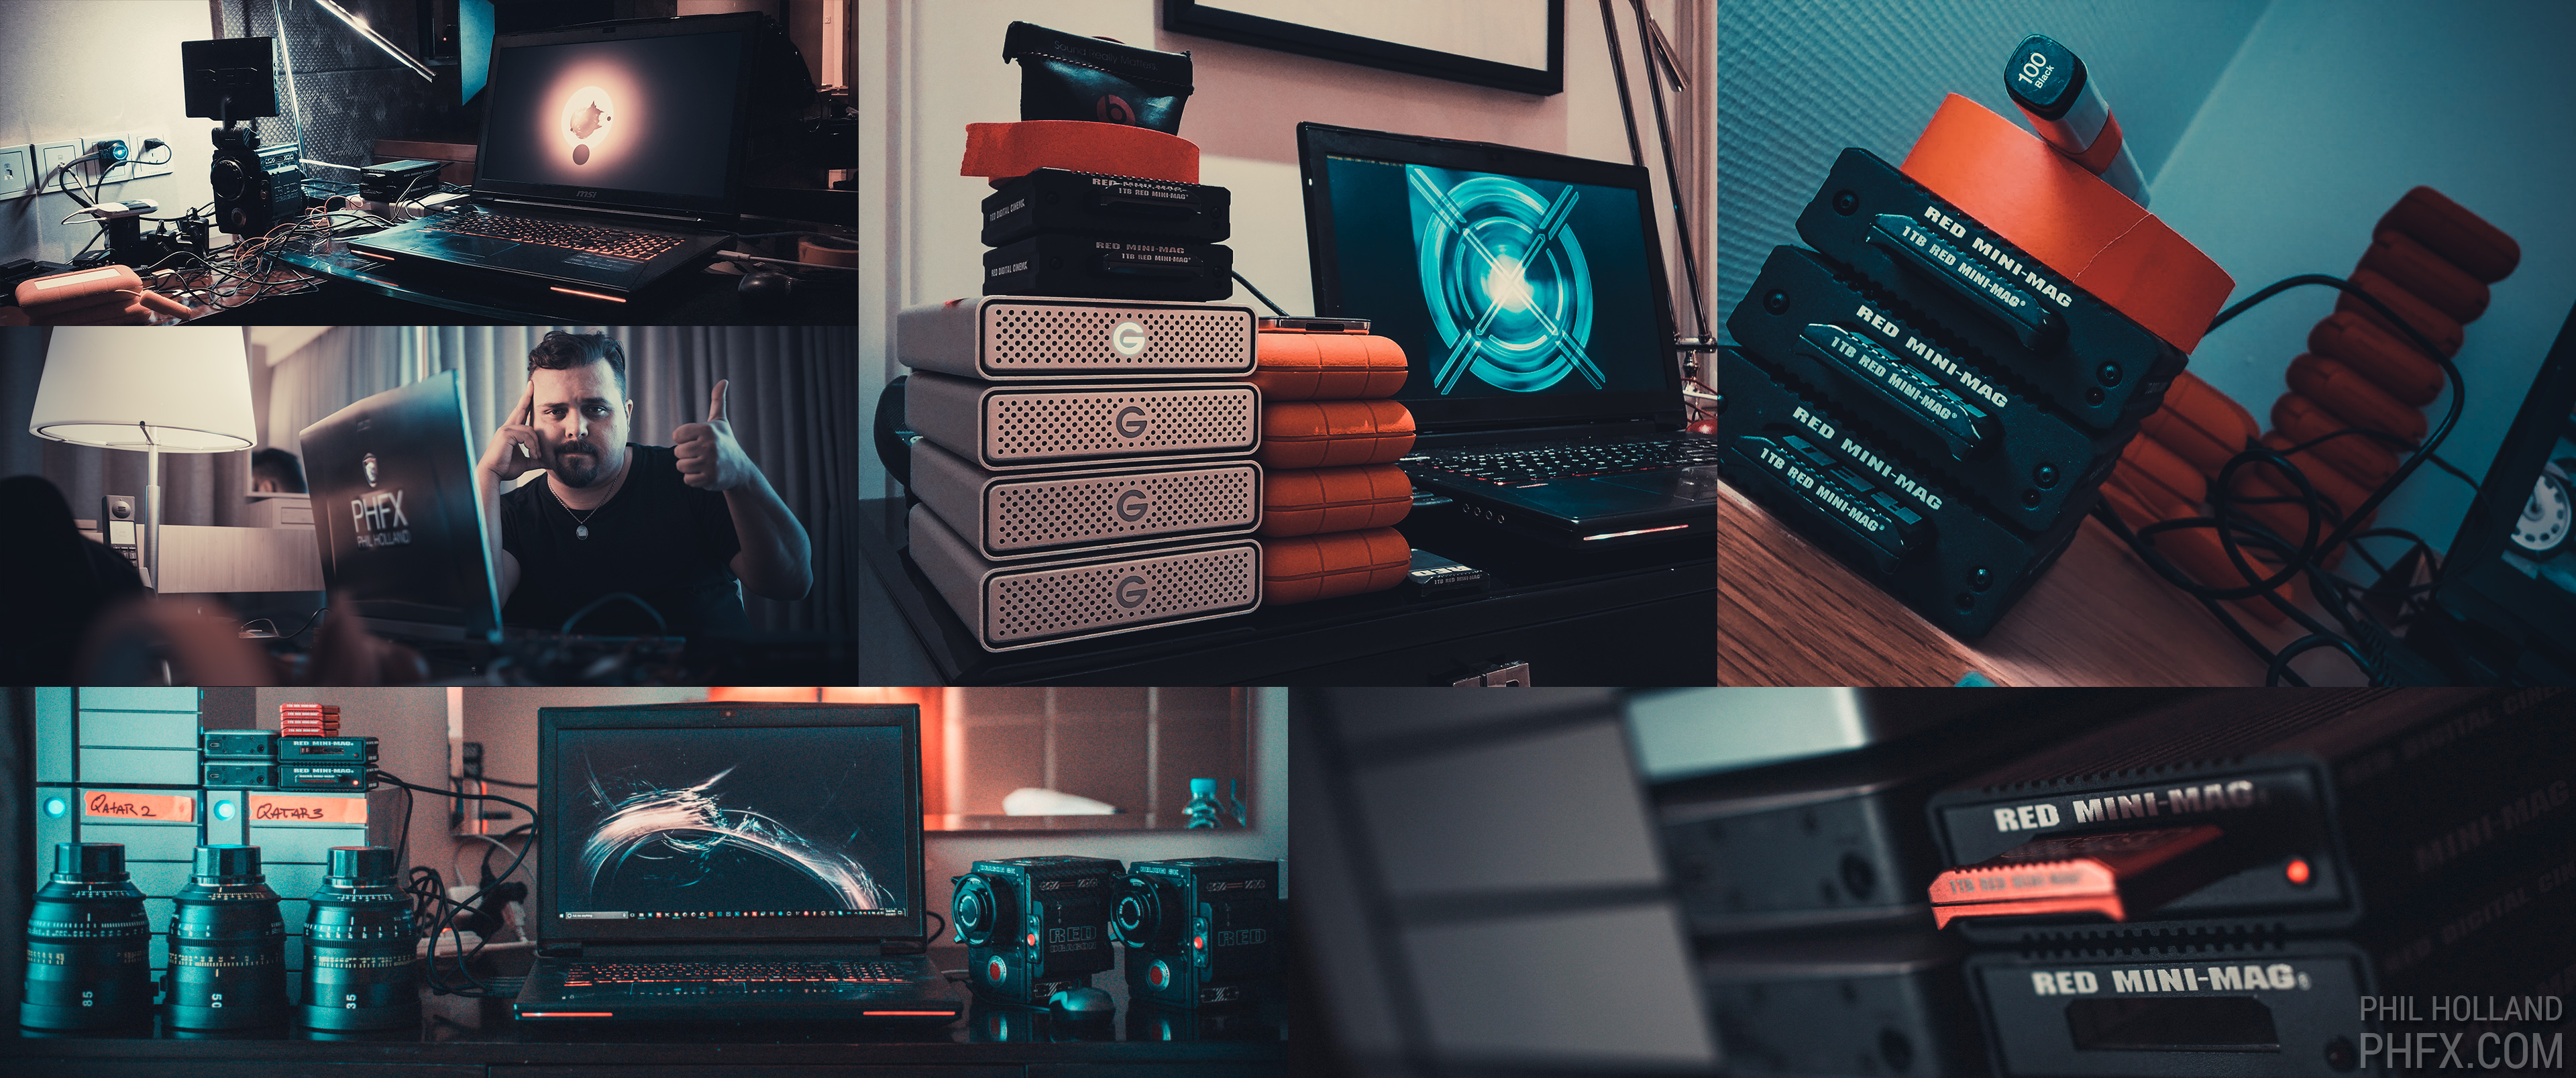
A great deal of my work has happened in hotel rooms around the world for the last few years using costly customized notebooks
My main strategy for my personal workflow over the years has been two pronged. Having a big powerful workstation at home and utilize big powerful custom notebooks when I'm on the road. The last 5 years in particular I've been working 4-6 months out of the year in hotel rooms abroad, which is illustrated in the above image.However, my mindset has changed on this front. Every year I was building one or two custom notebooks to cater to that specific project's needs. But this has been an uphill battle as notebooks do lock you into an ecosystem and form factor with fairly limited internal storage option, especially for a guy like me handling terabytes of data. With hardware changing so quickly, it's been tricky as these notebooks have been more or less five figure one off investments with limited upgrading potential, not to mention they weight 12-16lbs a pop. A few things happened though and I have changed my general mindset. One, GPU acceleration on notebooks have stepped up to the plate and smaller notebooks are doing the work of their larger previous generations predecessors more effectively. I now have 15.6? screen thin notebooks that can handle general manipulation of 8K footage and that's what been working well for me in 2018.
So the main change in my workstation strategy this year has been to aim at a big powerful workstation, that's always going to be needed in my life. For truly mobile work, mostly data management with a bit of color, edits, occasional rendering; smaller lighter weight notebooks. However, for longer term projects on the road, I am now building small form factor workstations. This special type of box allows me to still use big boy GPUs, processors, RAM, and still have more freedom over my storage design. While not super portable, they do fit into a Pelican case and with smaller portable displays I can take these the road, that's my new hotel based lab with the added benefit of having that smaller laptop free when I need to do other tasks.
Some Final Thoughts, Thanks, and a Look to the Future
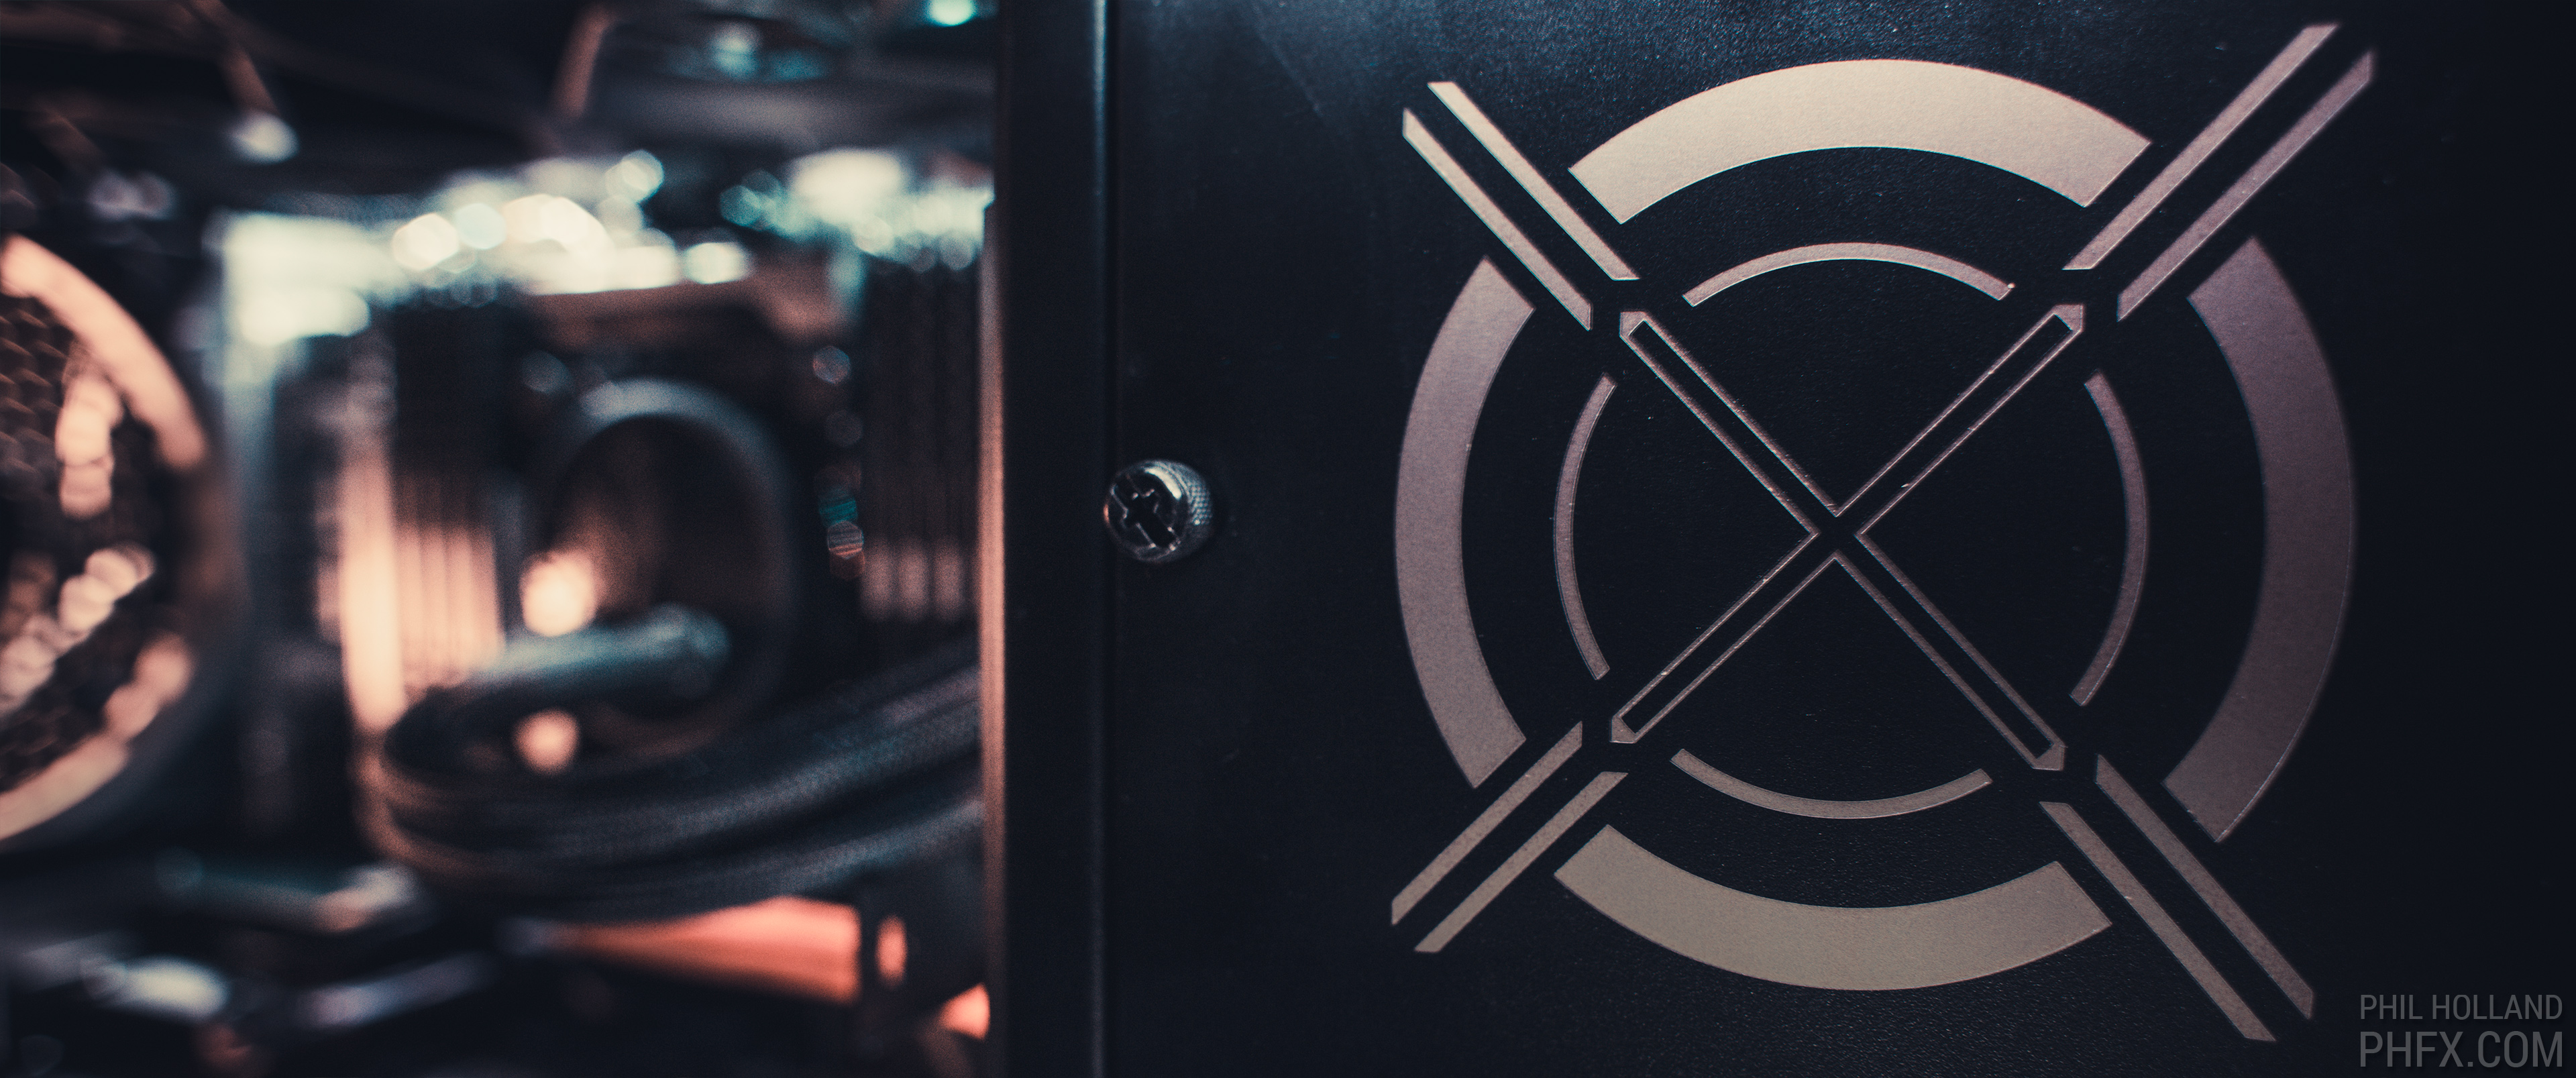
A bit of a personal touch with some laser engraving on the Fractal Design Define R6
About 9 years ago before I went out on my own as a fulltime Director and Cinematographer I had access to a $100 million dollar studio's hardware, camera equipment, film scanner, laser recorder, and render farm. As digital began taking hold in this industry throughout the 2000s in my old office I eventually had 5 workstations (Windows, Linux, Mac). Once out on my own I quickly discovered if I wanted to serve my client's needs I needed to stay up to date with current hardware to stay competitive and also be on the forefront of what's going on. I build systems pretty often to adapt to that quickly transforming landscape and tinker with a lot of technology to stay ahead of the game. Generally I've found building one powerful up to date workstation can really push you ahead in productivity year round. In fact, as an individual you are at a slight advantage compared to a studio setup as they often have a harder time updating 25, 100, 400, or more systems due to the cost and logistics of it effecting the pipeline.My simple advice for a professional who wants to add post production hardware into their workflow is to buy the best hardware you can within your budget level. The good news as many mid-level systems can handle working with modern digital cinema camera's various formats in 4K and 8K pretty easily. You can even handle 8K material on a modest laptop with a decent GPU in there. The real questions from there are what do you want to do, how fast you want to do it, and how much you want to spend. Even with this rather aggressive build I could have gone further to have a bigger beast, but this workstation fills out the various corners of what I typically do for a living nicely.
One thing I will say is the general disk layout of a fast OS/App disk, Working RAID Volume, Export Drive, and Temp Drive as separate volumes should be pretty useful as a starting point. You certainly don't need all SSDs like this build, but that is the direction I've been slowly navigating towards for a while now. My last two mobile notebook style workstation have been completely SSD based and that inspired much of this current build. Interestingly due to the speed of the NVMe SSDs these days you might be able to make do without a dedicated Temp Drive for 99% of users out there.
I enjoy the process of building a workstation on my own, but if you aren't comfortable with that there are many respectable companies who can consult, design, and build a system to your liking. Workstations such as this are tools and building them yourself towards your own needs truly helps understanding the inner workings and expected performance. It's sort of the difference of playing on a random piano versus one you've spent a while tuning on your own if that makes sense.
One thing I'm sure many have noticed is just how fast advancements are coming on the computer front. New models every 6-12 months, new processors, platforms, new GPUs, new SSD tech, higher capacity spinning drives, etc. The timeline is always moving and advancing and components are only getting more powerful. Soon we'll see advancements and speed benefits in the form of PCIe 4.0 and 5.0 standards and much higher capacity faster storage, not to mention faster GPUs and CPUs to play well with all of this. A higher end state of the art system like this will do well as that first generation or two of those advancements settle down. That gets back to the workstation being useful as a platform to add and/or swap out components as technology evolves. I will add higher capacity storage and swap out GPUs until something truly more powerful pops up into existence, but this beast of a workstation is doing what I intended it to do at the moment. To help drive my creative endeavors and deliver amazing content to my clients in a timely manner. It's been a big build, but a rewarding one to finally have completely.
I would like to personally thank Asus in particular on this workstation as they've been extremely helpful for several months leading up to the actual build as we were theorizing components before the install and much of the newer media types placed in RAID configurations weren't exactly commonly done, even now. I also should thank Nvidia for continuing the aggressive improvements in GPU technology. I've been exclusively using Nvidia GPUs in all of my systems for years now and they are certainly always leading the pack in performance.
I hope this article helpful to those looking to figure out a new build. Much of this took place in April 2018, but I've finally been able to settledown with the system and do a proper write-up. Some new SSDs will be going in here before year out and I'm certain some intersting GPUs will be added into the mix before this time next year. But the general idea with builds like this are they are an investment in your workflow and an expandable platform for as long as the technology is relevant and providing the performance you desire.