Thoughts and Behind the Scenes on my first 8K Shoot - 02.19.2016
During February 2016 I had the special opportunity to shoot with the upcoming RED Weapon 8K camera. This is one of the very first 8K shoots and these are the earliest of days for 8K. Filming was as much a camera test as an actual shoot for me. However, this format size and resolution are important to me as we are getting into the VistaVision+ format size, which is something I've been after for some time. Below is the finished short and a few of my thoughts with some behind the scenes of my first 8K shoot.
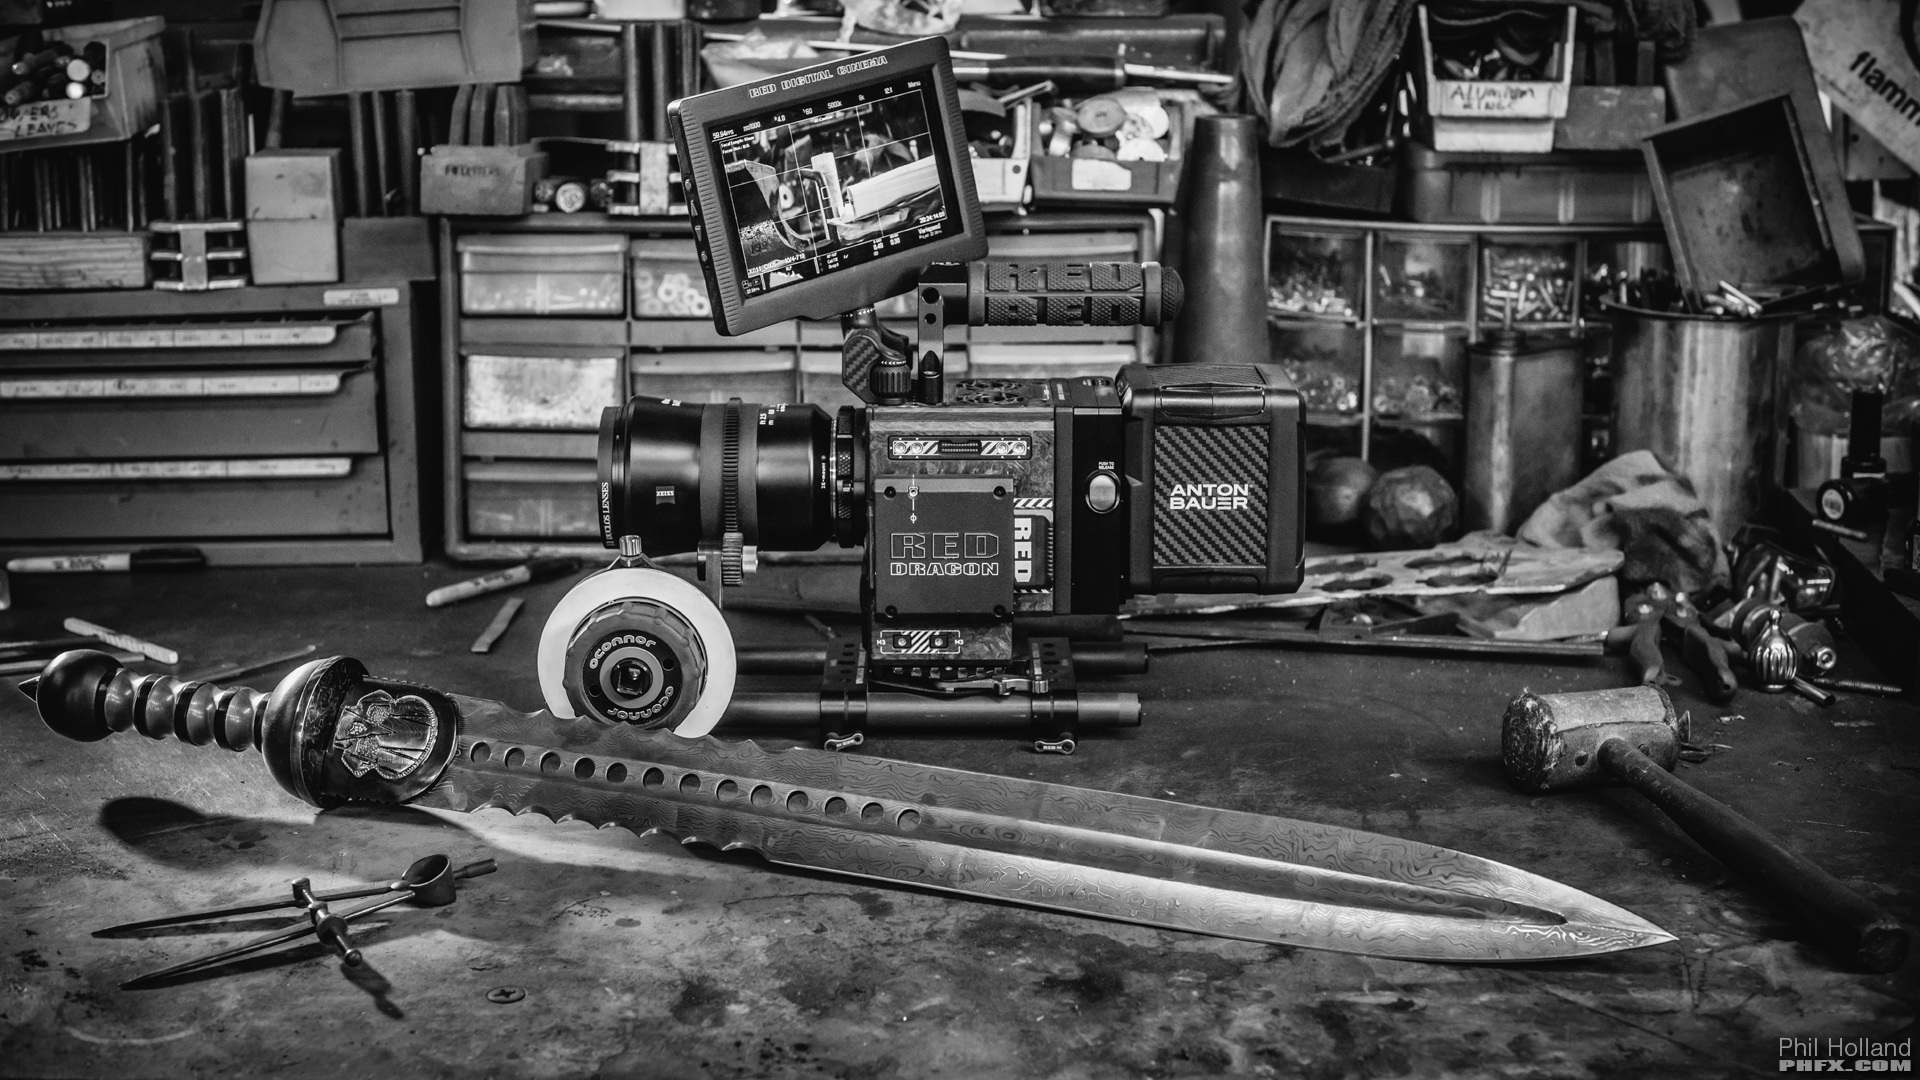
FORGED - shot on RED Weapon 8K
Thoughts on 8K and RED Weapon
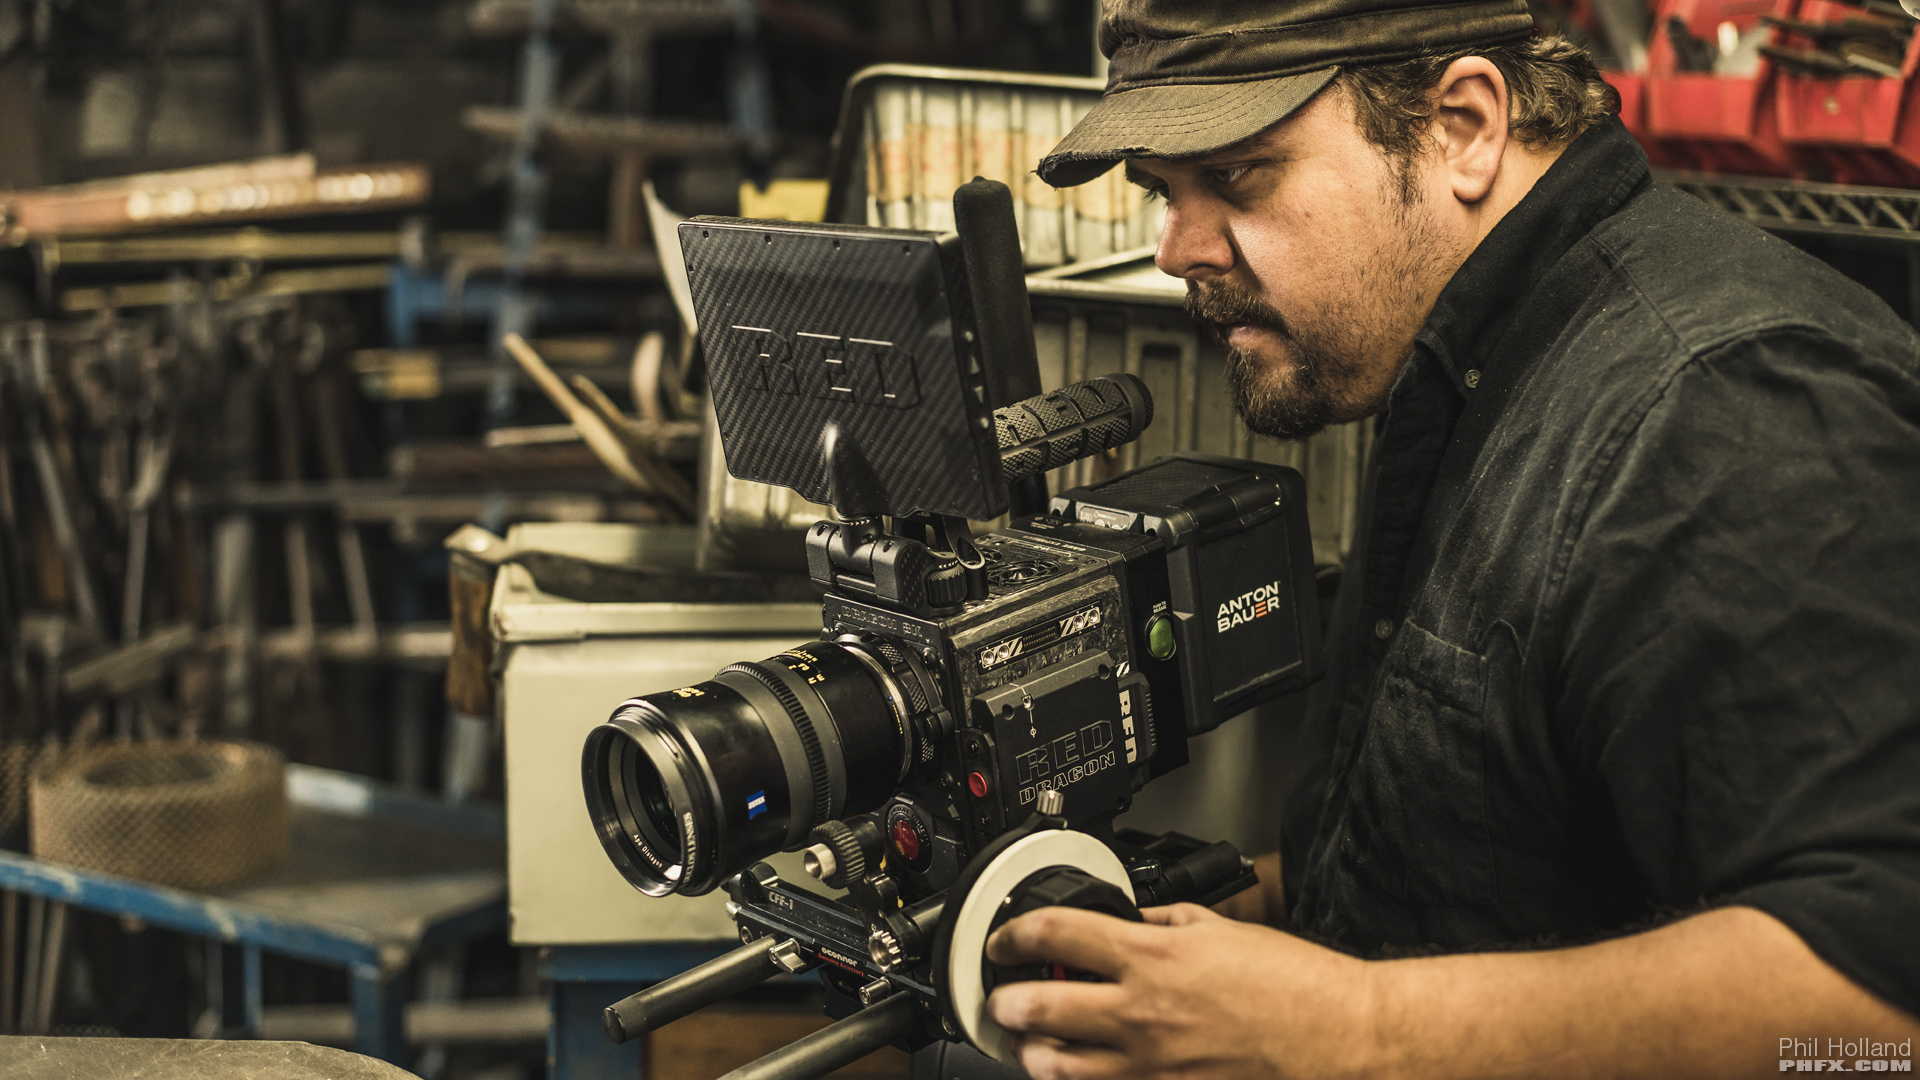
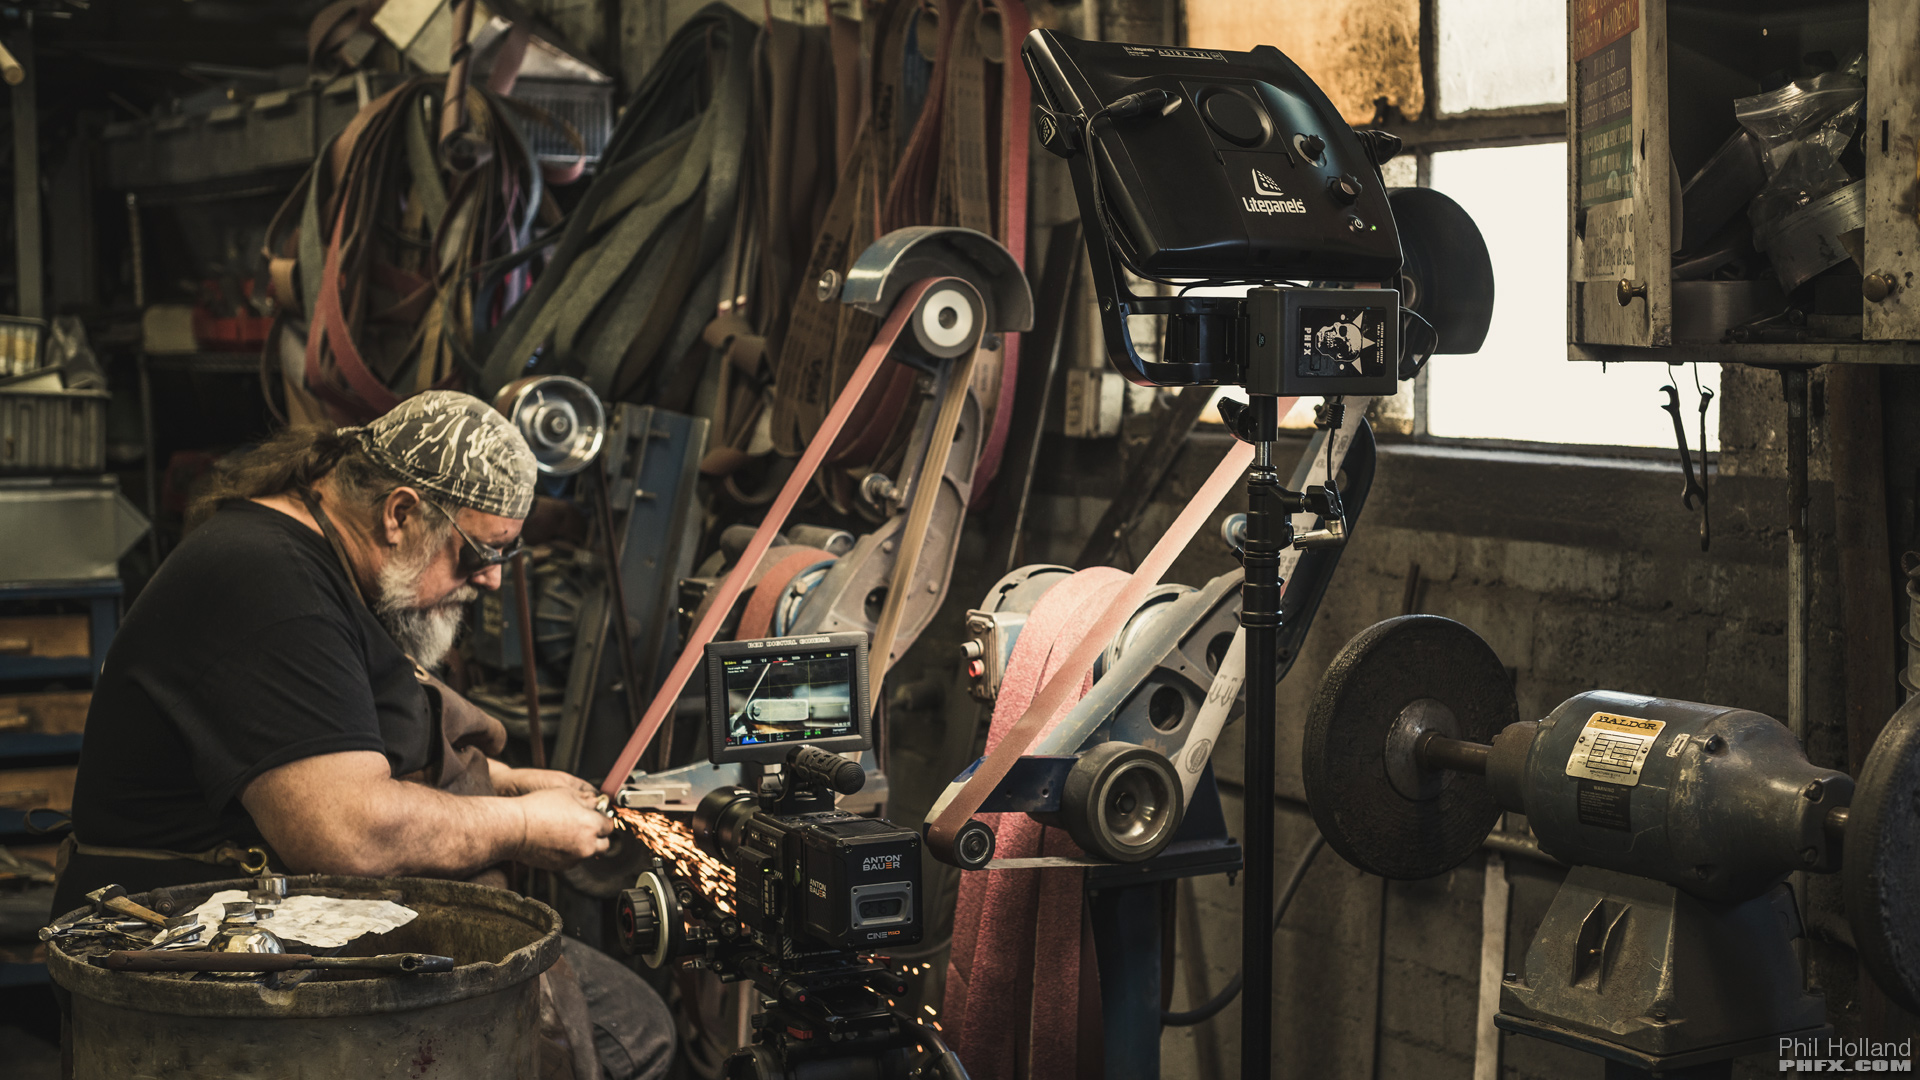
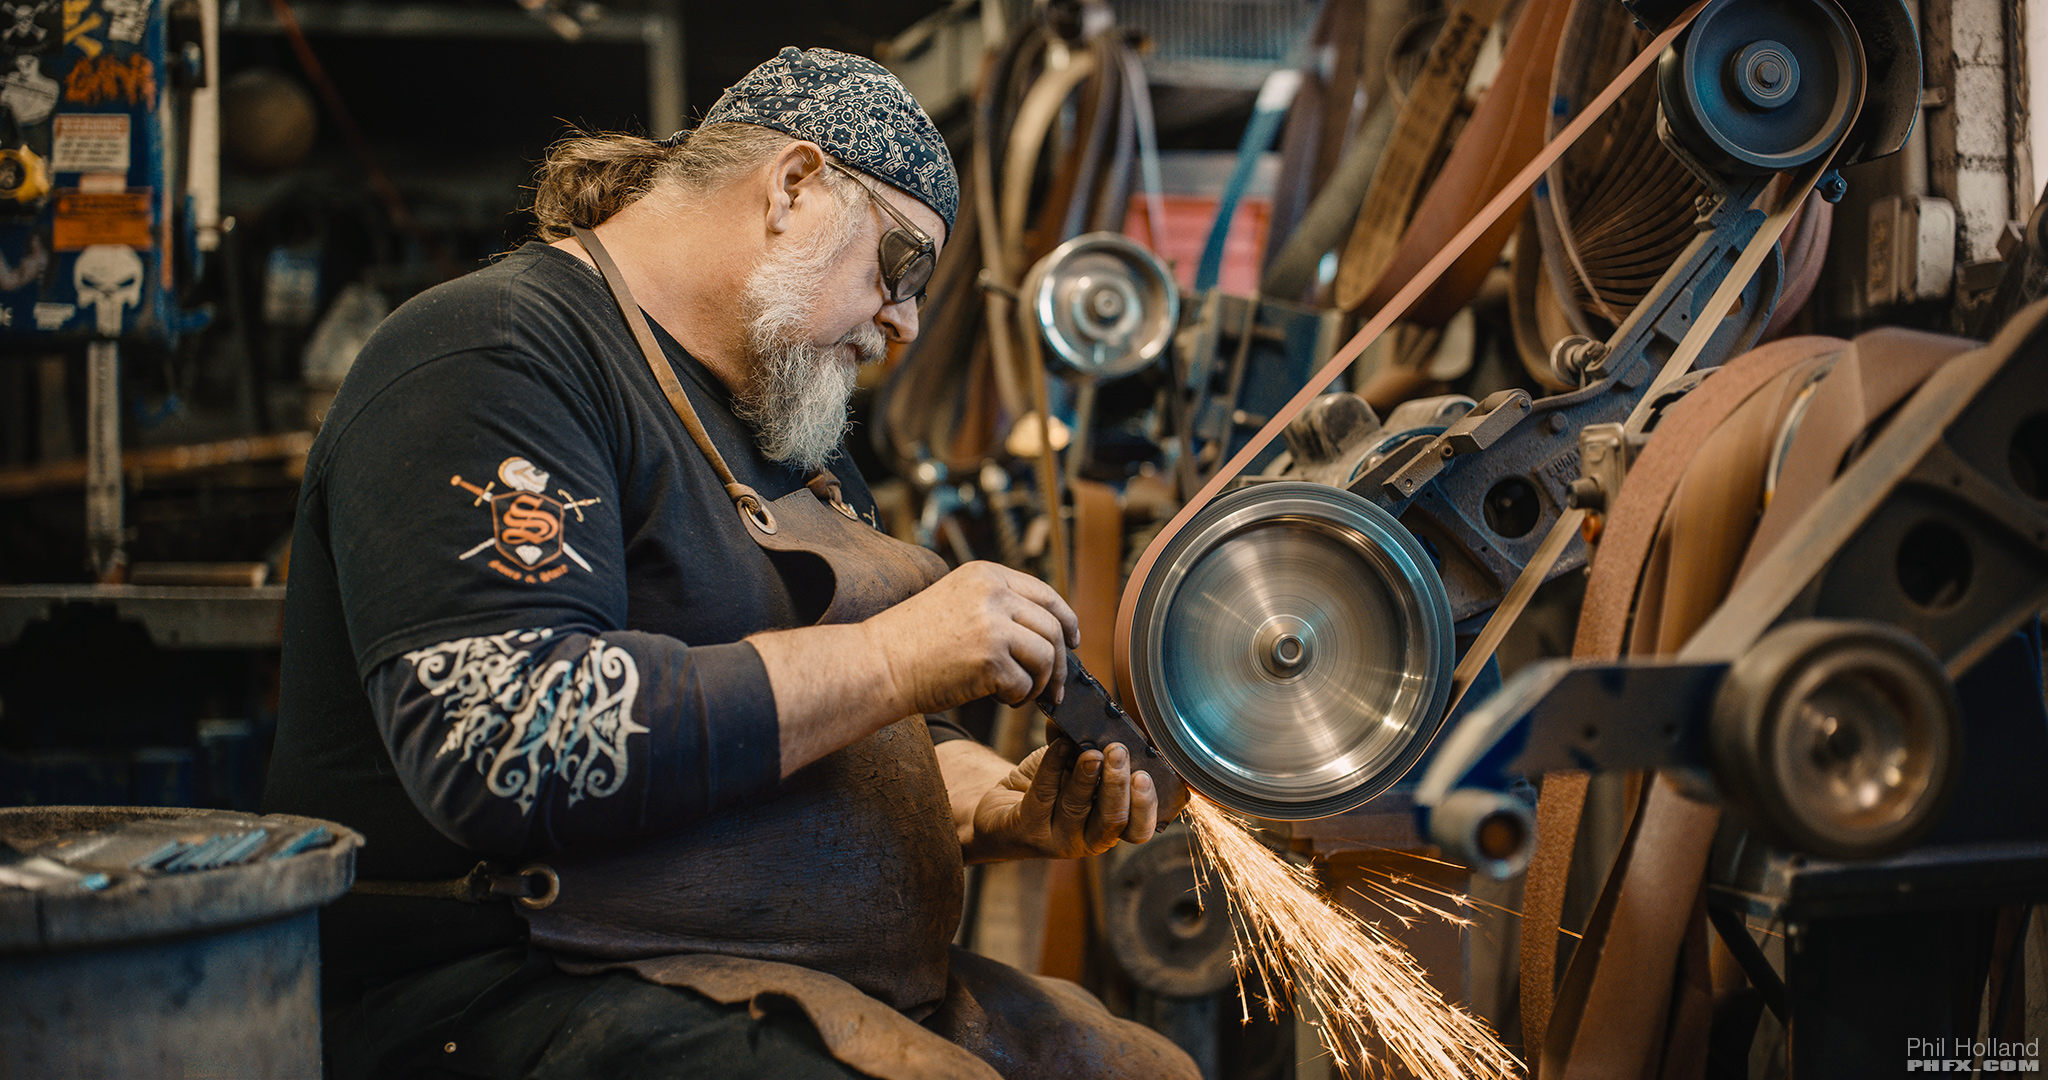
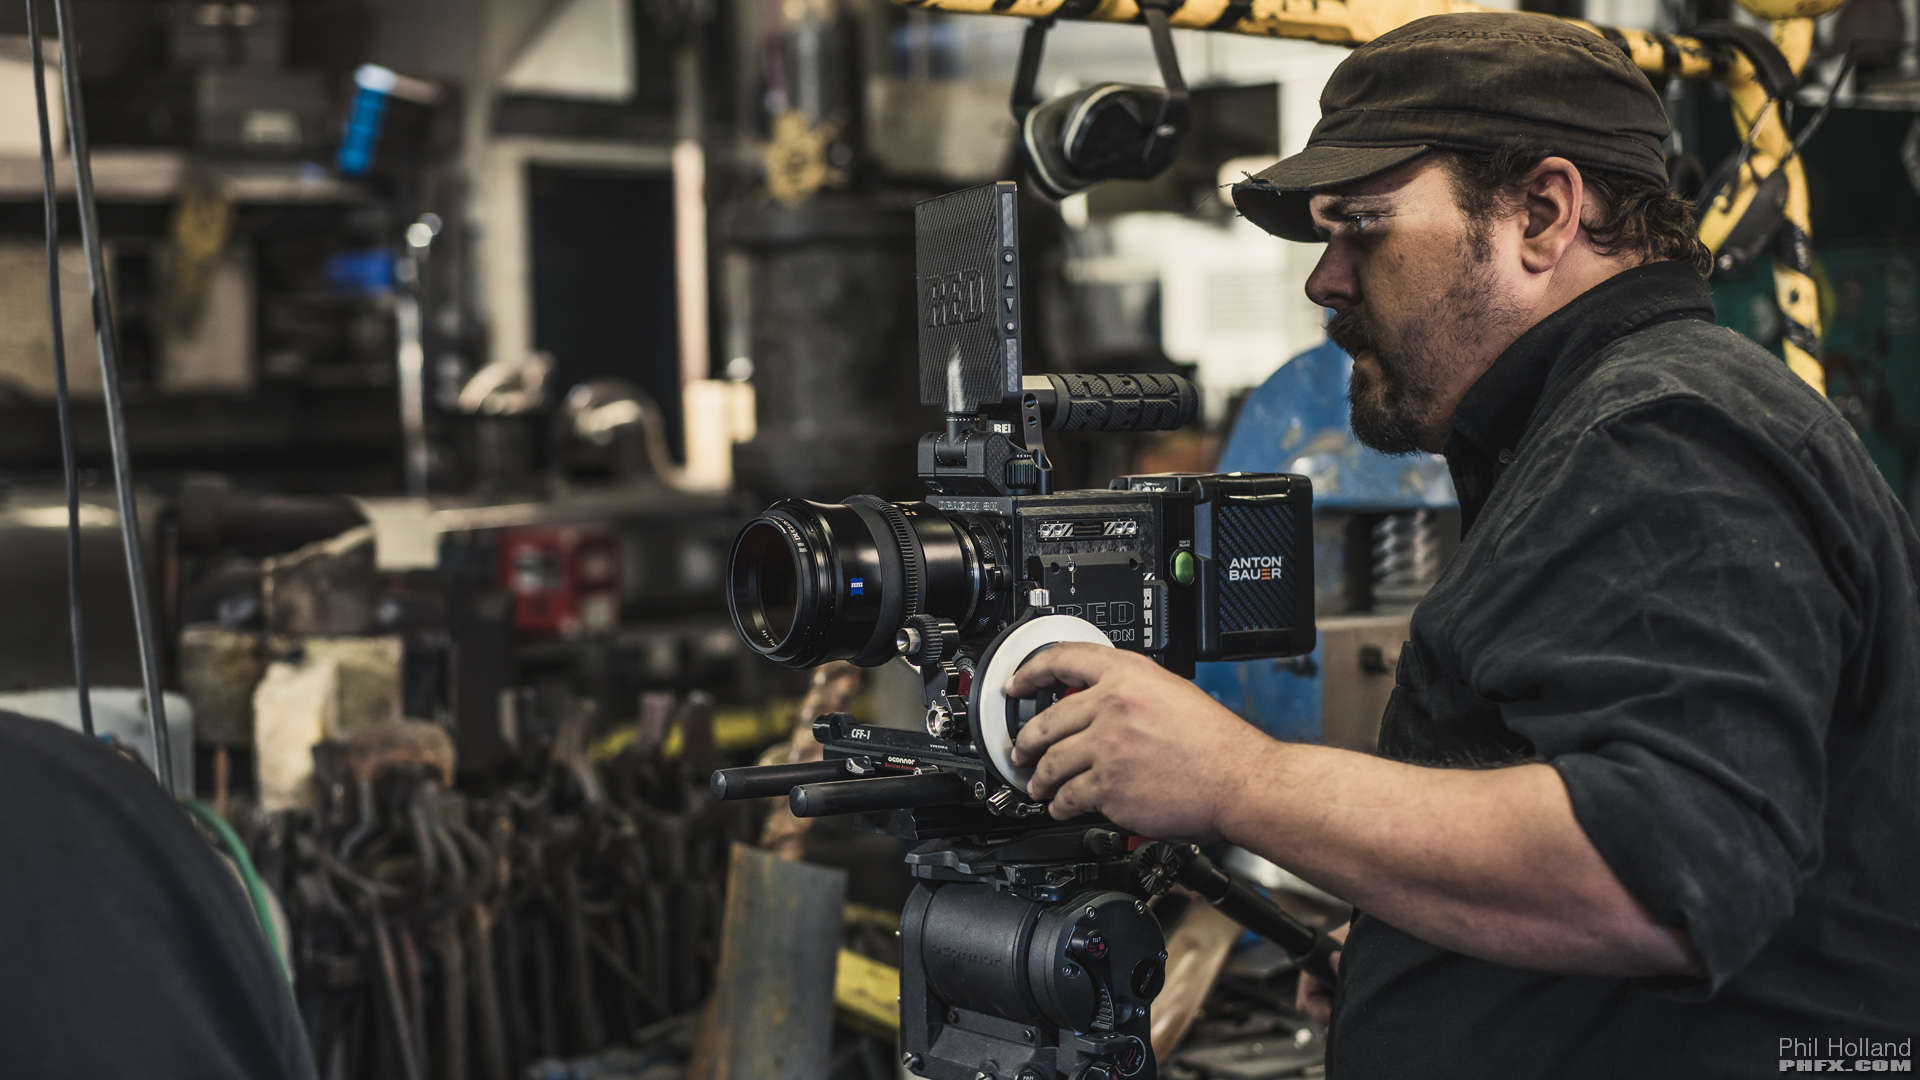
On Set with the RED Weapon 8K.
RED Weapon 8K. A camera, format size, and resolution that's extremely attractive to me for so many reasons. But there's certainly questions. How's the image quality? The Workflow? What exactly can it do?
A visual comparison of VistaVision, Super 35mm, and RED Weapon Format Sizes
I've written much about my thoughts on resolution. Particularly the concept of how over the years working with film, digitizing with the film scanner, and oversampling to create our scaled down workable or delivery resolution. This film mindset translates very well into the RED sensor technology as it benefits in the very same way through the use of a Bayer Pattern CMOS sensor design. The Dragon sensor we have in both DSMC and DSMC2 class cameras is a very special sensor in terms of creating and capturing more film-like images. Everybody makes their own decisions, but for me the Dragon sensor has allowed allowed me ?not to miss film? anymore, and has served as my digital film alternative.
This Film Format to Resolution Relevance is important to those who have worked with film and experienced the best of what it can offer. Shooting at 8K provides the format size and resolution you?d expect from shooting actual VistaVision 8-perf film, while shooting and windowing down to 5K creates a Super 35mm filming experience. Combining that with impressive Color Science and a very broad Total Captured Dynamic Range, makes this one of the most film-like digital cinema cameras on the market. All of this is something I am looking for out of my digital cinema cameras. This RED Weapon 8K camera weighs less than 4lbs un-rigged and it's remarkable how far things have come.
RED Weapon's measured Total Captured Dynamic Range via the DSC Labs Xyla-21
As for the 8K format size at 40.96mm wide. In short it's awesome. This particular format size has so much potential. Shallow depth of field, extremely wide FOV possibilities, a wide variety of glass options, etc... Considering the resolution as well I've found quickly that my close up, mid, and wide shots hold so much richness but also draw in that very film-like smoothness. It seems odd to say detailed-yet-smooth, but that's exactly what it is. I'm an active focus puller and focusing on various areas of interest and finding the little nuances that live in those compositions really jumps to life in 8K and with this format size. The potential here is truly exciting.
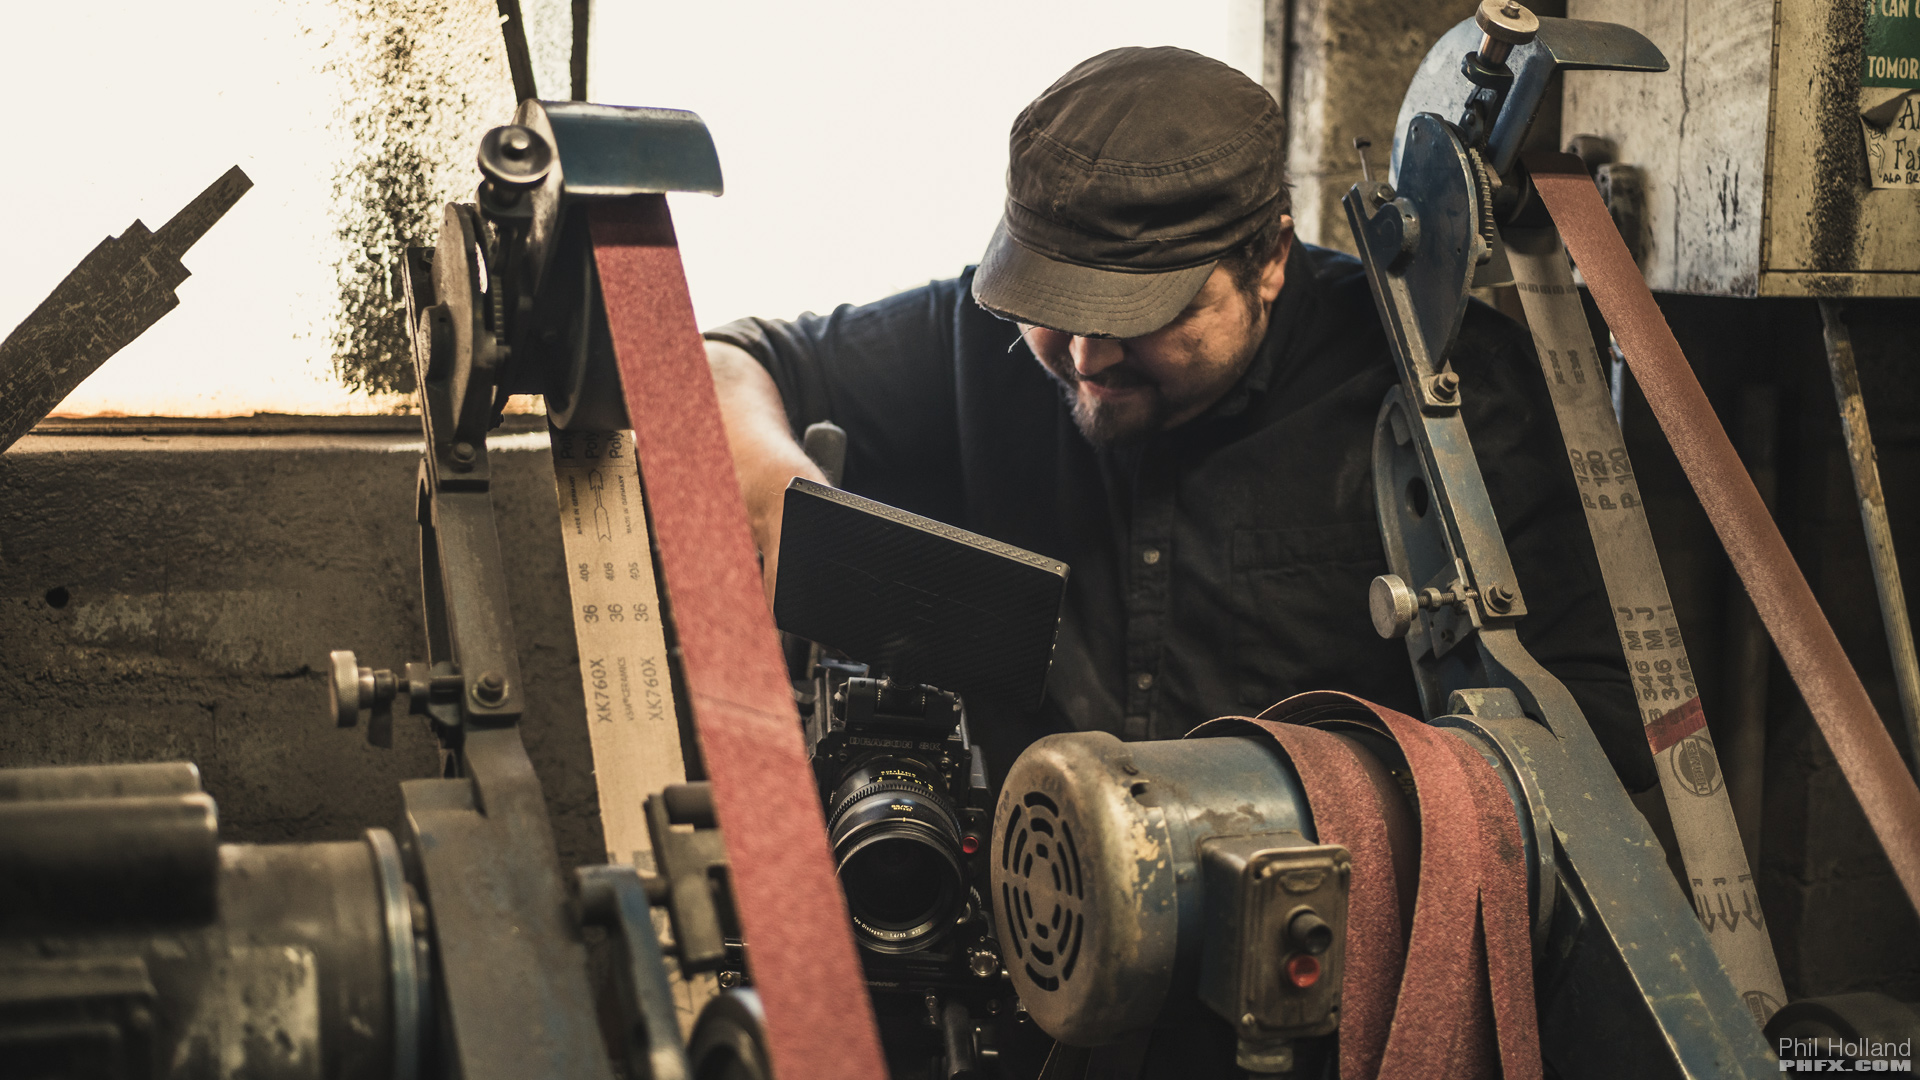
RED Weapon's compact size allowed me to wedge myself and the camera in pretty tight spaces
This camera can be used in so many ways. Finishing at 8K, 4K, whatever you want. There's enough resolution and format size to be extremely flexible. In this case on this short project there's no cropping, no reframing, no sharpening, just a 8K to a 4K down sample. And to me I think the frames look fantastic. I've been focused on creating "bigger than life" images for a while now and this format and resolution truly brings much of that concept to life for me.
Camera Settings and Rigging
Most of the shoot was rated and exposed for ISO 500, lit to f/2
Much of this shoot was achieved at 8K FF, 60 fps, REDCODE RAW 12:1 (RED's compressed RAW format), using the Standard OLPF (Optical Low Pass Filter). There's a few 24fps shots in there too at 5:1 REDCODE RAW as well. This was a 4 day shoot and I didn't shoot any differently than I do today. I captured about 3-4 hours of footage per day as Tony worked at various places in his shop. I ended up with a lot of actual setups. The ISO Rating was mostly 500, however as this was also sort of a camera test for me you'll see shots in the ISO 320-1280 range as well.
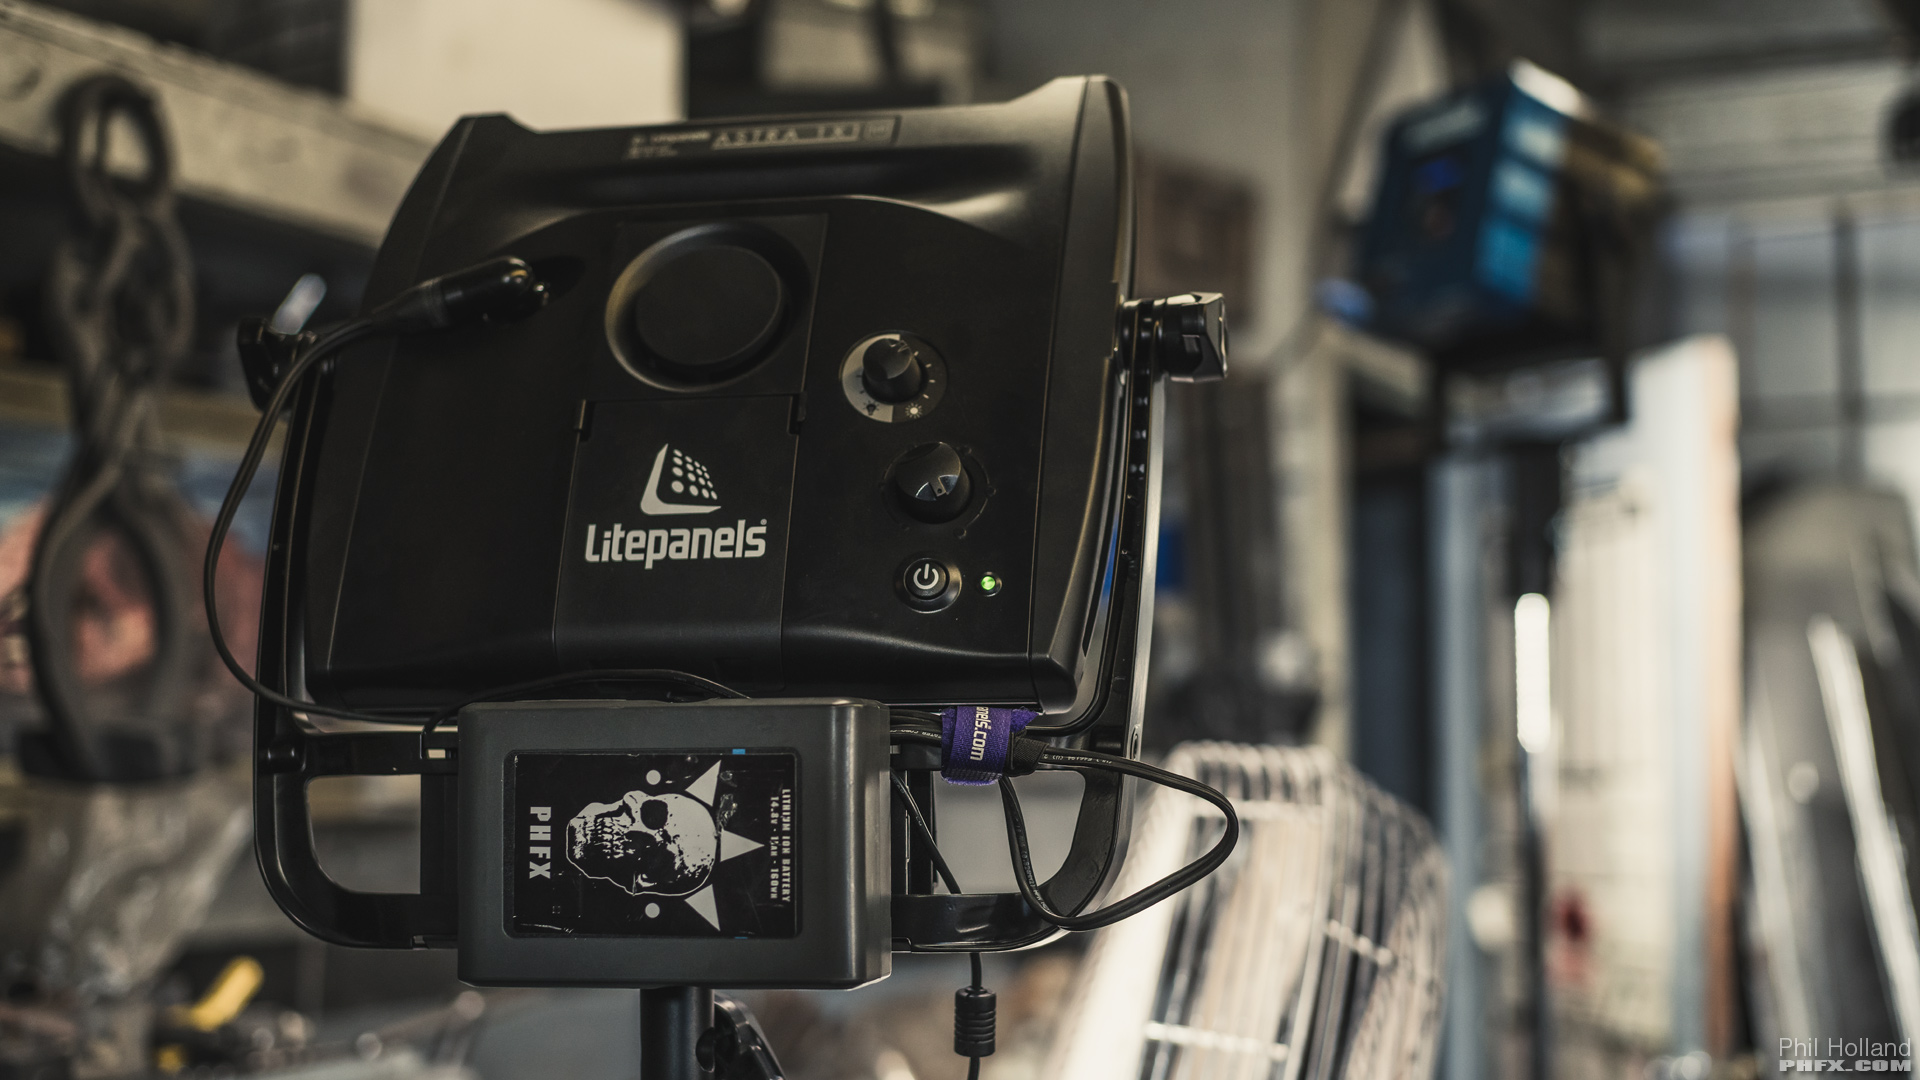
Anton Bauer Cine V-Lock Batteries have a form factor that works very well with the Weapon camera body
I opted for the Element Technica V-Lock plate with the Anton Bauer Cine 150Wh bricks that I recently picked up. Each brick got me about 2.5 hours of uptime, shooting days were about 12 hours for the most part minus one shorter day. The camera was never off except at lunch. We only had 4 days to pull off what would traditionally be a two week build for Tony and big high fives to him for going hard and producing a beautiful piece.
Lens Selection
Most of the shoot was shot on Zeiss Otus Primes with Duclos Lenses Cine-Mod
I've been preparing for this format size for a long, long time. VistaVision has a bit of history with all sorts of lenses. Leica-R, Nikon-F, Olympus-OM, Mamiya-645, Canon FD, etc. Over the last couple of years in particular I've had a full set of Mamiya 645 glass modified by Duclos lenses for motion picture use and initially I thought I'd be pulling out that set for the whole projection. However, prior to shooting I found myself thinking about "the then and now". VistaVision, progression of digital technology, the modern spin on a classic historic sword; this all influenced how and what glass I used. I decided to take perhaps some of the most impressive modern lenses in the Zeiss Otus Primes and combine them with a few shots from a vintage Olympus-OM set of 30-40 years ago. Additionally there were a few shots tackled with Zeiss Milvus lenses, one Leica-R shot, and a 200mm Canon prime as well (to help get inside the forge). All of these lenses featured the Duclos Lenses Cine-Mod so I could pull focus and attach a light weight clamp on matte box when needed. The extreme close up shots were mostly Olympus, Leica, and Zeiss. However, I did get a bit creative with extension rings on the Otus primes during the skull welding process as it allowed me to get in close with the 85mm Otus and be significantly closer than it's minimum focus distance. This to me was the perfect shoot to get a little creative as typically I tend to stick to one set of glass for a given production.
This shot was achieved using a vintage Olympus 21mm f/2 prime lens
Light transmission is a bit all over the place with lenses like these, but I shot the vast majority of this footage at f/2, though there's a fair amount of f/1.4 and f/2.8 in there with a couple f/5 shots. All lights were dimmable on set, making these exposure transitions was pretty painless and I didn't utilize ND Filters for this particular shoot.
The Bright Tangerine Misfit Atom Matte Box with an Optical Clear protected the lens from harm.
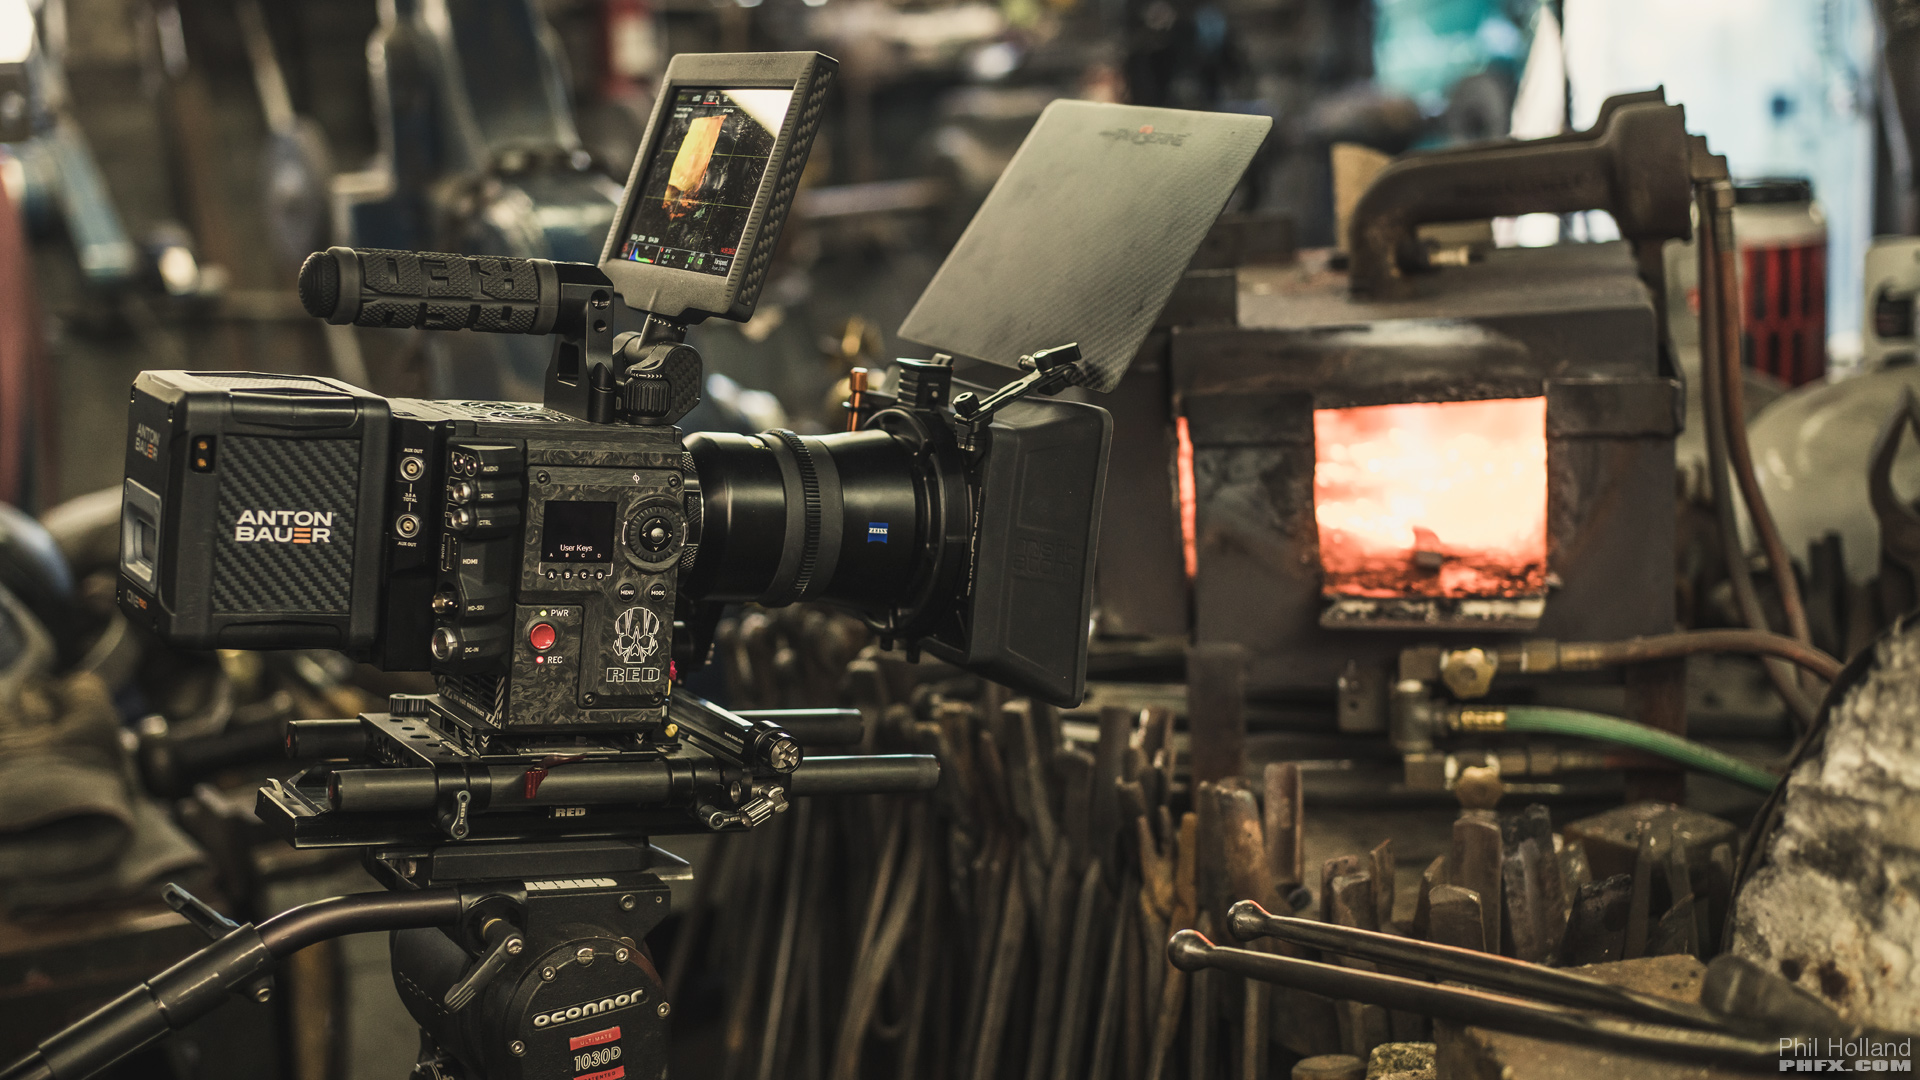
I had the camera in very precarious situations. Literally on a grinder belt or having 1500 degree bits of steel being shot on the camera. As you can see from some of the images I used the Bright Tangerine Misfit Atom with optical clear filters to protect the lens and camera. Though I can't say the optical clear filters survived. They were pitted with metal bits as was my skin.
Lighting the Shop
Nearly every setup was lit with Nila Boxers and Litepanel Astra 1x1 Bi-Color units
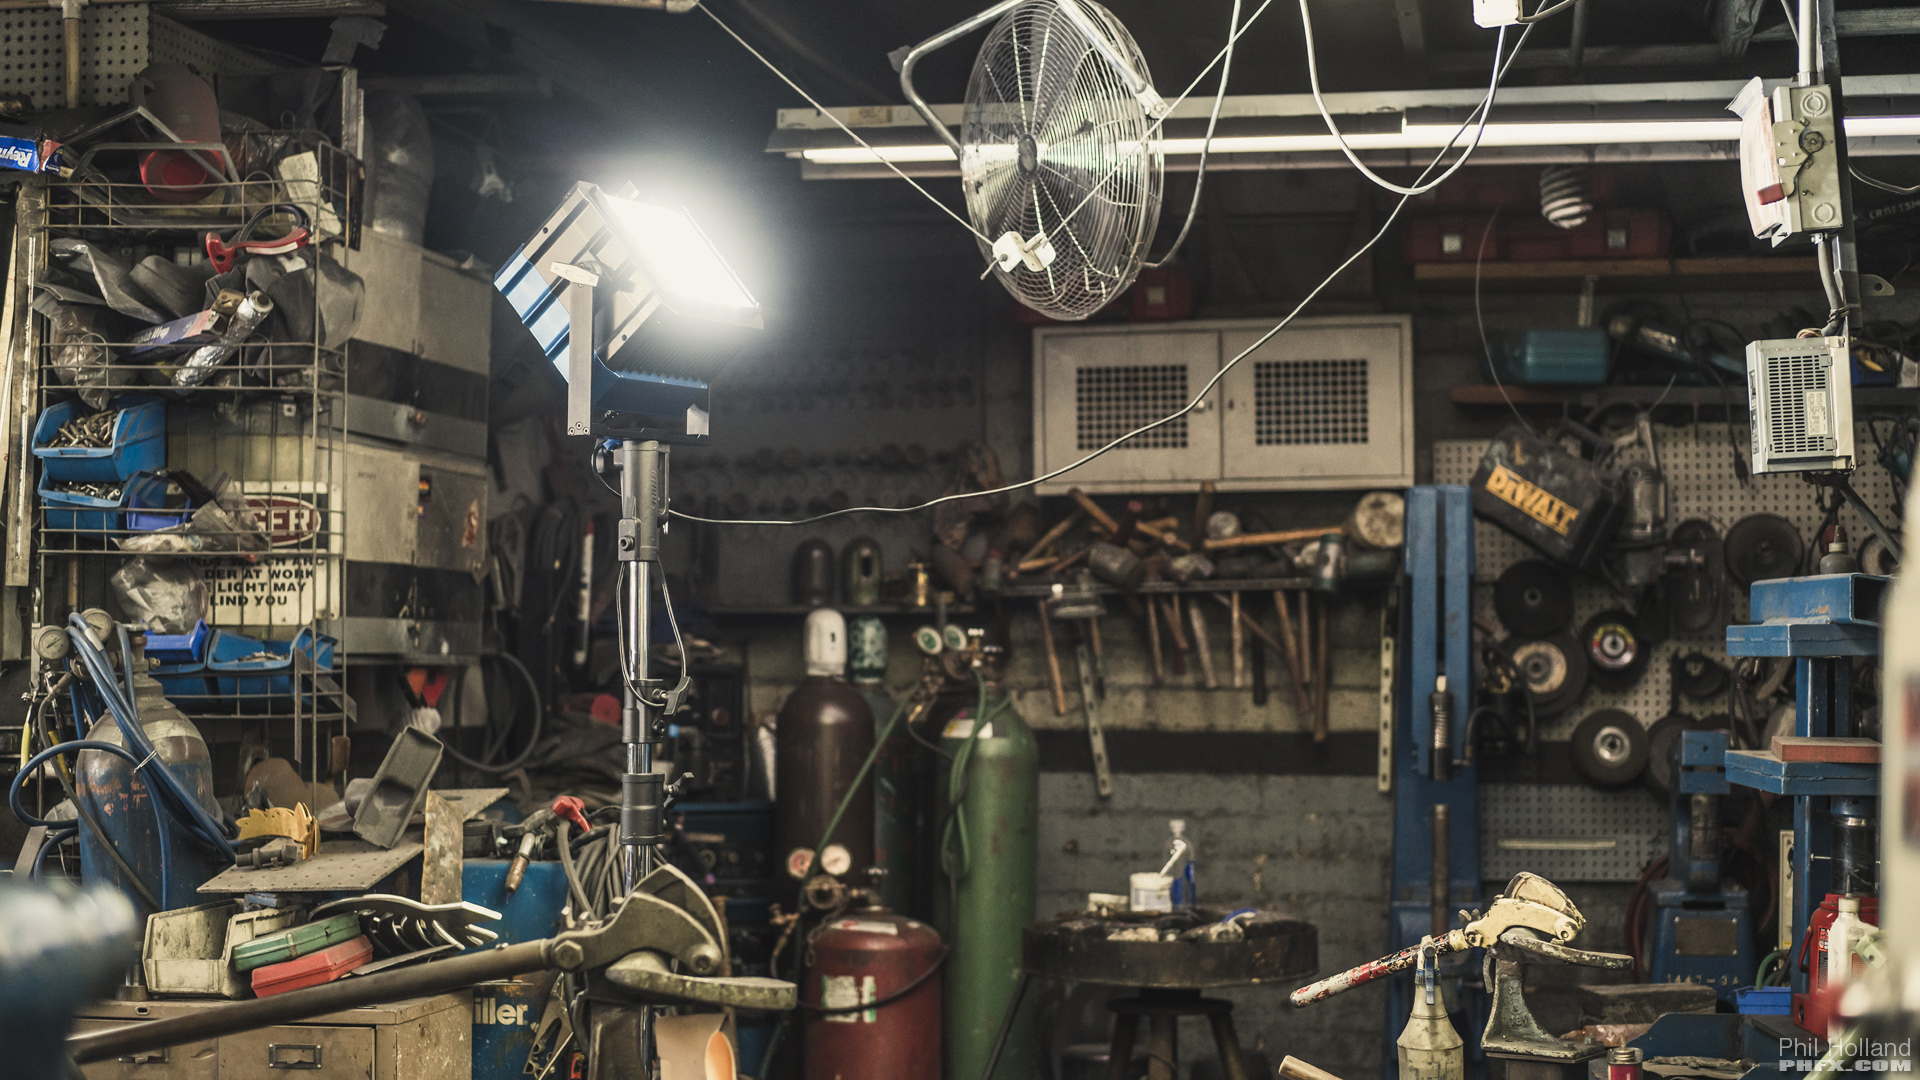
Lighting was tricky. I didn't want to go full on narrative beauty lighting as Tony's shop has some gritty allure to it. There also just wasn't enough space to go nuts with huge diffusion panels, Tony's shop is full of machinery and fairly tight spaces. So I tackled this with 2X Nila Boxers to provide bounce and serve as a skylight mimic to help fill some of the shadowy corners of the shop or occasionally serving as key.
One of two Nila Boxers used on set rigged atop a combo stand
Additionally I had two Litepanel Astra 1x1 Bi-Color units rigged with V-Locks on small sturdy stands that could be placed in some of those tight corners. These would travel with camera and Tony as myself and my camera assistant chased him around the shop. I was mixing these with daylight and the house fluorescents while filming during the daytime. However, when it got dark this setup showed it's real strengths. Anywhere Tony went and I didn't find what I wanted in the frame I setup those Litepanels and redirected the Nilas. More or less a documentary style of working if you will. However, no handheld, all tripod. About 100 setups a day.
Litepanels were used as mobile key, rim, or wrap light
I was mostly aiming for f/2-ish. Depending on how we quickly adjusted and positioned the various lights we were able to get f/1.4-f/5 if I felt that suited the composition better. Focusing mostly on an enhanced aesthetic that felt it was a source within the shop, but enhancing some situations with a bit of wrap or rim lighting depending on the frame.
Post Workflow
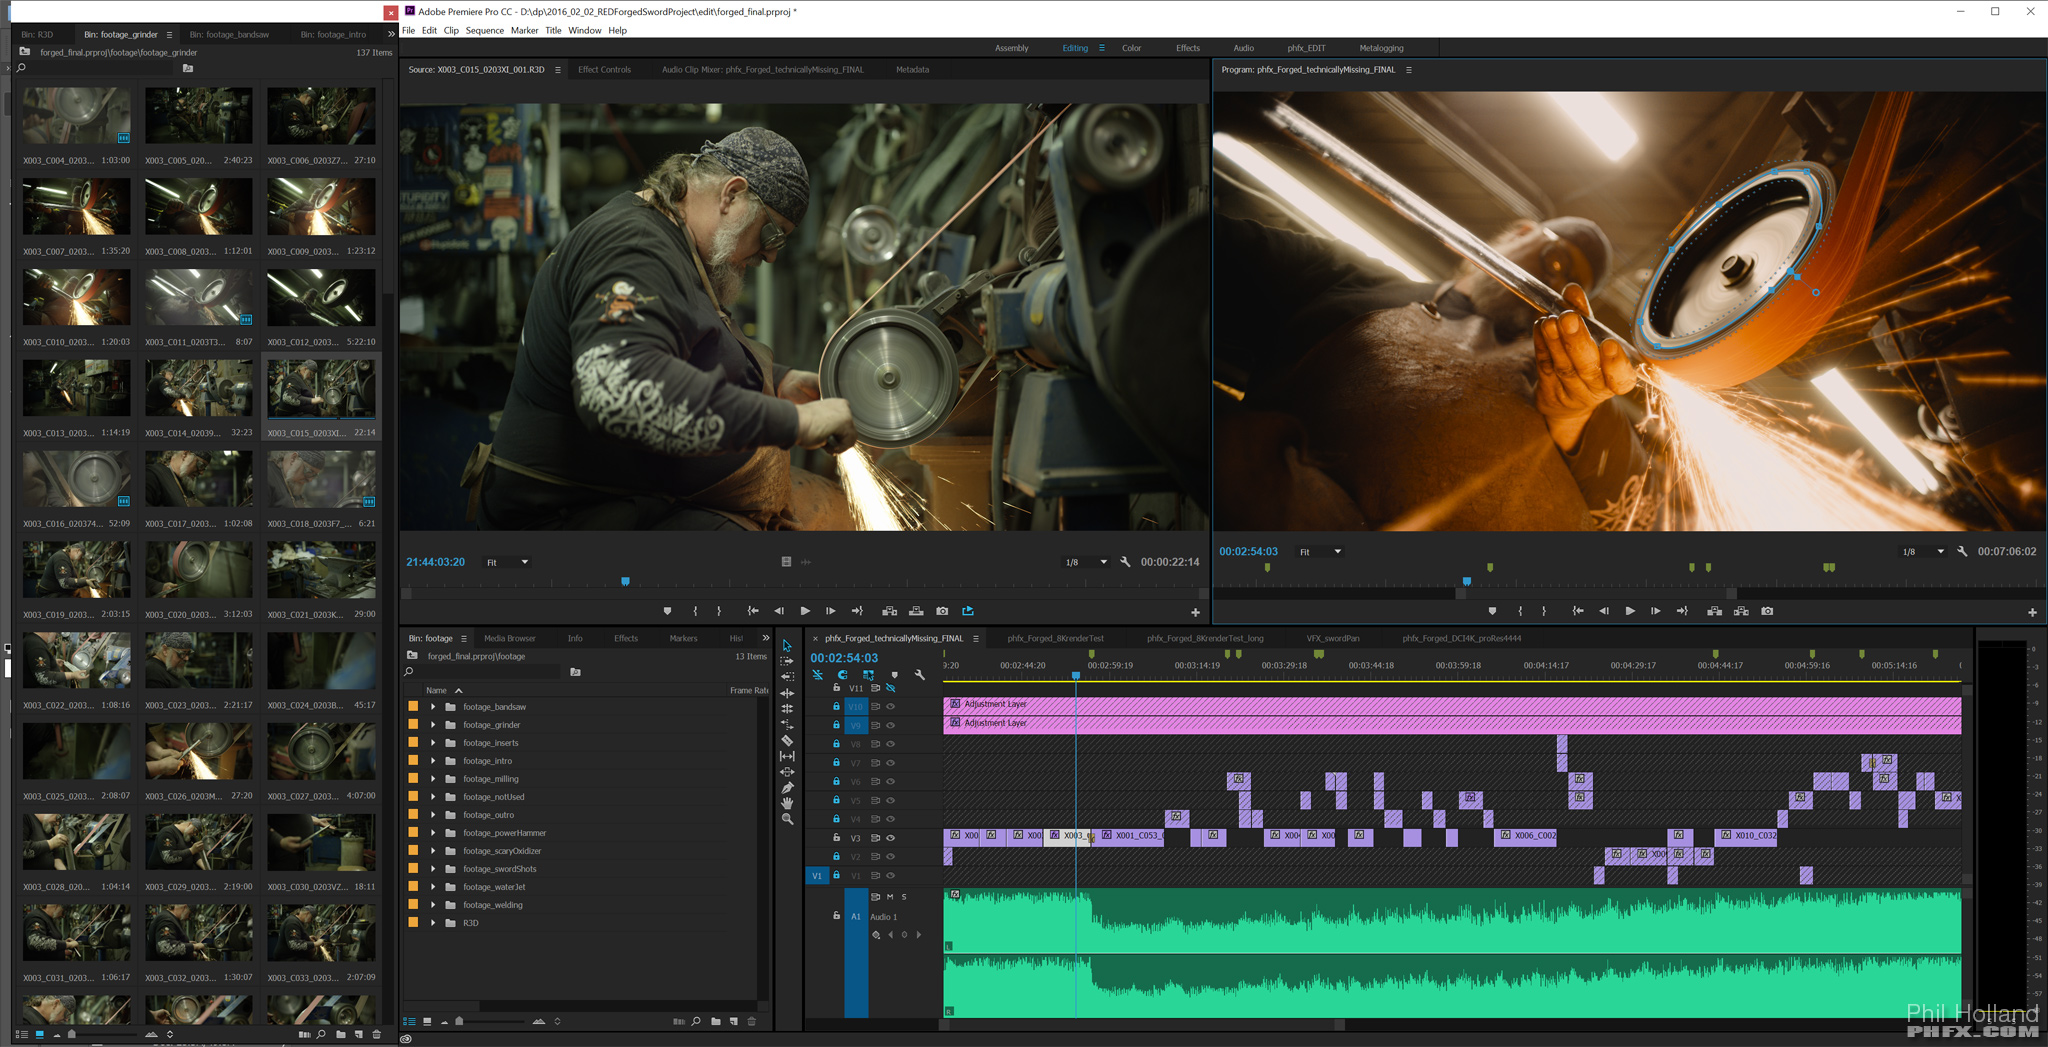
Premiere Pro CC layout on my LG 31" DCI 4K Display
Huge, big thanks to Adobe for getting me a very early pre-release build of Premiere Pro CC that supported RED Weapon 8K .R3Ds. This was a 4 day shoot with 2 days of post (one day edit, one day color/export) and a bit of experimentation with various codecs for exporting. I edited the 8K FF .R3Ds natively in Premiere Pro CC with no issues on my workstation PC, even tested those files out on my Laptop without any problems. 1/8th playback for time sensitive cuts, 1/4 for QC related work, Full Resolution when Paused for critical work. Adaptive resolution and GPU support in our NLE software has truly changed the way we can possibly work these last few years. I also leveraged the Lumetri Color Panel/Tools to executre the color grade. In the screen grab above you can see where I masked off an area on the grinder wheel and knocked it down about 1/2 a stop. The grade was achieved via a custom 3D LUT I made, then individual clip adjustments via Lumetri within Premiere Pro CC. I'm big on editing with native REDCODE RAW material on projects of this scale. This workflow has even become commonplace on larger projects for me. Glad to see even at 8K nothing is holding back this particular method of working.
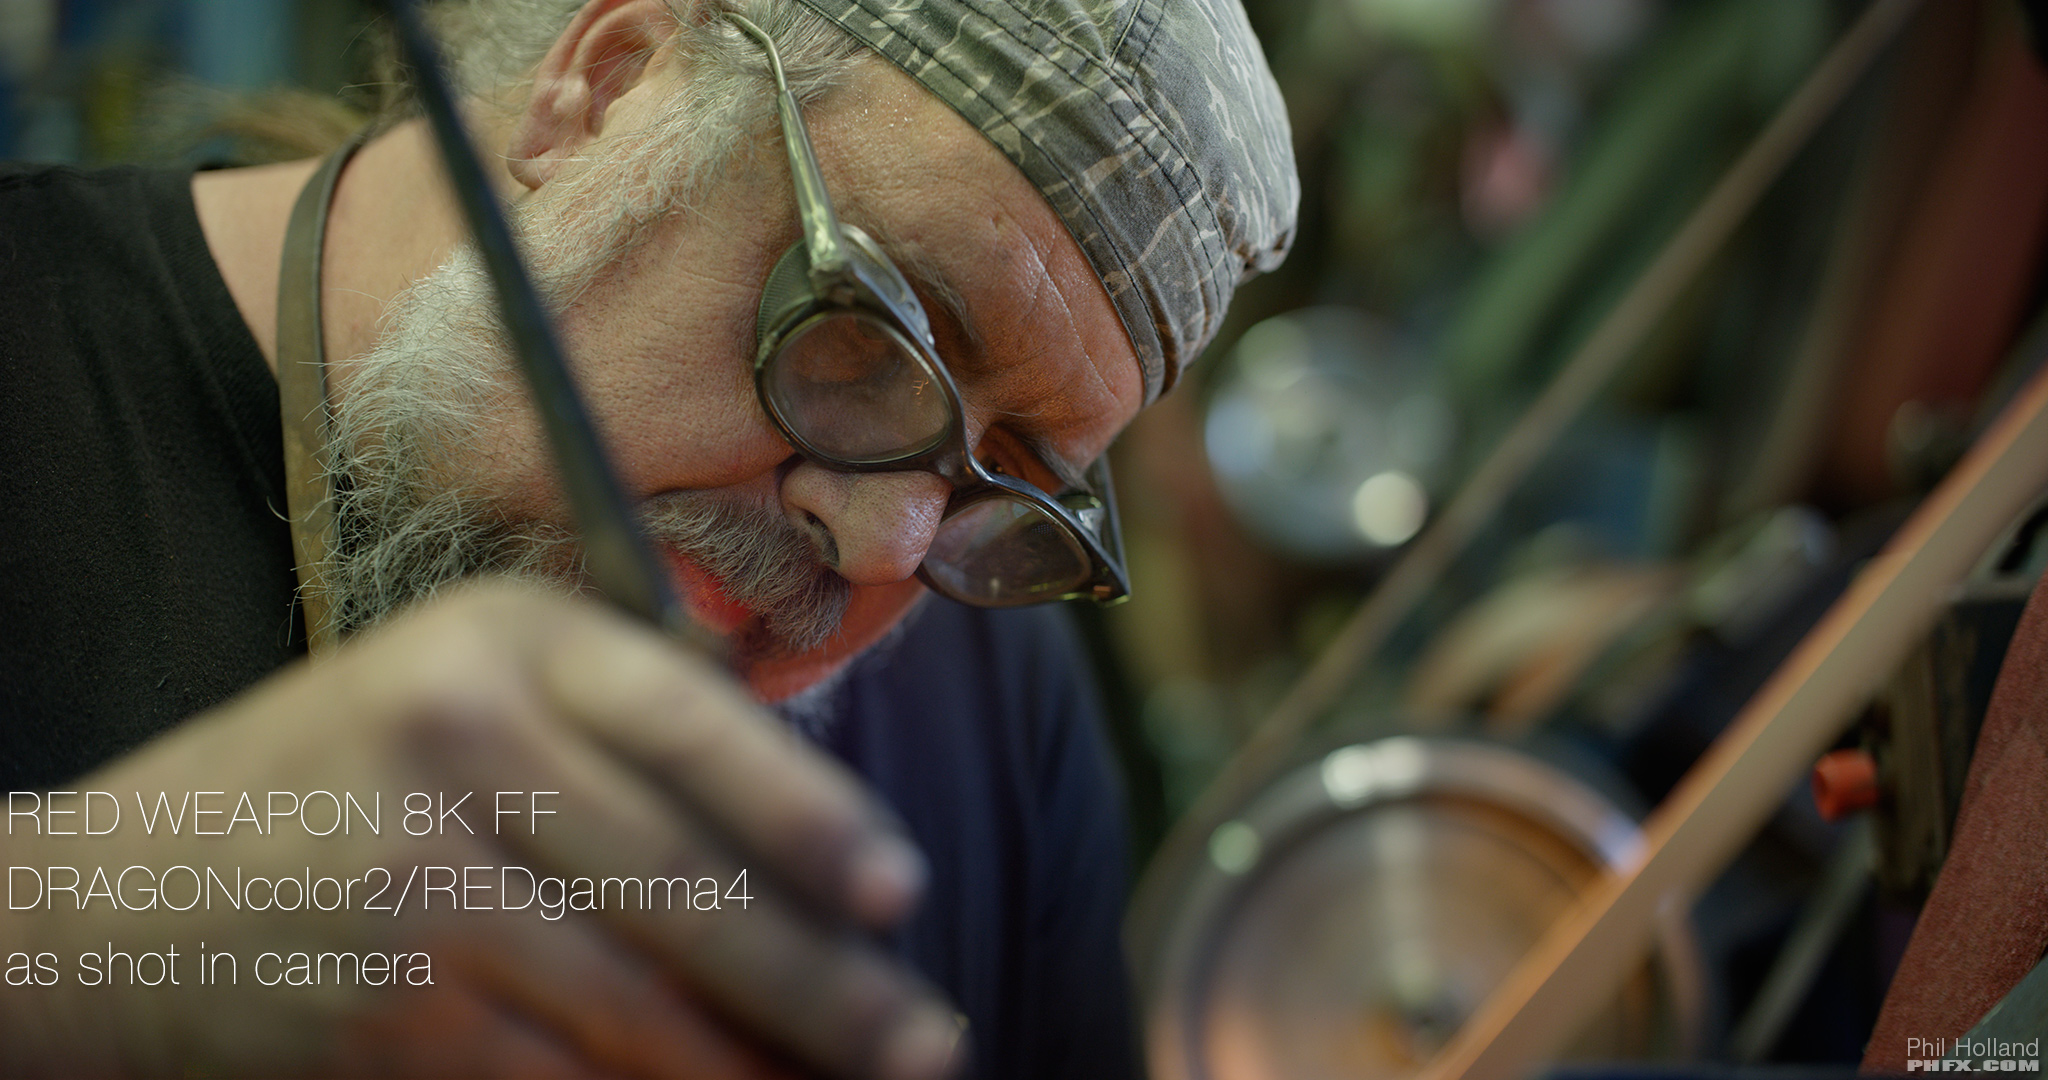
Color: How the image looked in camera.
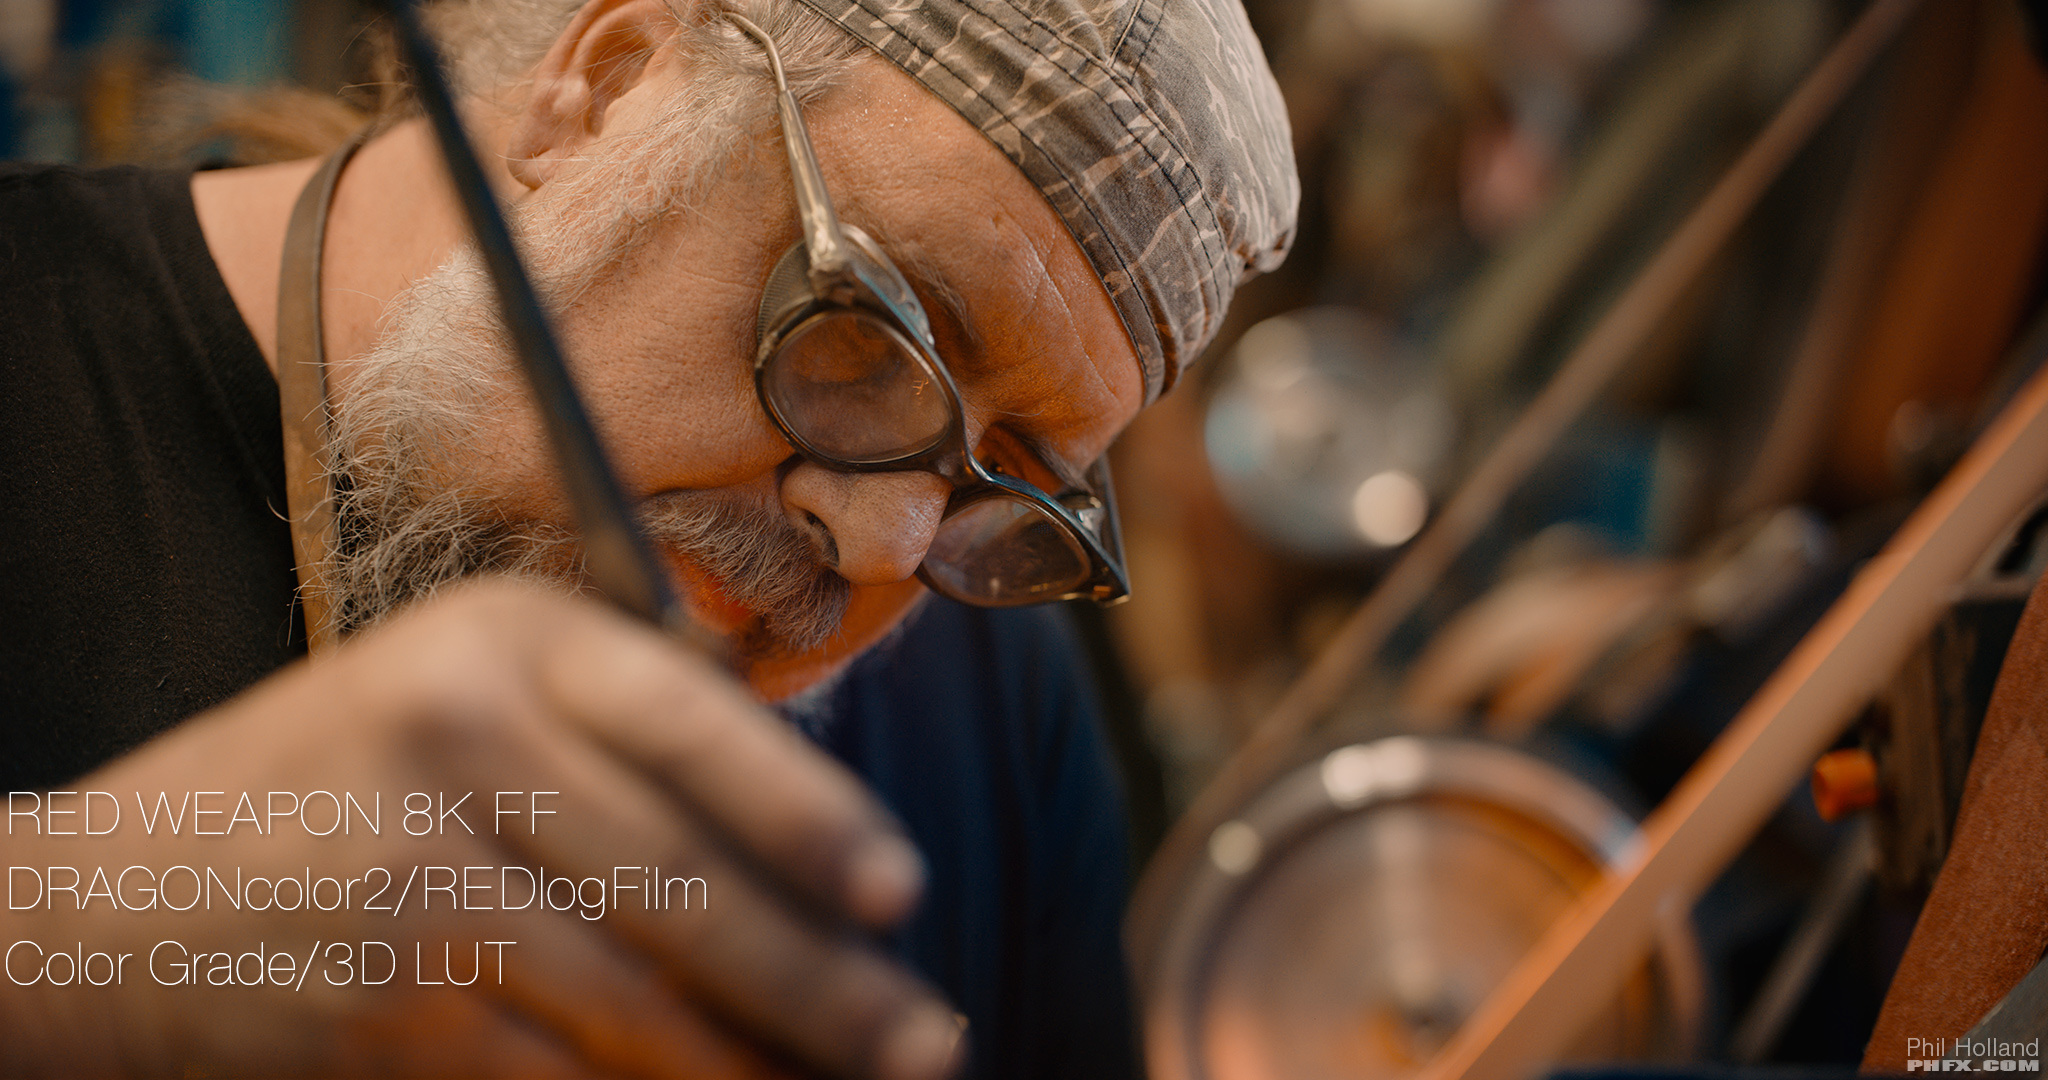
Color: Final Color Grade
I exported a whole bunch of versions. 2K, 4K, 8K. What you see on YouTube is a high bit-rate H.264 4K DCI encode. Then of course YouTube re-encodes that and we lose a bit of the meaty goodness. My Apple ProRes, VP9, and H.265 4K and 8K masters are actually much better than what you can see via the web at the moment.
As for the cut, the footage shown in this cut is about 25% of what I actually shot in terms of general content. I had to leave a few things on the cutting floor, like Tony "rounding" a square piece into the pommel and hammering the dome for the guard, but my focus was on the blade and the assembly for this edit.
Finishing Experiments
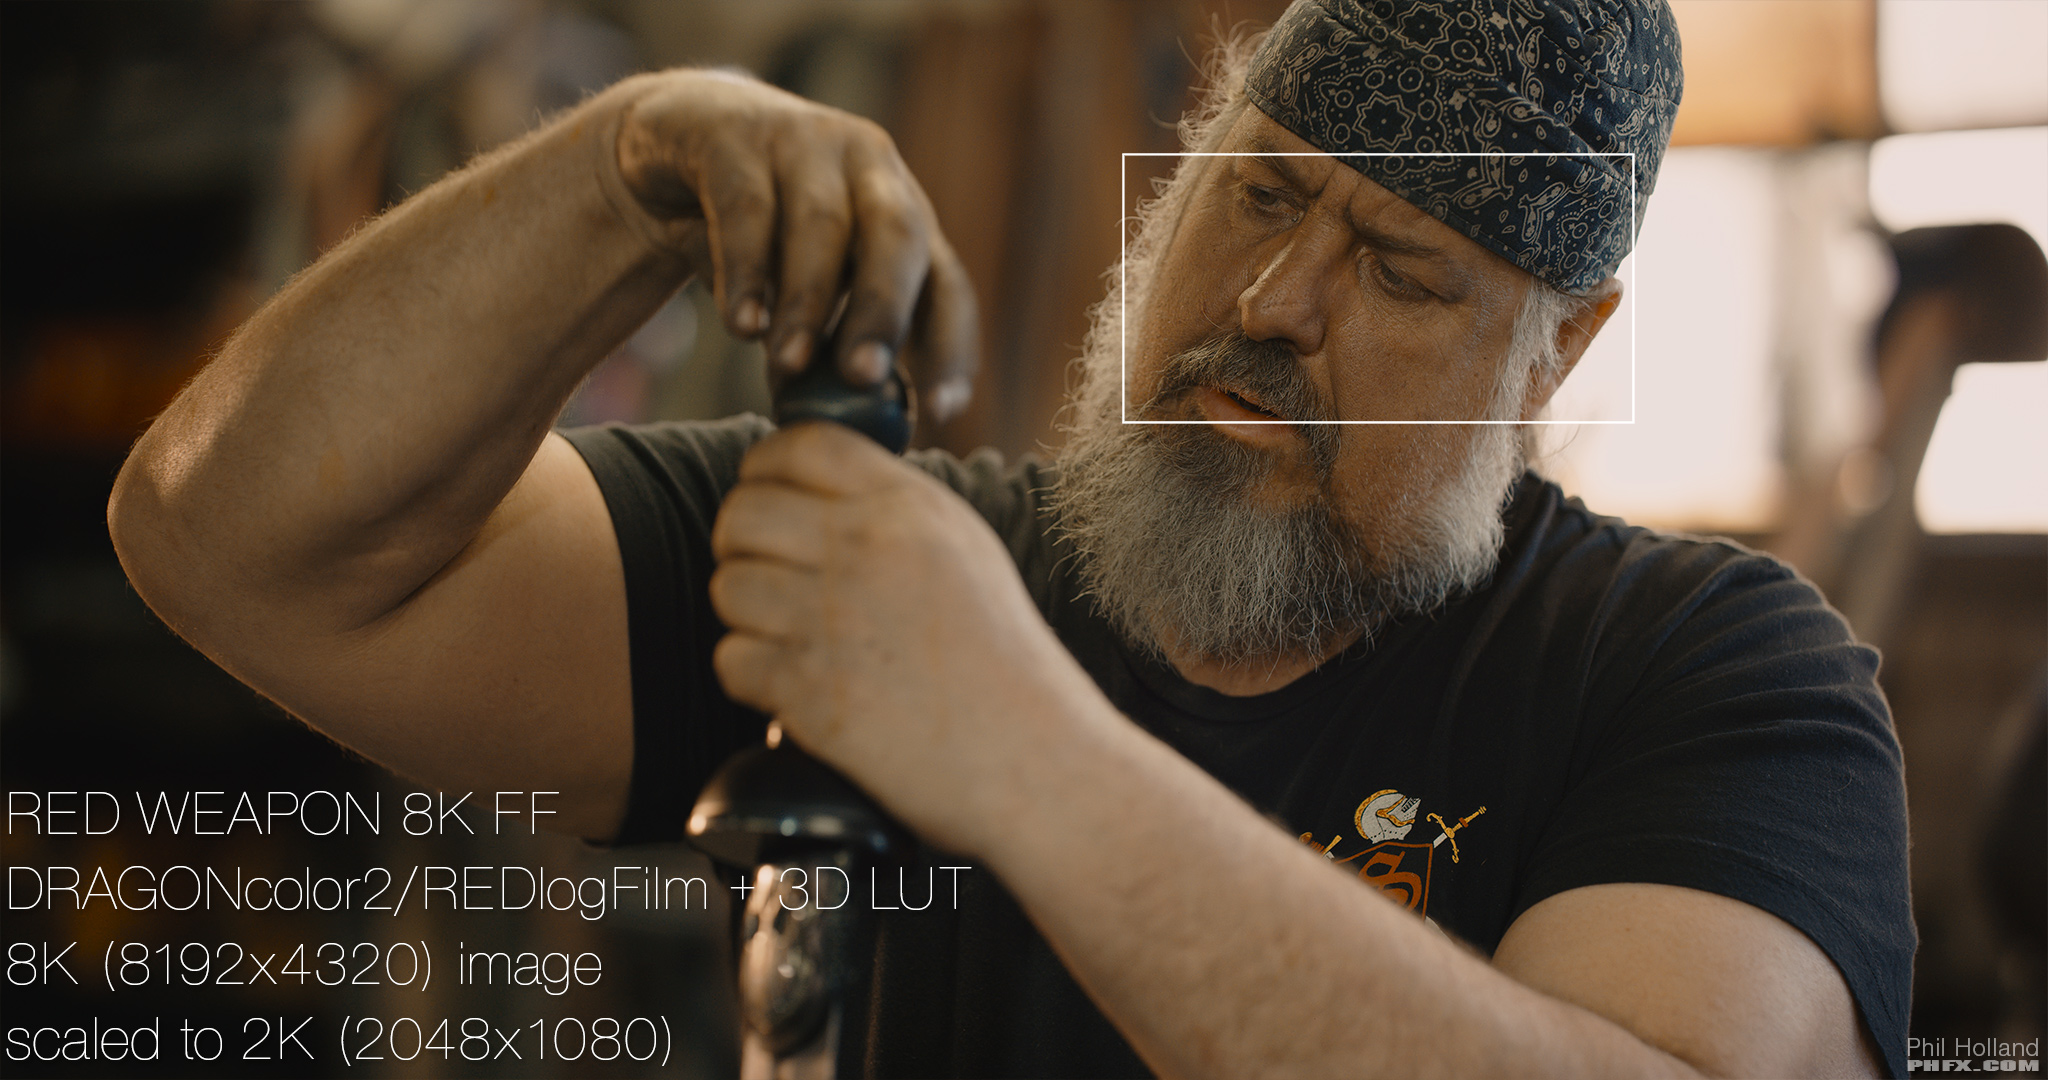
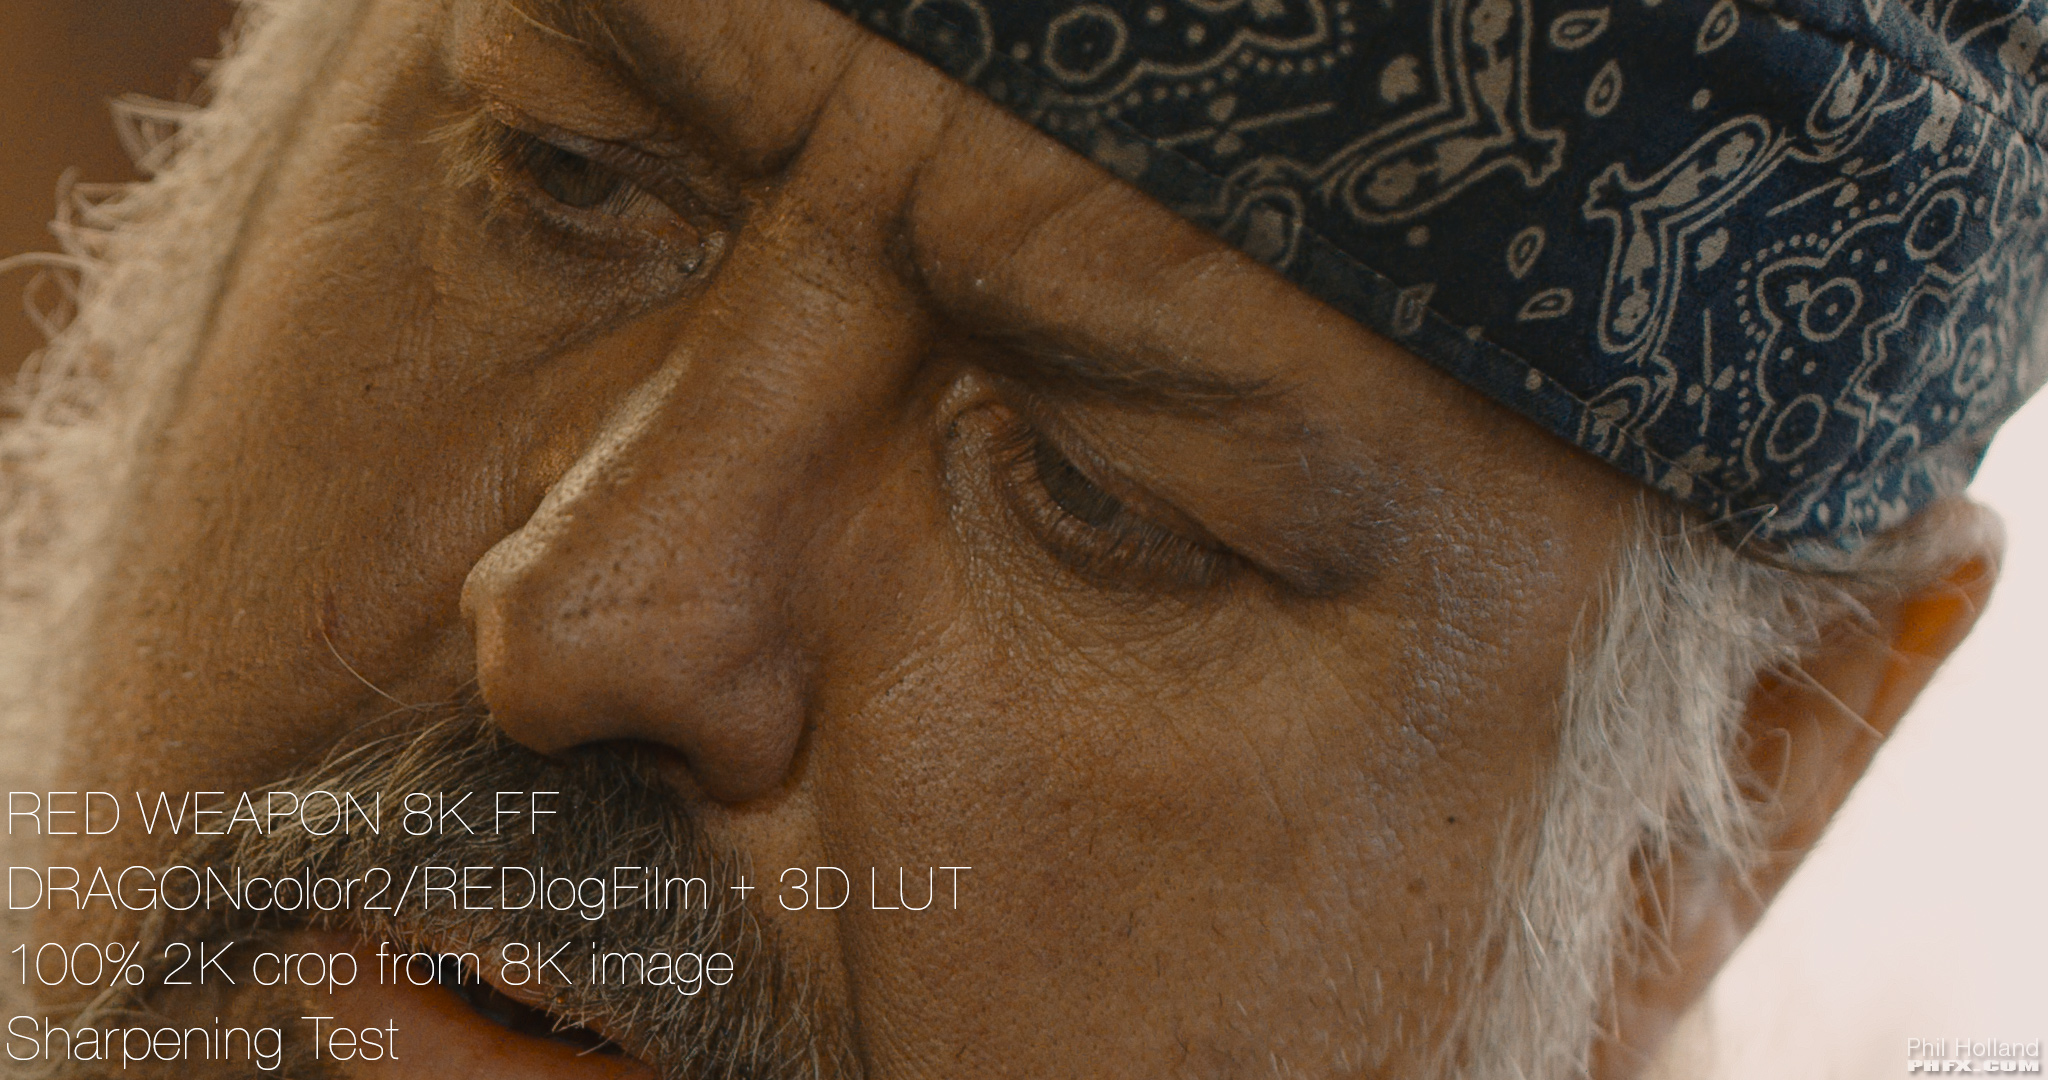
Now that the project has been edited and released I can begin to dig a bit further into the potential of 8K resolution. Experimenting with additional image processing for both still and motion purposes unlocks a bit more than working straight from the REDCODE RAW footage. REDCODE RAW is a compressed RAW format that doesn't apply additional processing like sharpening or noise reduction, and the Weapon 8K sensor itself is Bayer Pattern CMOS. There's certainly information inside the .R3D that can be carved out if so desired. Traditionally I don't sharpen my motion picture content from RED cameras as it maintains more of a film-like organic quality without any additional processing. However, various sharpening and scaling methods can indeed cut out more if that's your goal. Sharpening at delivery resolution and/or sharpening and then scaling down to your delivery resolution certain yields visibly noticeable results. Here's the images from an early test:
Full Image, Scaled to 2K
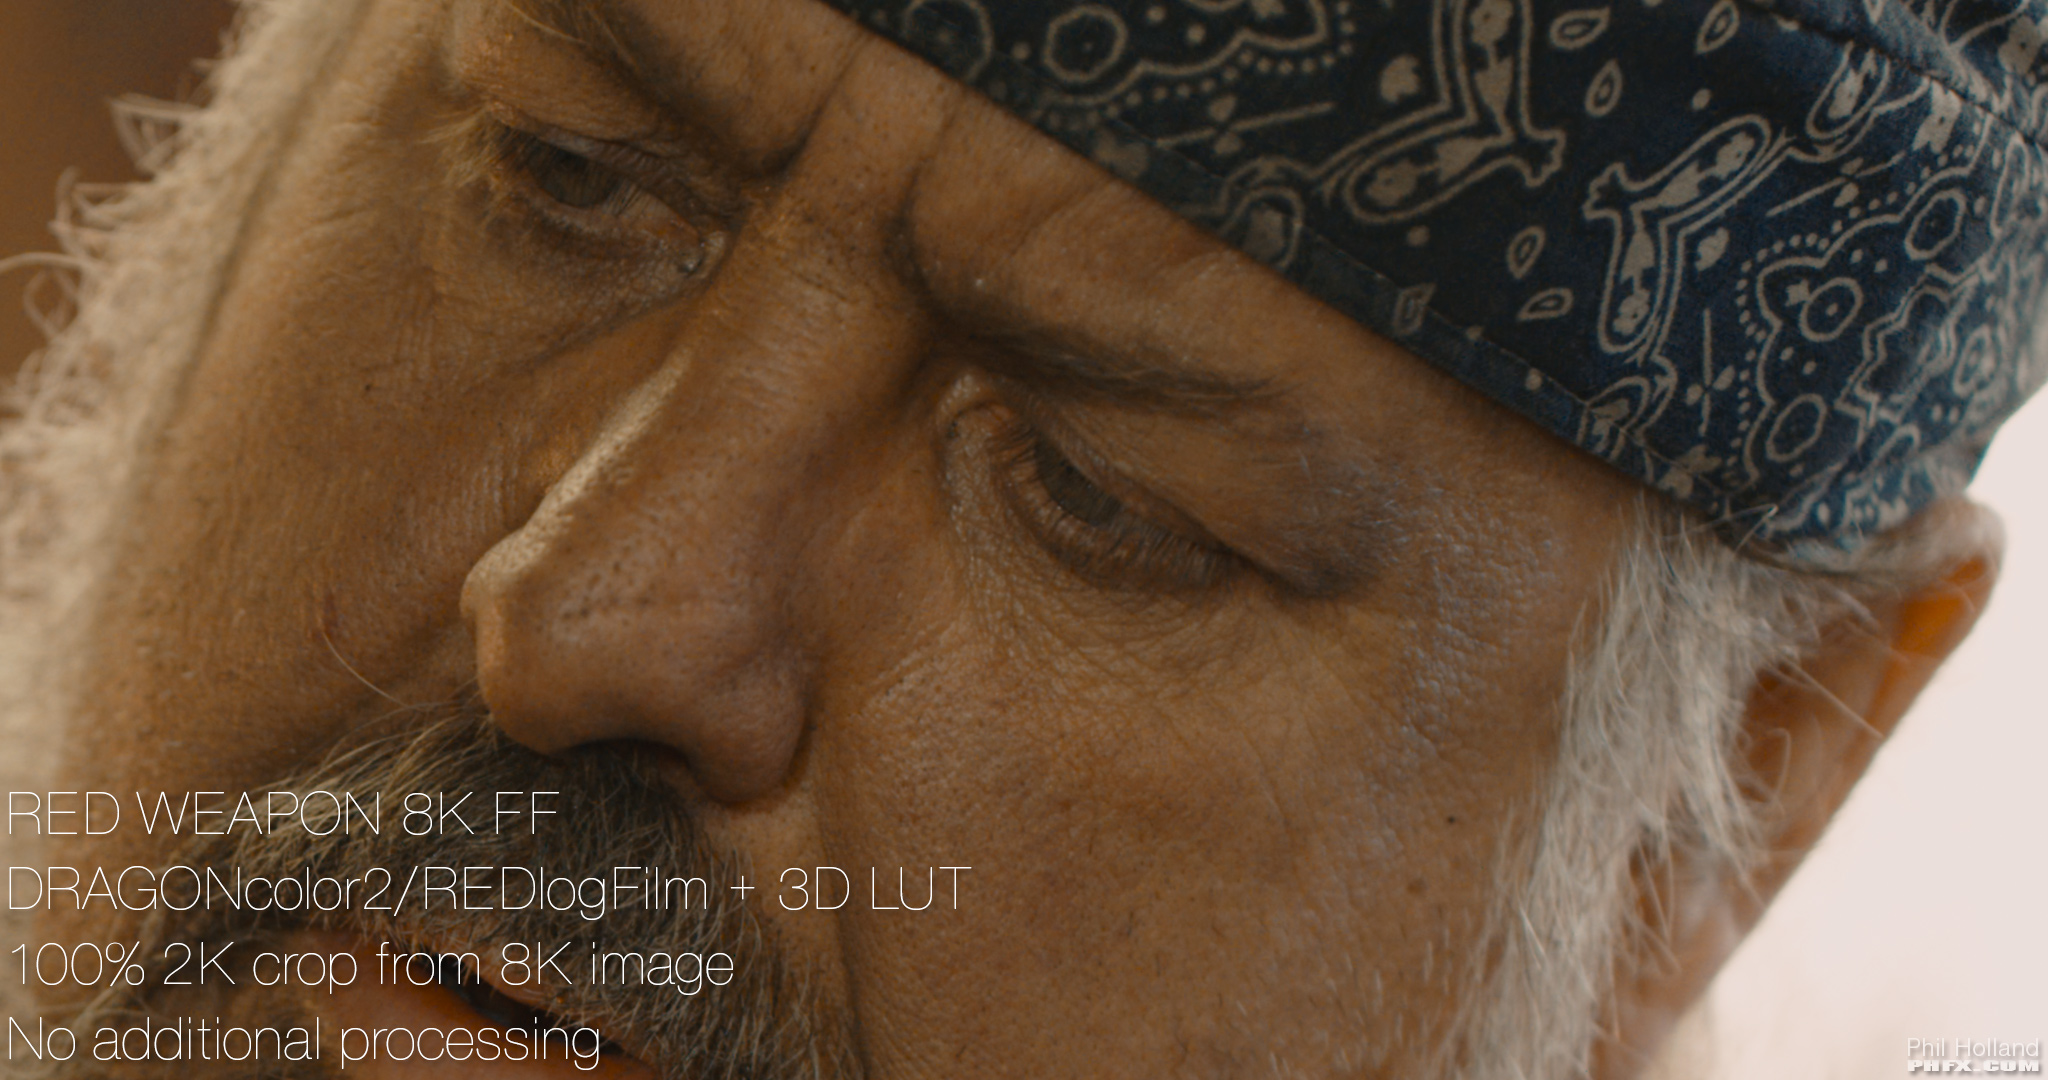
2K Crop, No Processing
2K Crop, With Sharpening
That's looking pretty good. It's important to sharpen motion picture content with a gentle touch. If you use aggressive methods, very quickly detail has unnatural edges and you can potentially reveal/create artifacts you likely wouldn't want. In this case, this was fairly modest attempt and I'll be doing further experiments on this front. The other instant realization is that this 8K camera shoots 16 times the resolution of that 2K crop.
The additional aspects of finishing I'm testing with this content are exploring 8K delivery with various codecs and even mastering an HDR version. This will take a bit of time, but I've already started exploring VP9 and H.265 8K encodes and testing playback. I've reached out to two of the upcoming 8K display manufacturers to get the specs that they find ideal for 8K playback and will be targeting that initially. On a powerful workstation, 8K playback is indeed possible and smooth. However, 8K Display Technology and Encoding is sort of the Wild West right now, but it will be exciting to see this develop over time.
Stills from Motion
This frame grab received additional stills-minded processing
One thing that I kept reminding myself during shooting was the striking potential of extracting stills from the motion pictures. At 8K FF we're looking at 35.4 Megapixels, exporting out a 16-bit TIF nets a large and thick 202.51MB image file. This could produce a stunning 27.3x14.4 inch print at 300 DPI for each frame that grabbed a sense of stillness. There's a lot of potential with that from a motion picture industry point of view. Suddenly marketing stills from productions could easily be printed as very high quality double page spreads, used for print ads, billboards, etc... I spent an evening after finishing this short just combing through footage all of the footage, some of which that I didn't include in the final piece, to explore some additional stills processing via Adobe Camera Raw and Adobe Photoshop. The potential here is very intriguing. I think we'll certainly be seeing high end fashion shoots explore motion and stills projects via a similar workflow with the 8K RED Weapon camera.
Sword Information
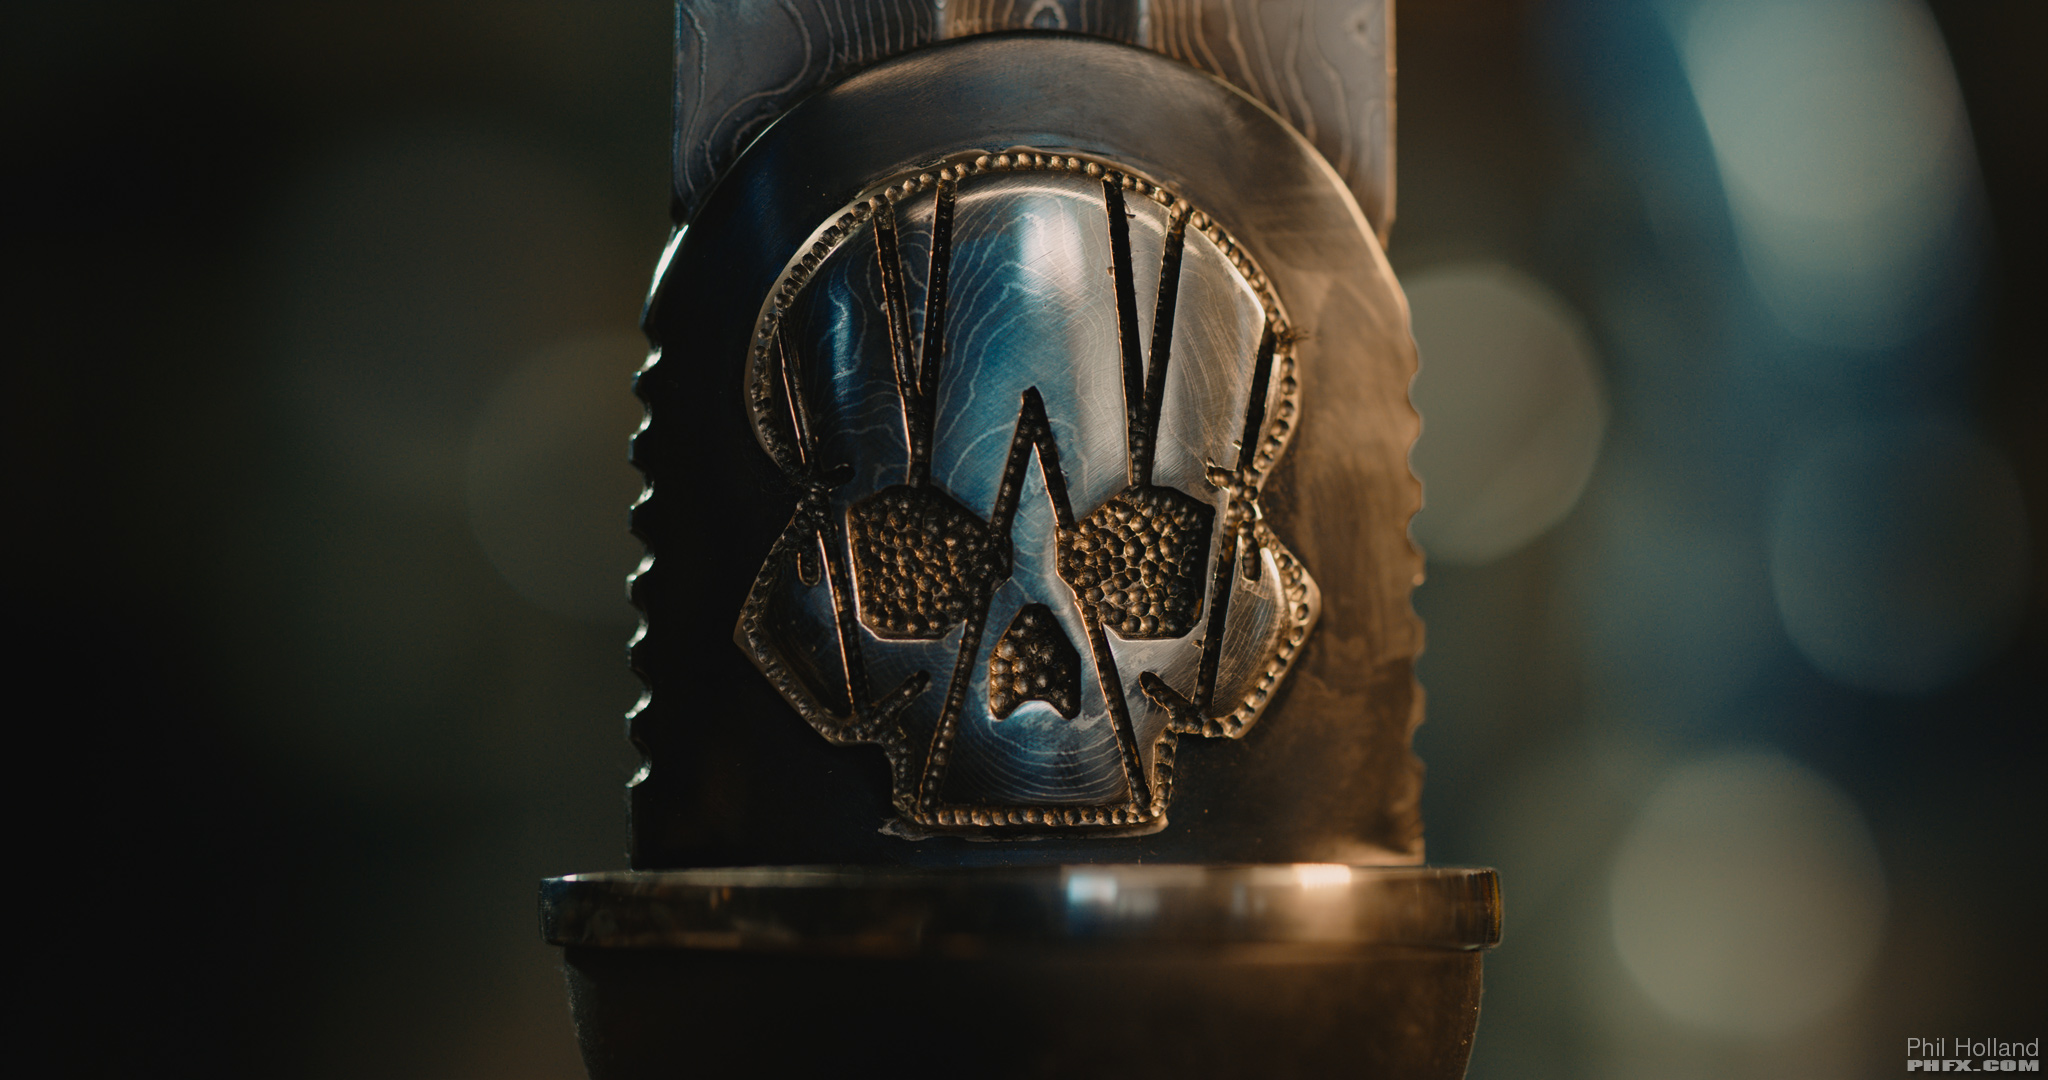
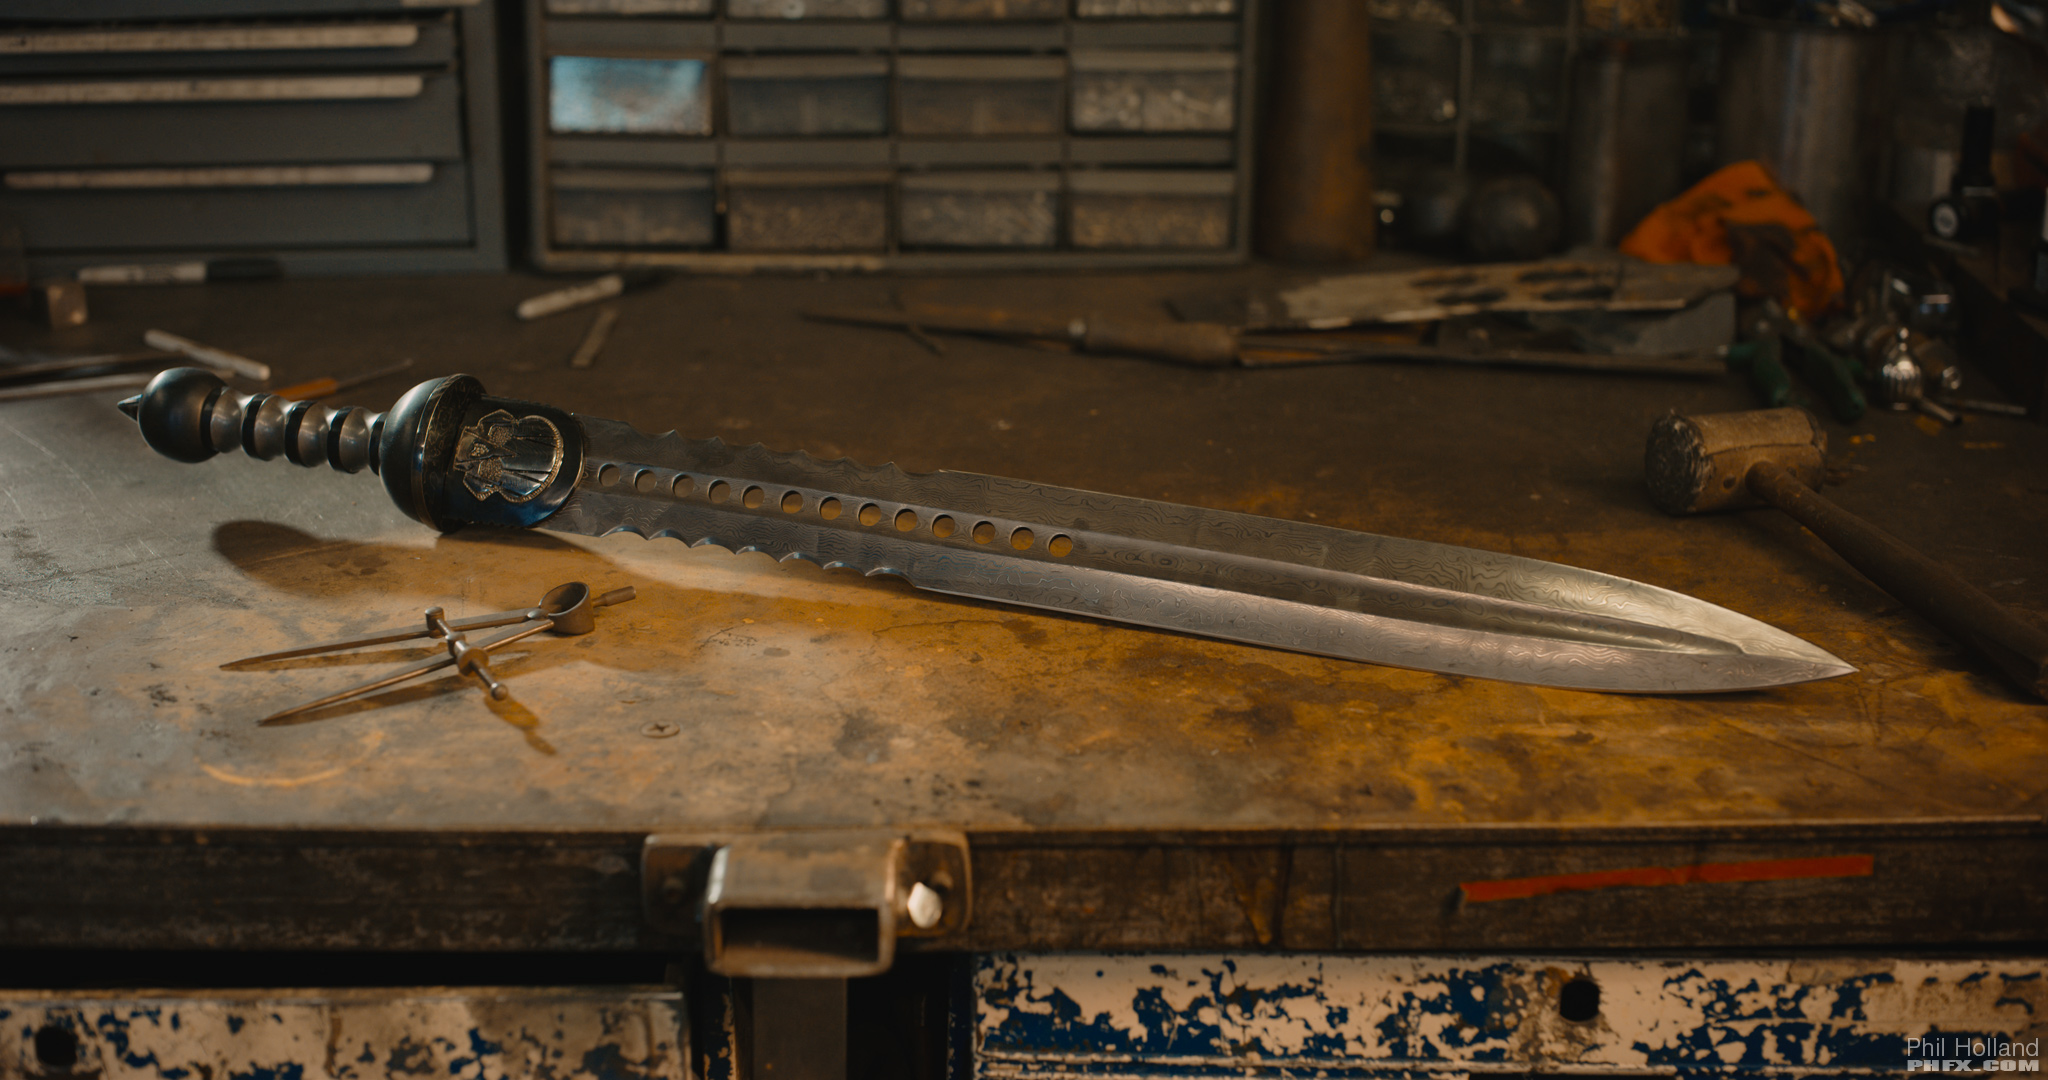
Close up of the Damascus Steel RED skull logo
Just a few notes about the sword and the general concept for the shoot. I wanted to put together something fairly unique for my first 8K shoot and I've wanted to work with Tony Swatton for over 7 years as his swords have been on a few films I've worked on in the past. I was determined to explore the use of Damascus Steel, which to me is one of the most beautiful ways to craft a blade. I purchased the RED Weapon 6K camera with the Forged Carbon Fiber body and thought Forging a blade would be a nice tip of the hat to that construction. RED's own Matt Tremblay created the final sword design and it's a modern take on the Roman Gladius. The short documents Tony over the course of 4 days as he forges and constructs this modern take on a classic weapon.
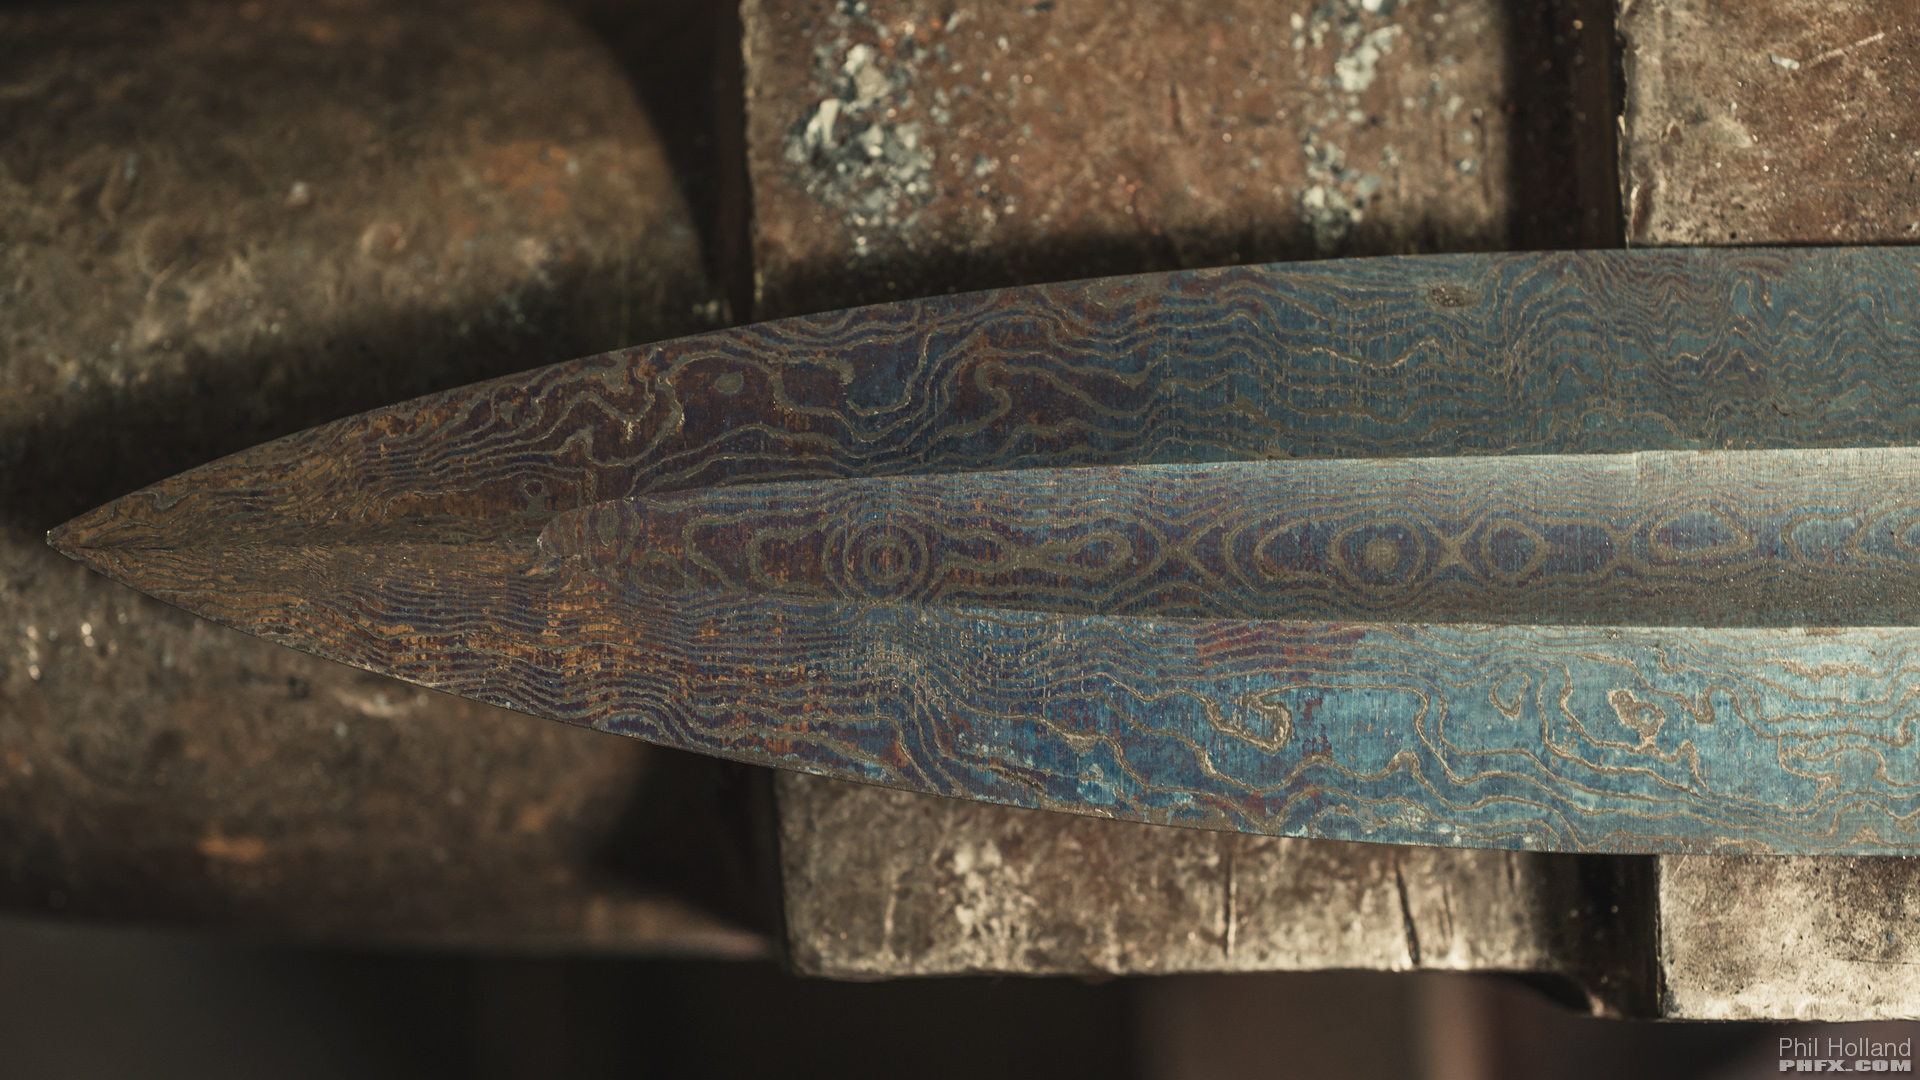
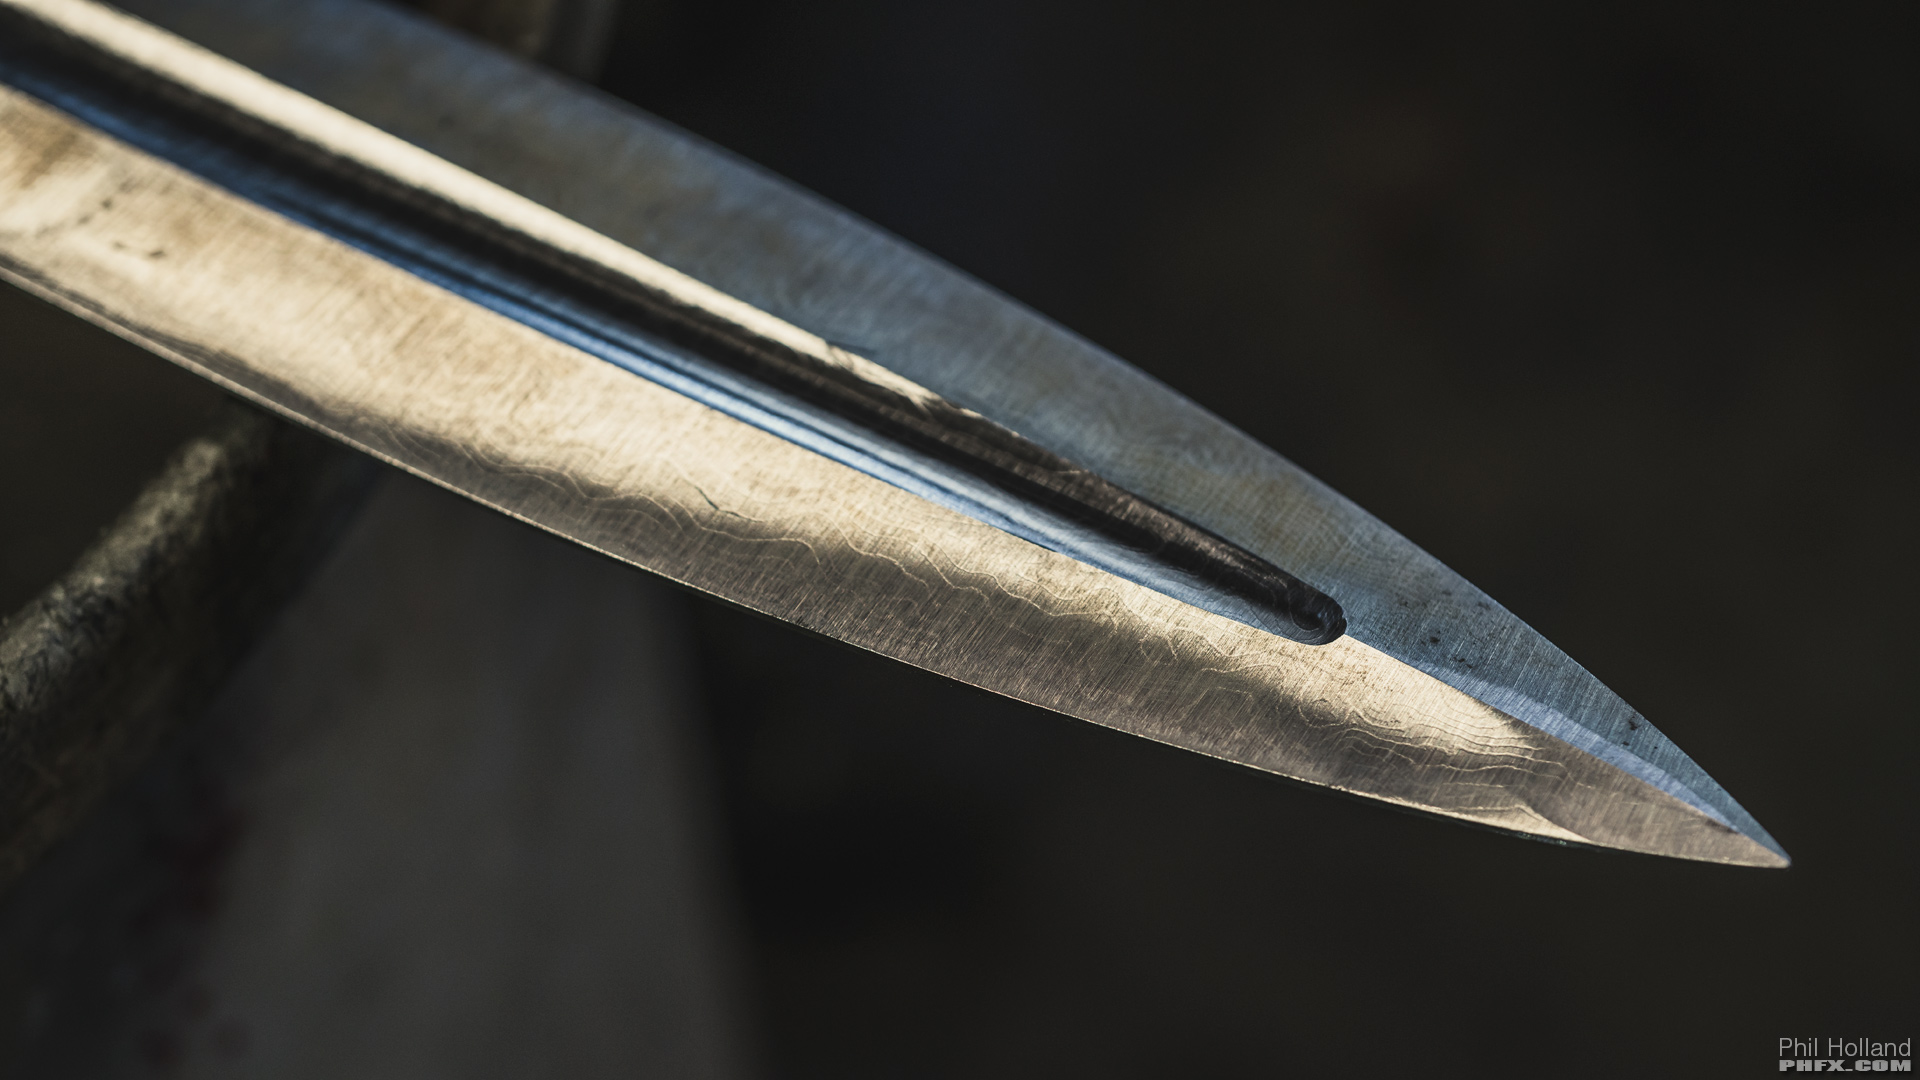
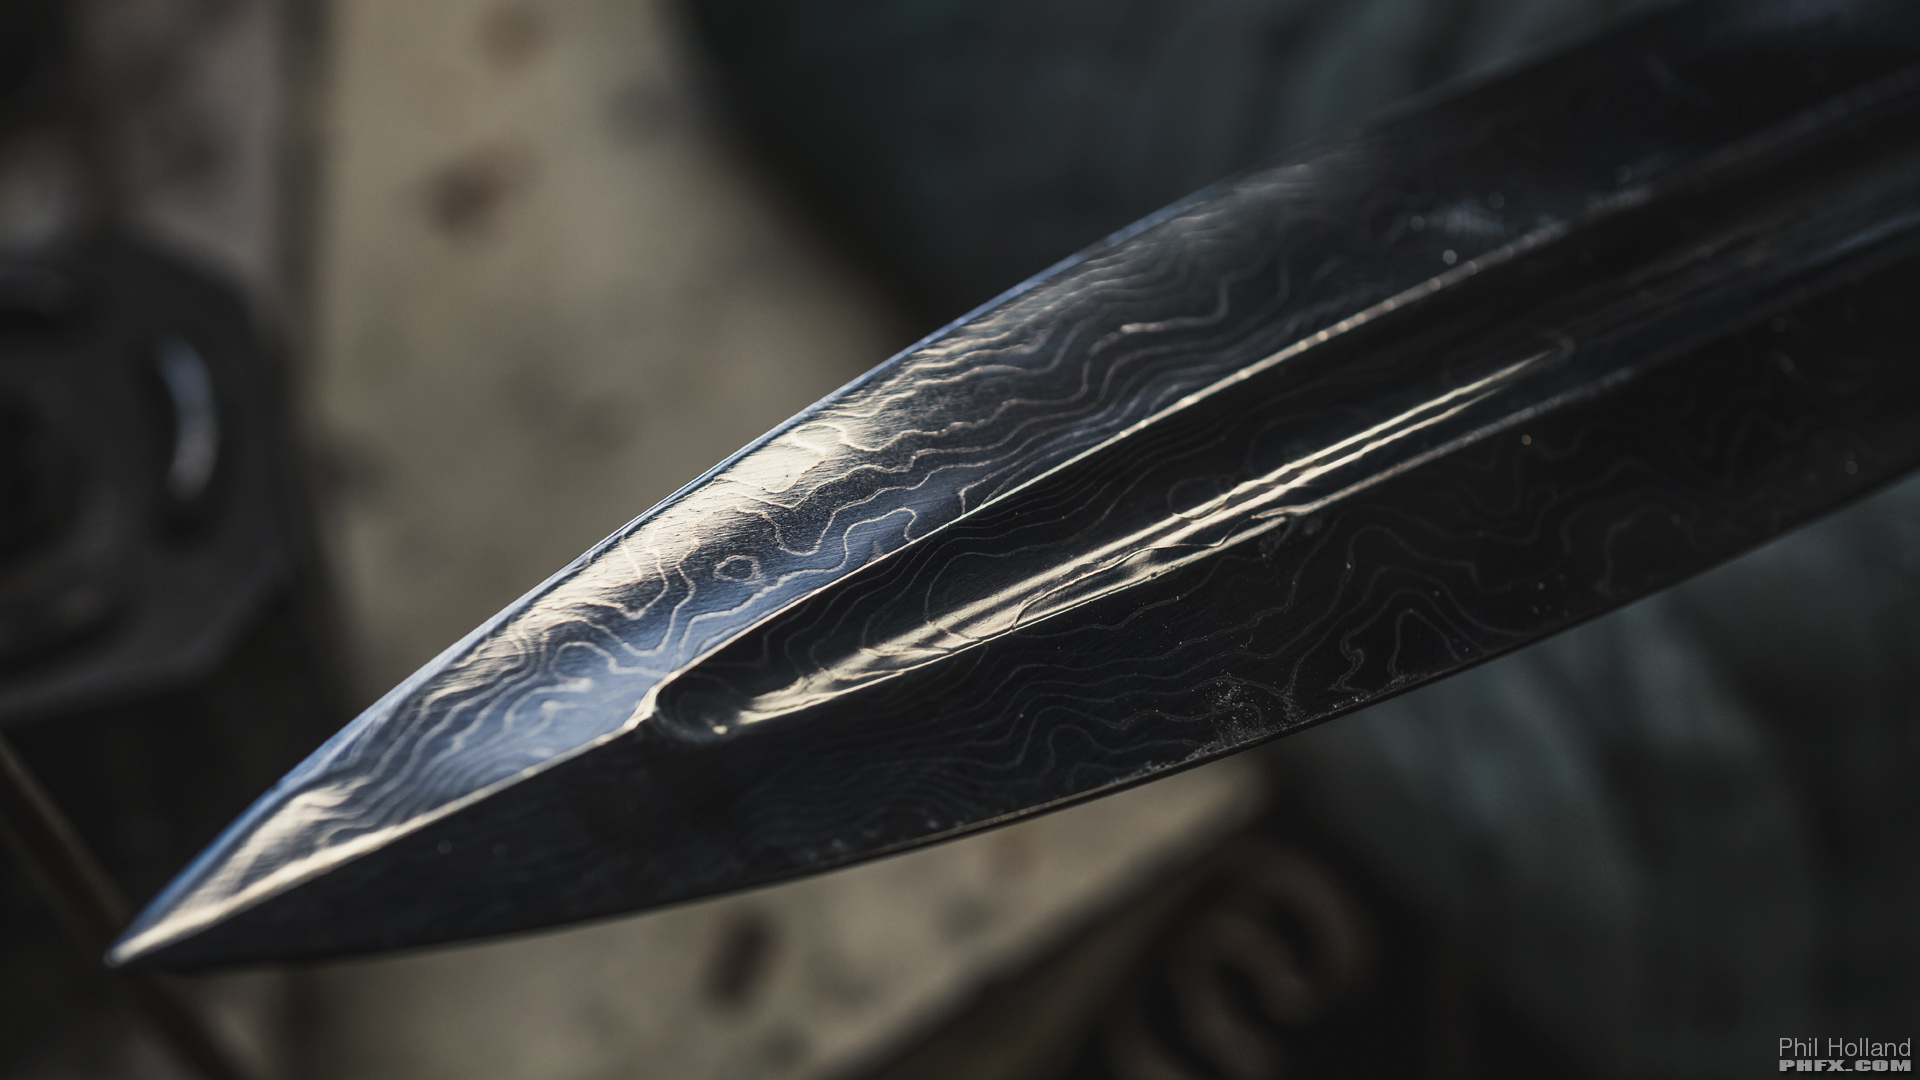
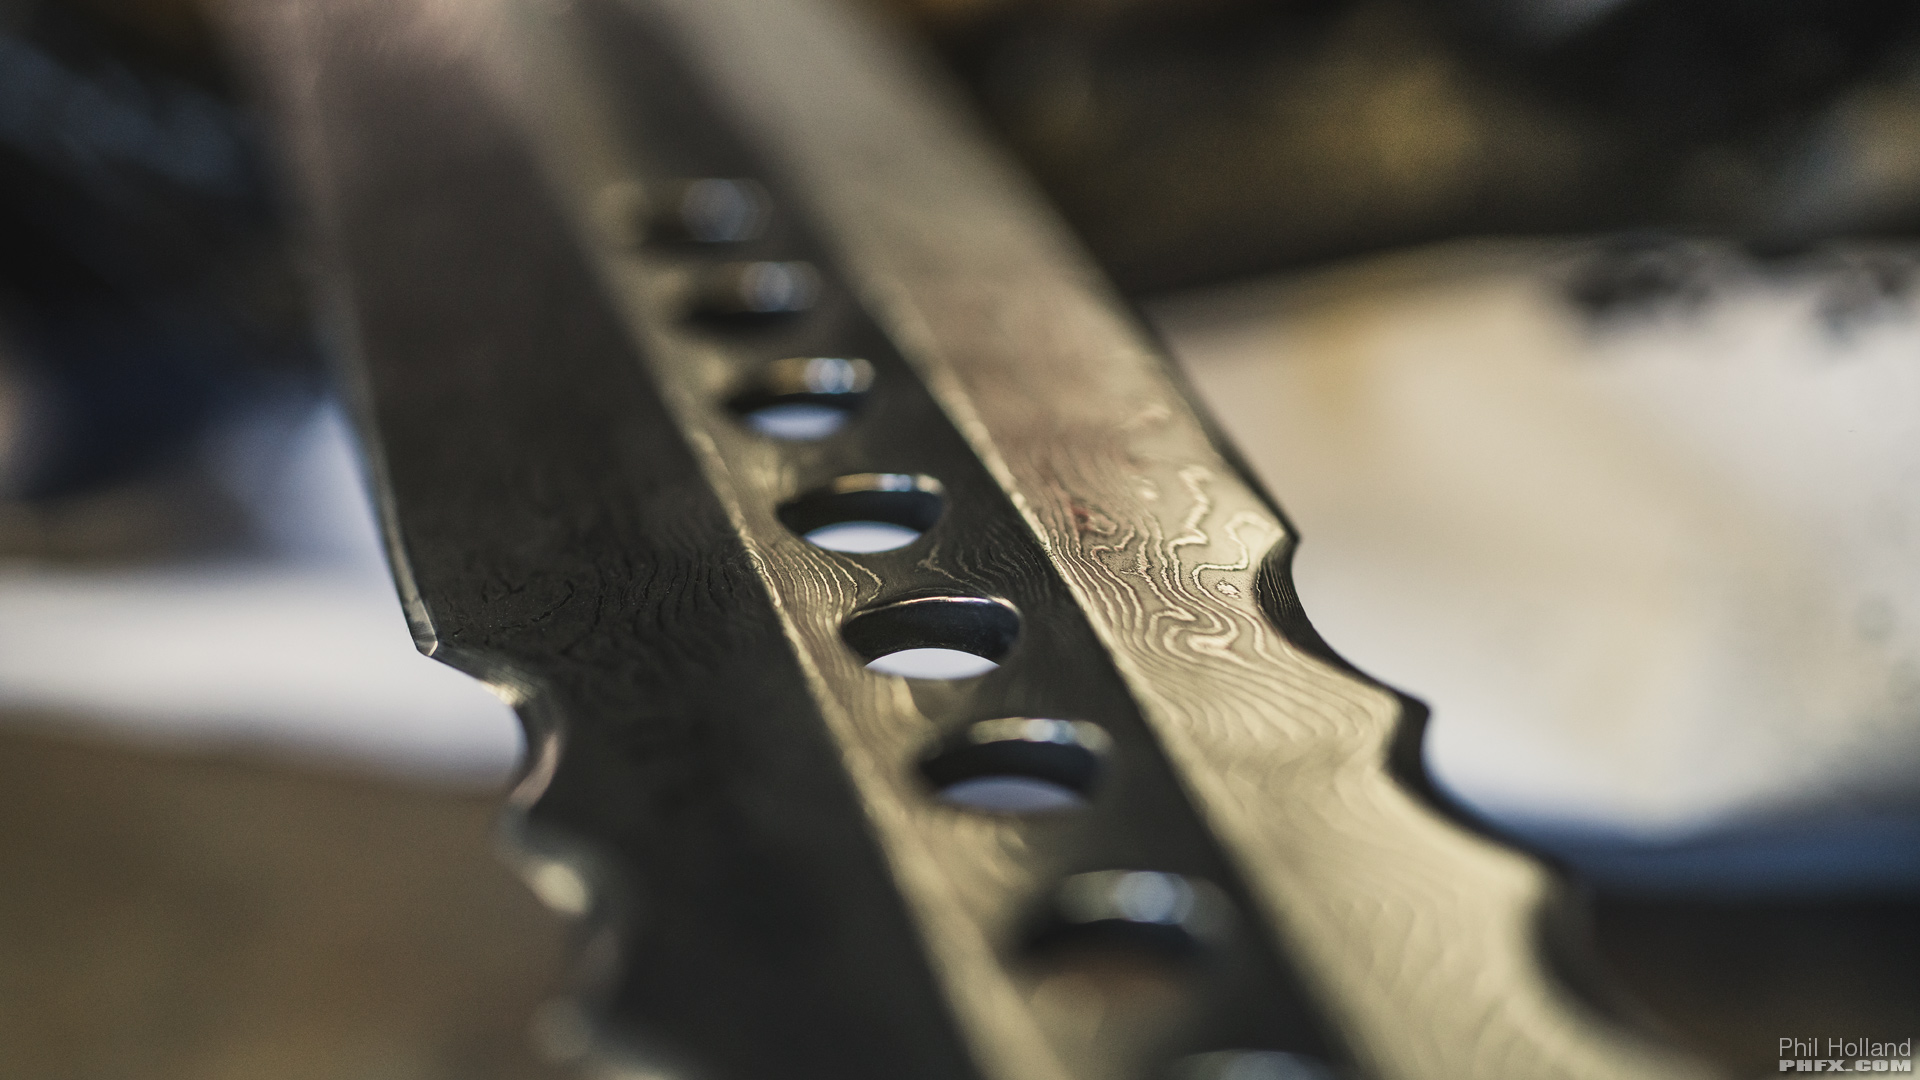
Various stages of the blade during contruction
It was a special few days shooting with Tony in his shop as he gears up to move into a new location after 25 years. I really enjoyed filming him and certainly learned a great deal through the process about his methods and techniques. With this sword there's a 93 layer z-fold damascus technique in the blade achieved with layers of steel and nickel, twisted in the grip, and in detailed pieces throughout the guard and pommel nut. While the pommel nut is actually one of my favorite details of the piece, the oxidized then etched finish of the blade itself maintains a darkness, yet still captures the brilliant shine from light. This is truly one of Tony's most beautiful swords.
Final Thoughts
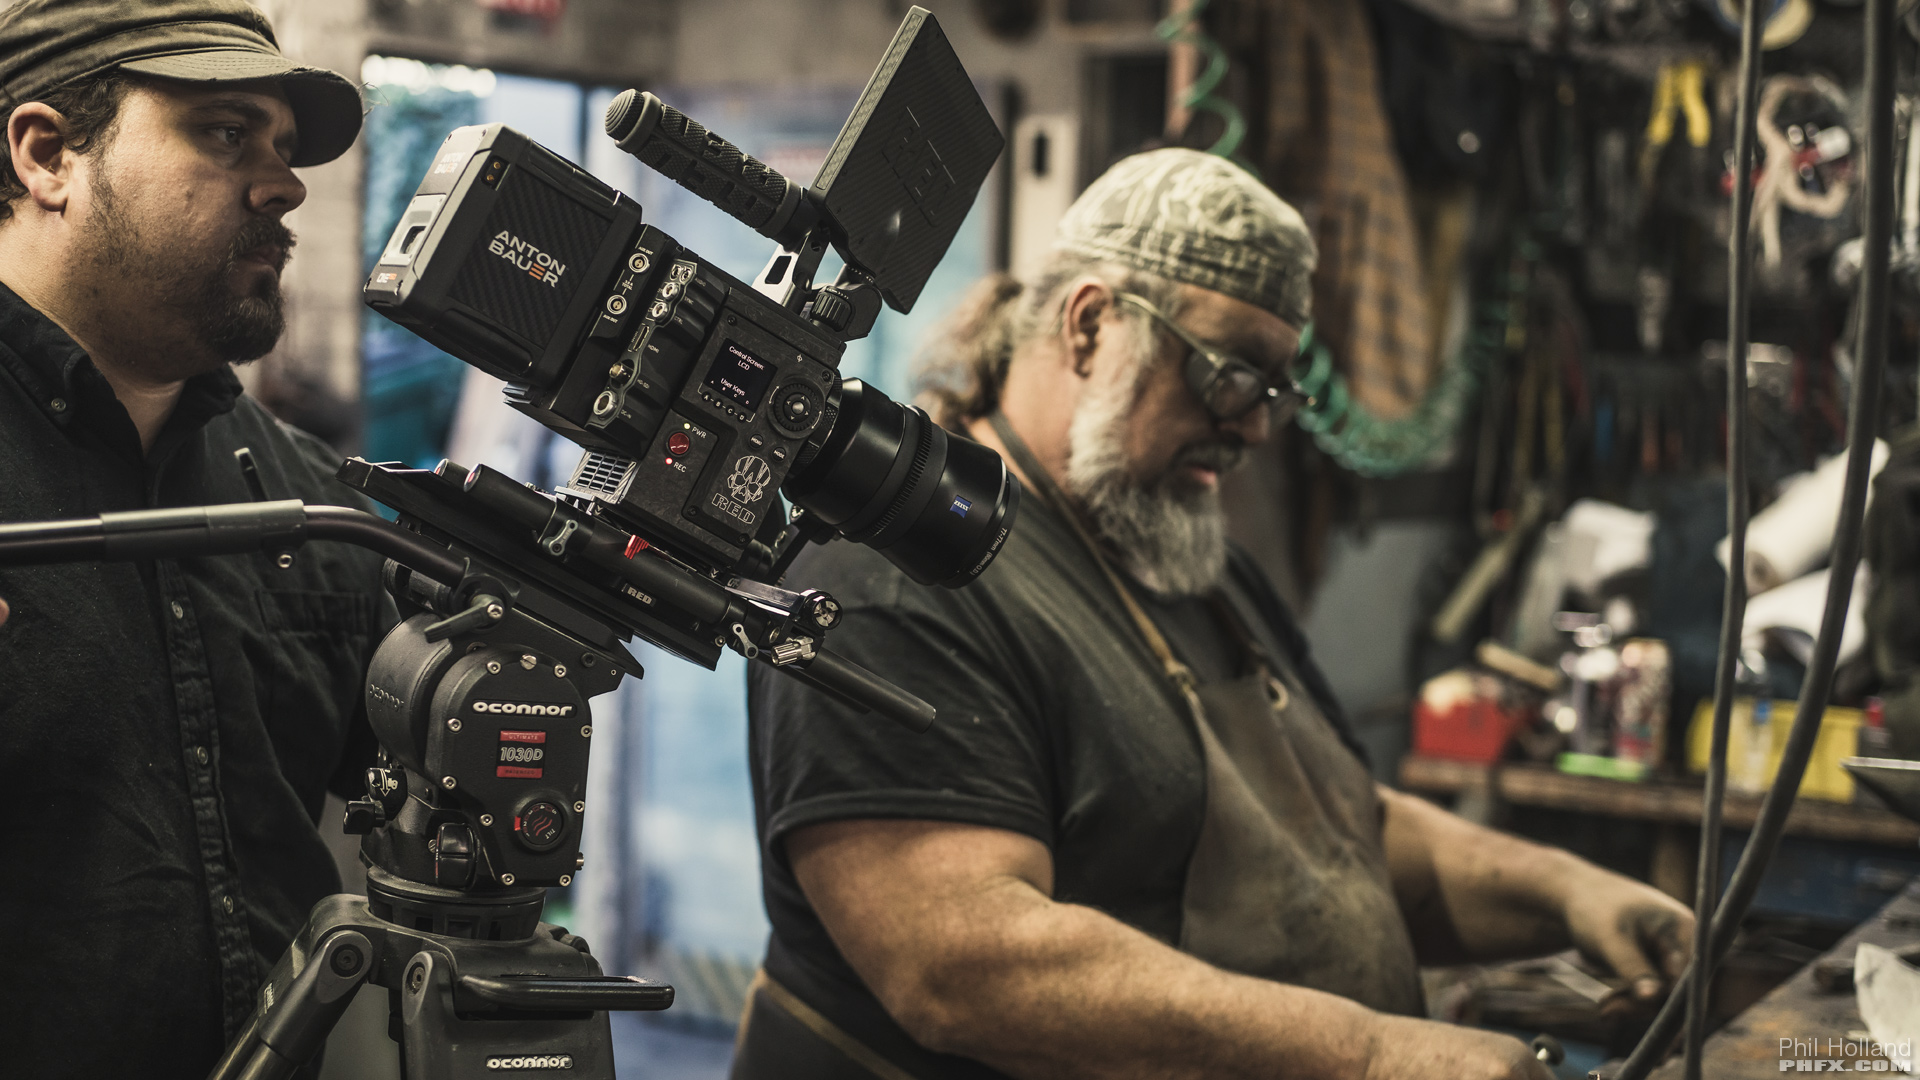
Pulling focus over Tony's shoulder during final blade assembly
I'm so very happy that my first 8K shoot was something special and unique like this. Everything came together while filming this short. It's impressive to me that this whole thing was turned around in 6 days with so much new technology. So often when dealing with the bleeding edge there are indeed hiccups that slow things down. Working at 8K for me isn't too different from working at 6K today. It will indeed be a different story for folks at VFX and Post Houses who work with 8K image sequences. I'm certainly curious about the potential, how, and where this camera will be used. The concept of 8K for 8K or 8K to 4K delivery is very attractive. Having access to this resolution also provides a level of creative and technical freedom. This begins my journey of capturing and working in 8K. Can't wait to shoot my first narrative or commercial projects in the near future at this format and resolution. This format and resolution lines up so very well with the visual imprint I'm after when creating motion and still pictures.
One last thank you to all involved for making this shoot possible and unforgettable.
Hope you enjoyed the BTS and ramblings. Back to work I go.