


Introduction
It is a rare treat to be the first to work with a material in a new creative way and Quantum Flows provided just that sort of experience. For this short abstract experimental film I worked with Nanosys to capture Quantum Dots in a rather different way than they are typically used for. There were many creative and technical challenges, but also with each hurdle cleared a good deal of fun was had right to the finish. Below I'll discuss some of the process behind this project, which was a bit more complicated than it may appear in the finished short film.
First if you haven't seen it, please enjoy the 4:30 short. It is best viewed full screen on an 4K or 8K display with support for HDR.
Quantum Flows - Available in 8K HDR and SDR on YouTube
Article Quick Links
- Introduction
- About Nanosys & Quantum Dots
- Conceptualizing, Planning, Execution
- Color Grading
- Desktop Wallpapers
- Special Thanks
About Nanosys & Quantum Dots
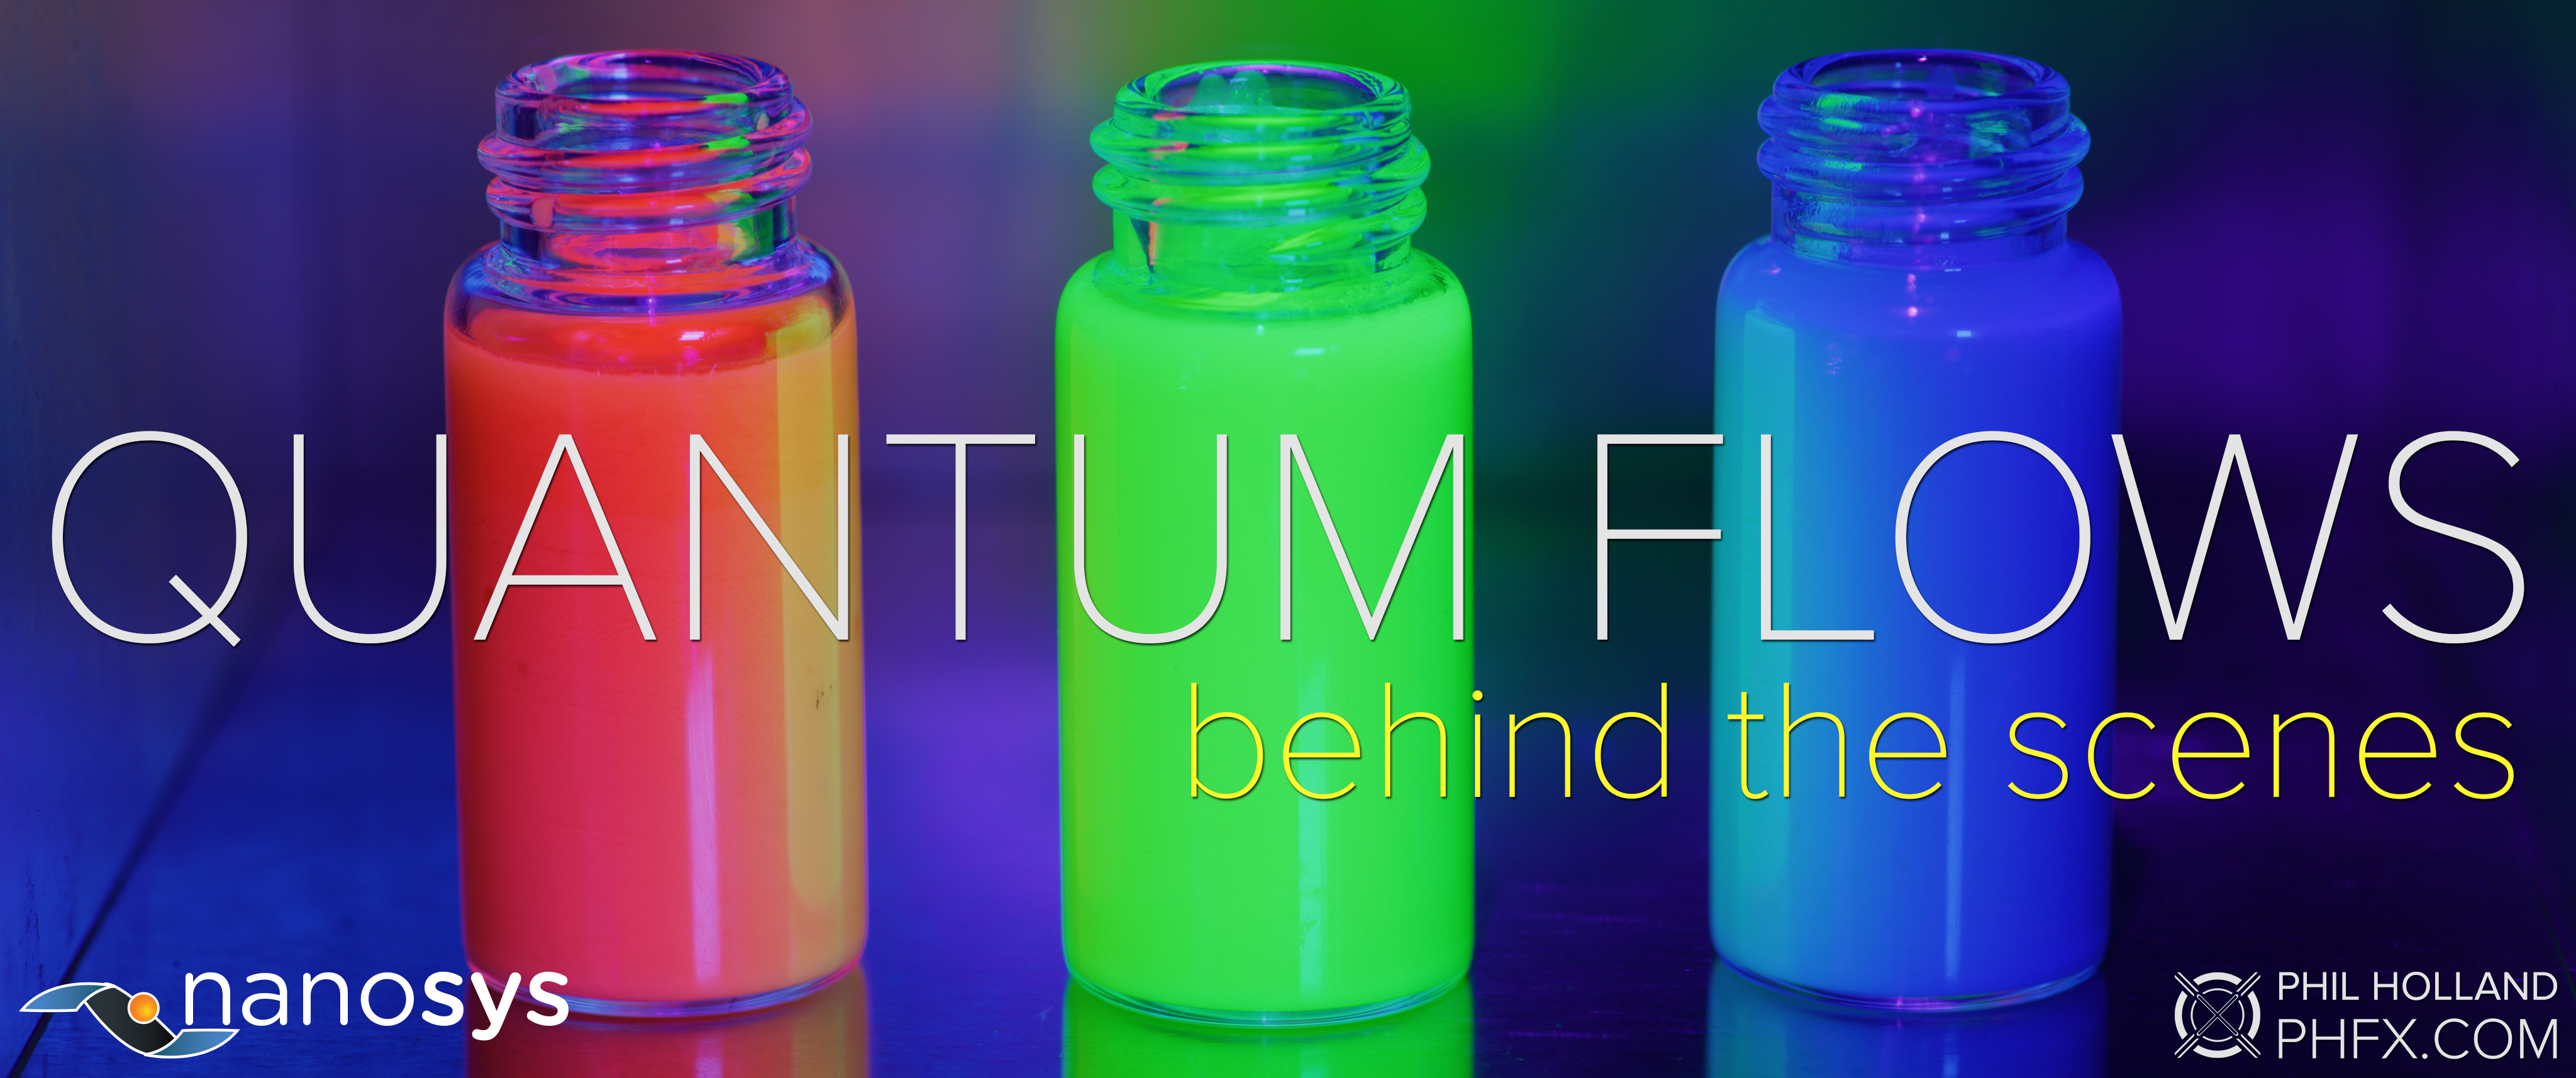
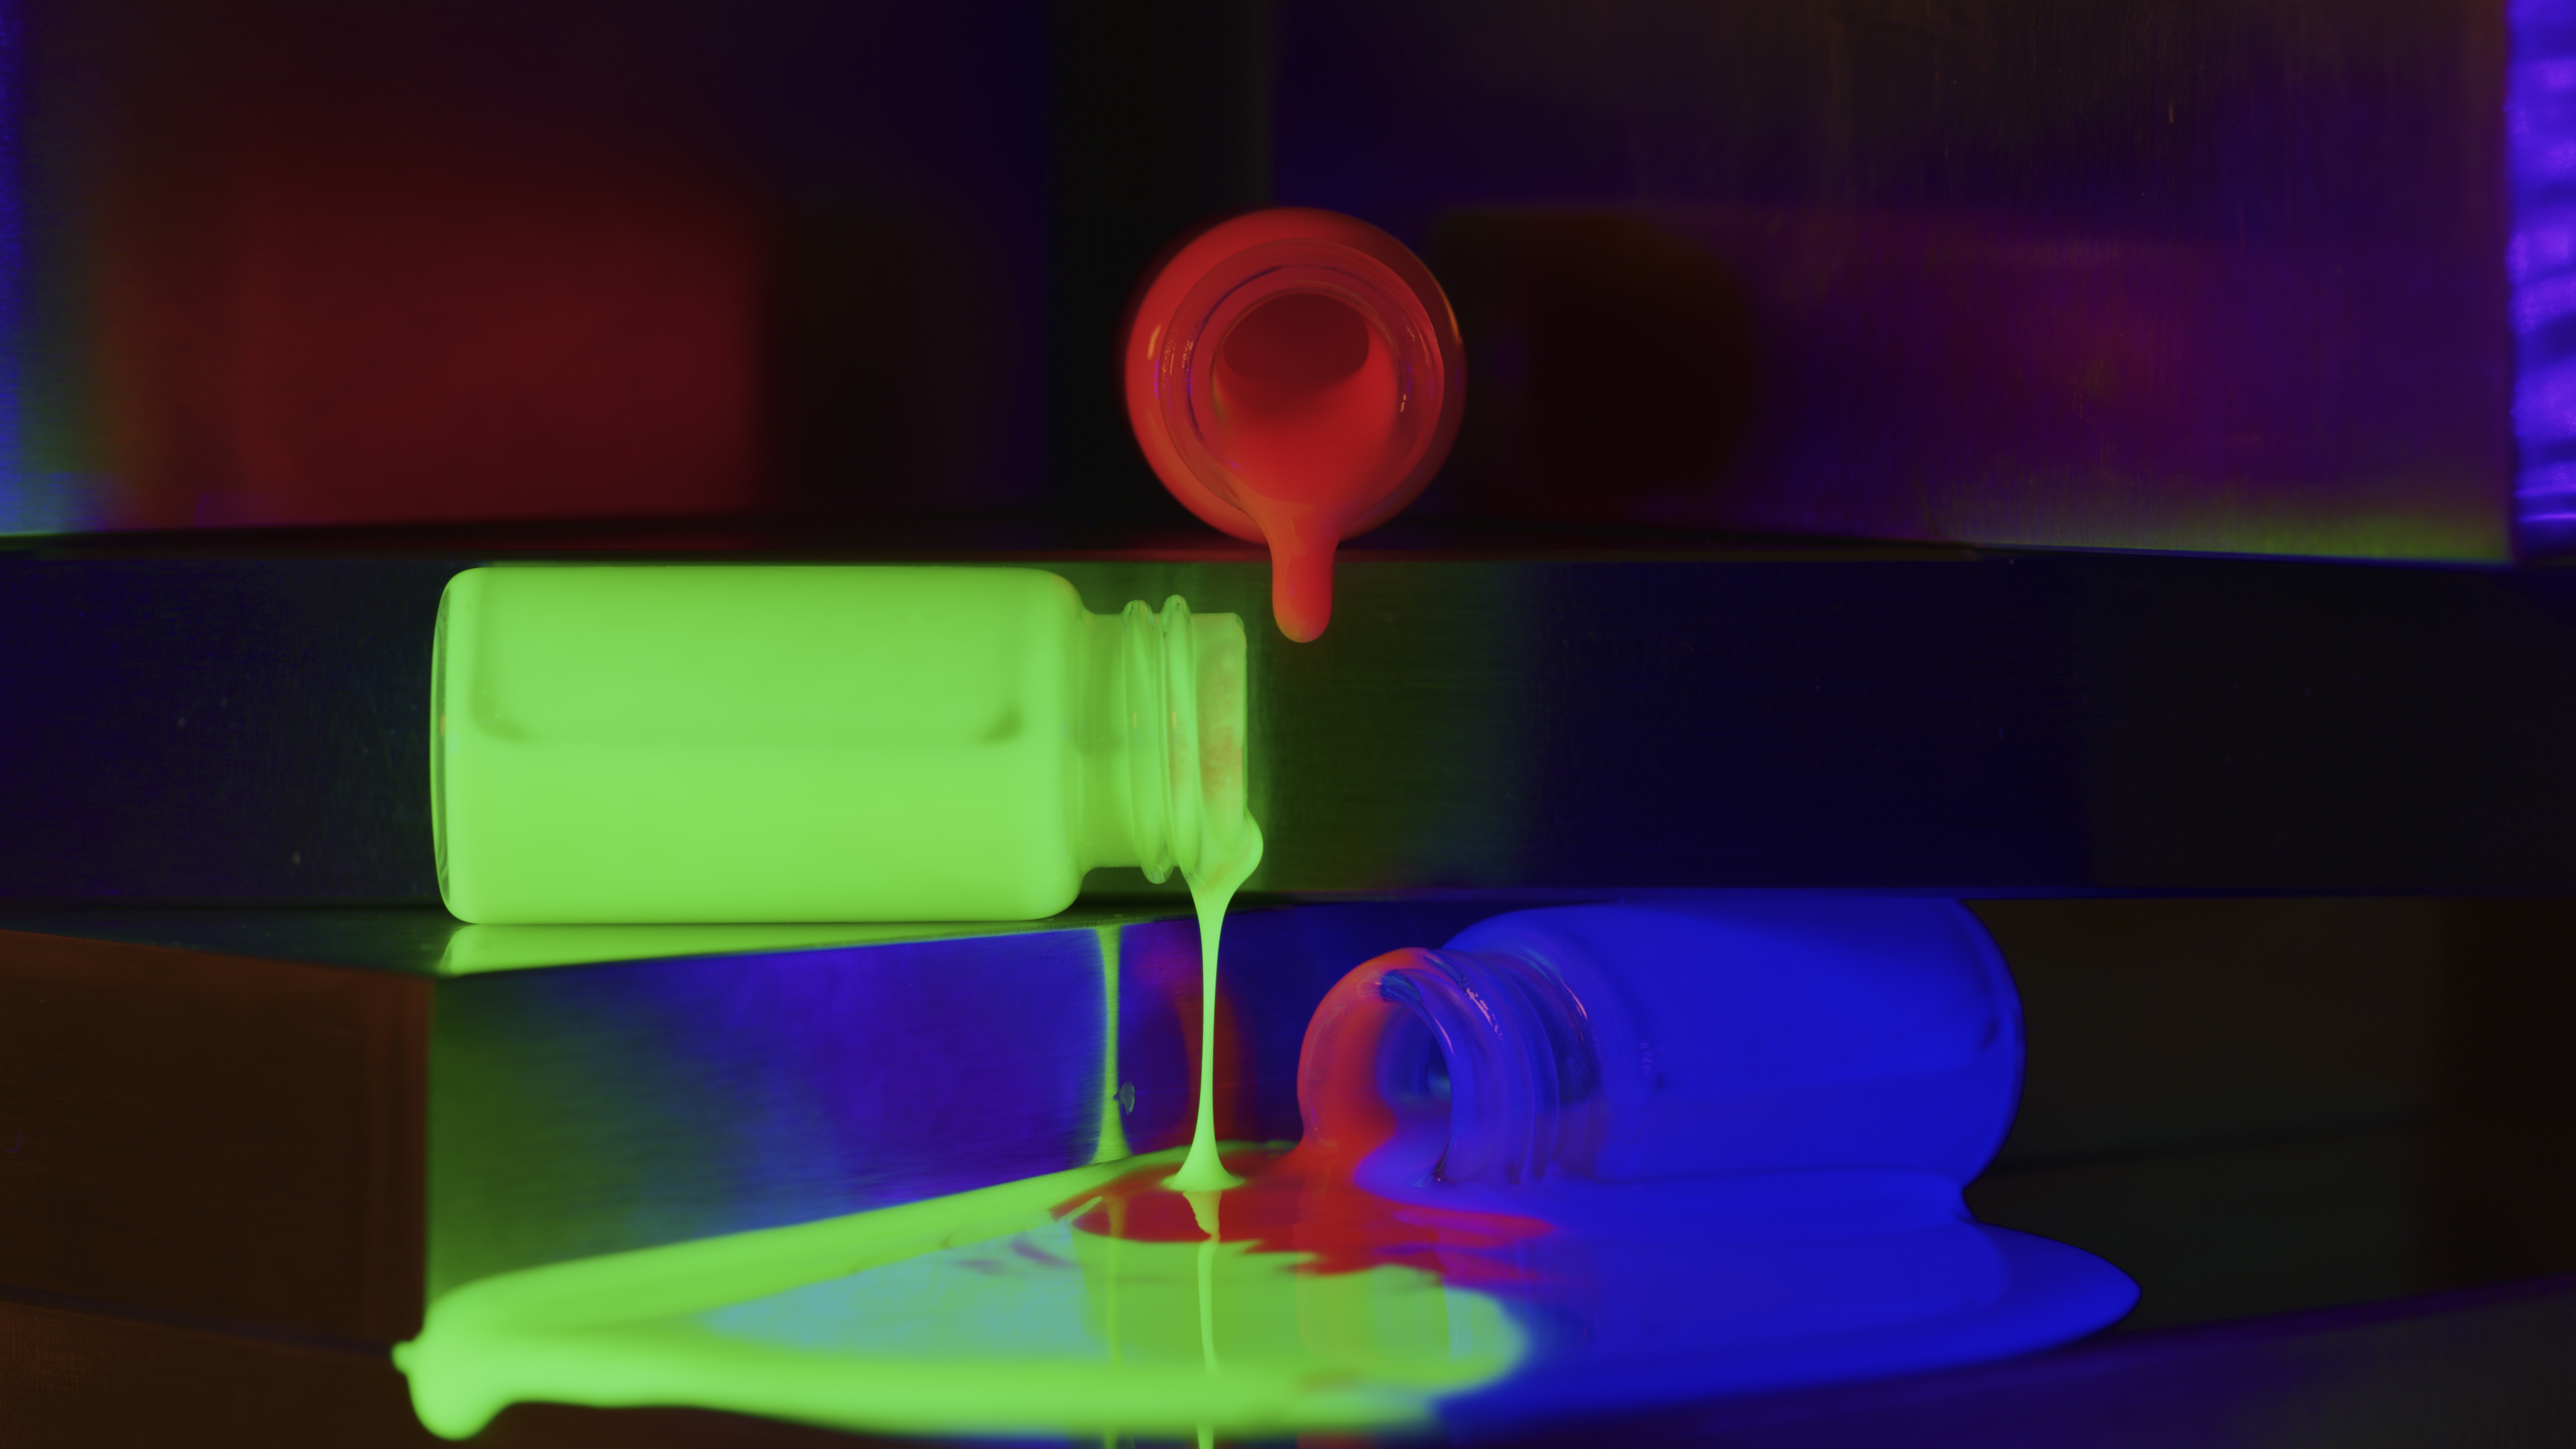
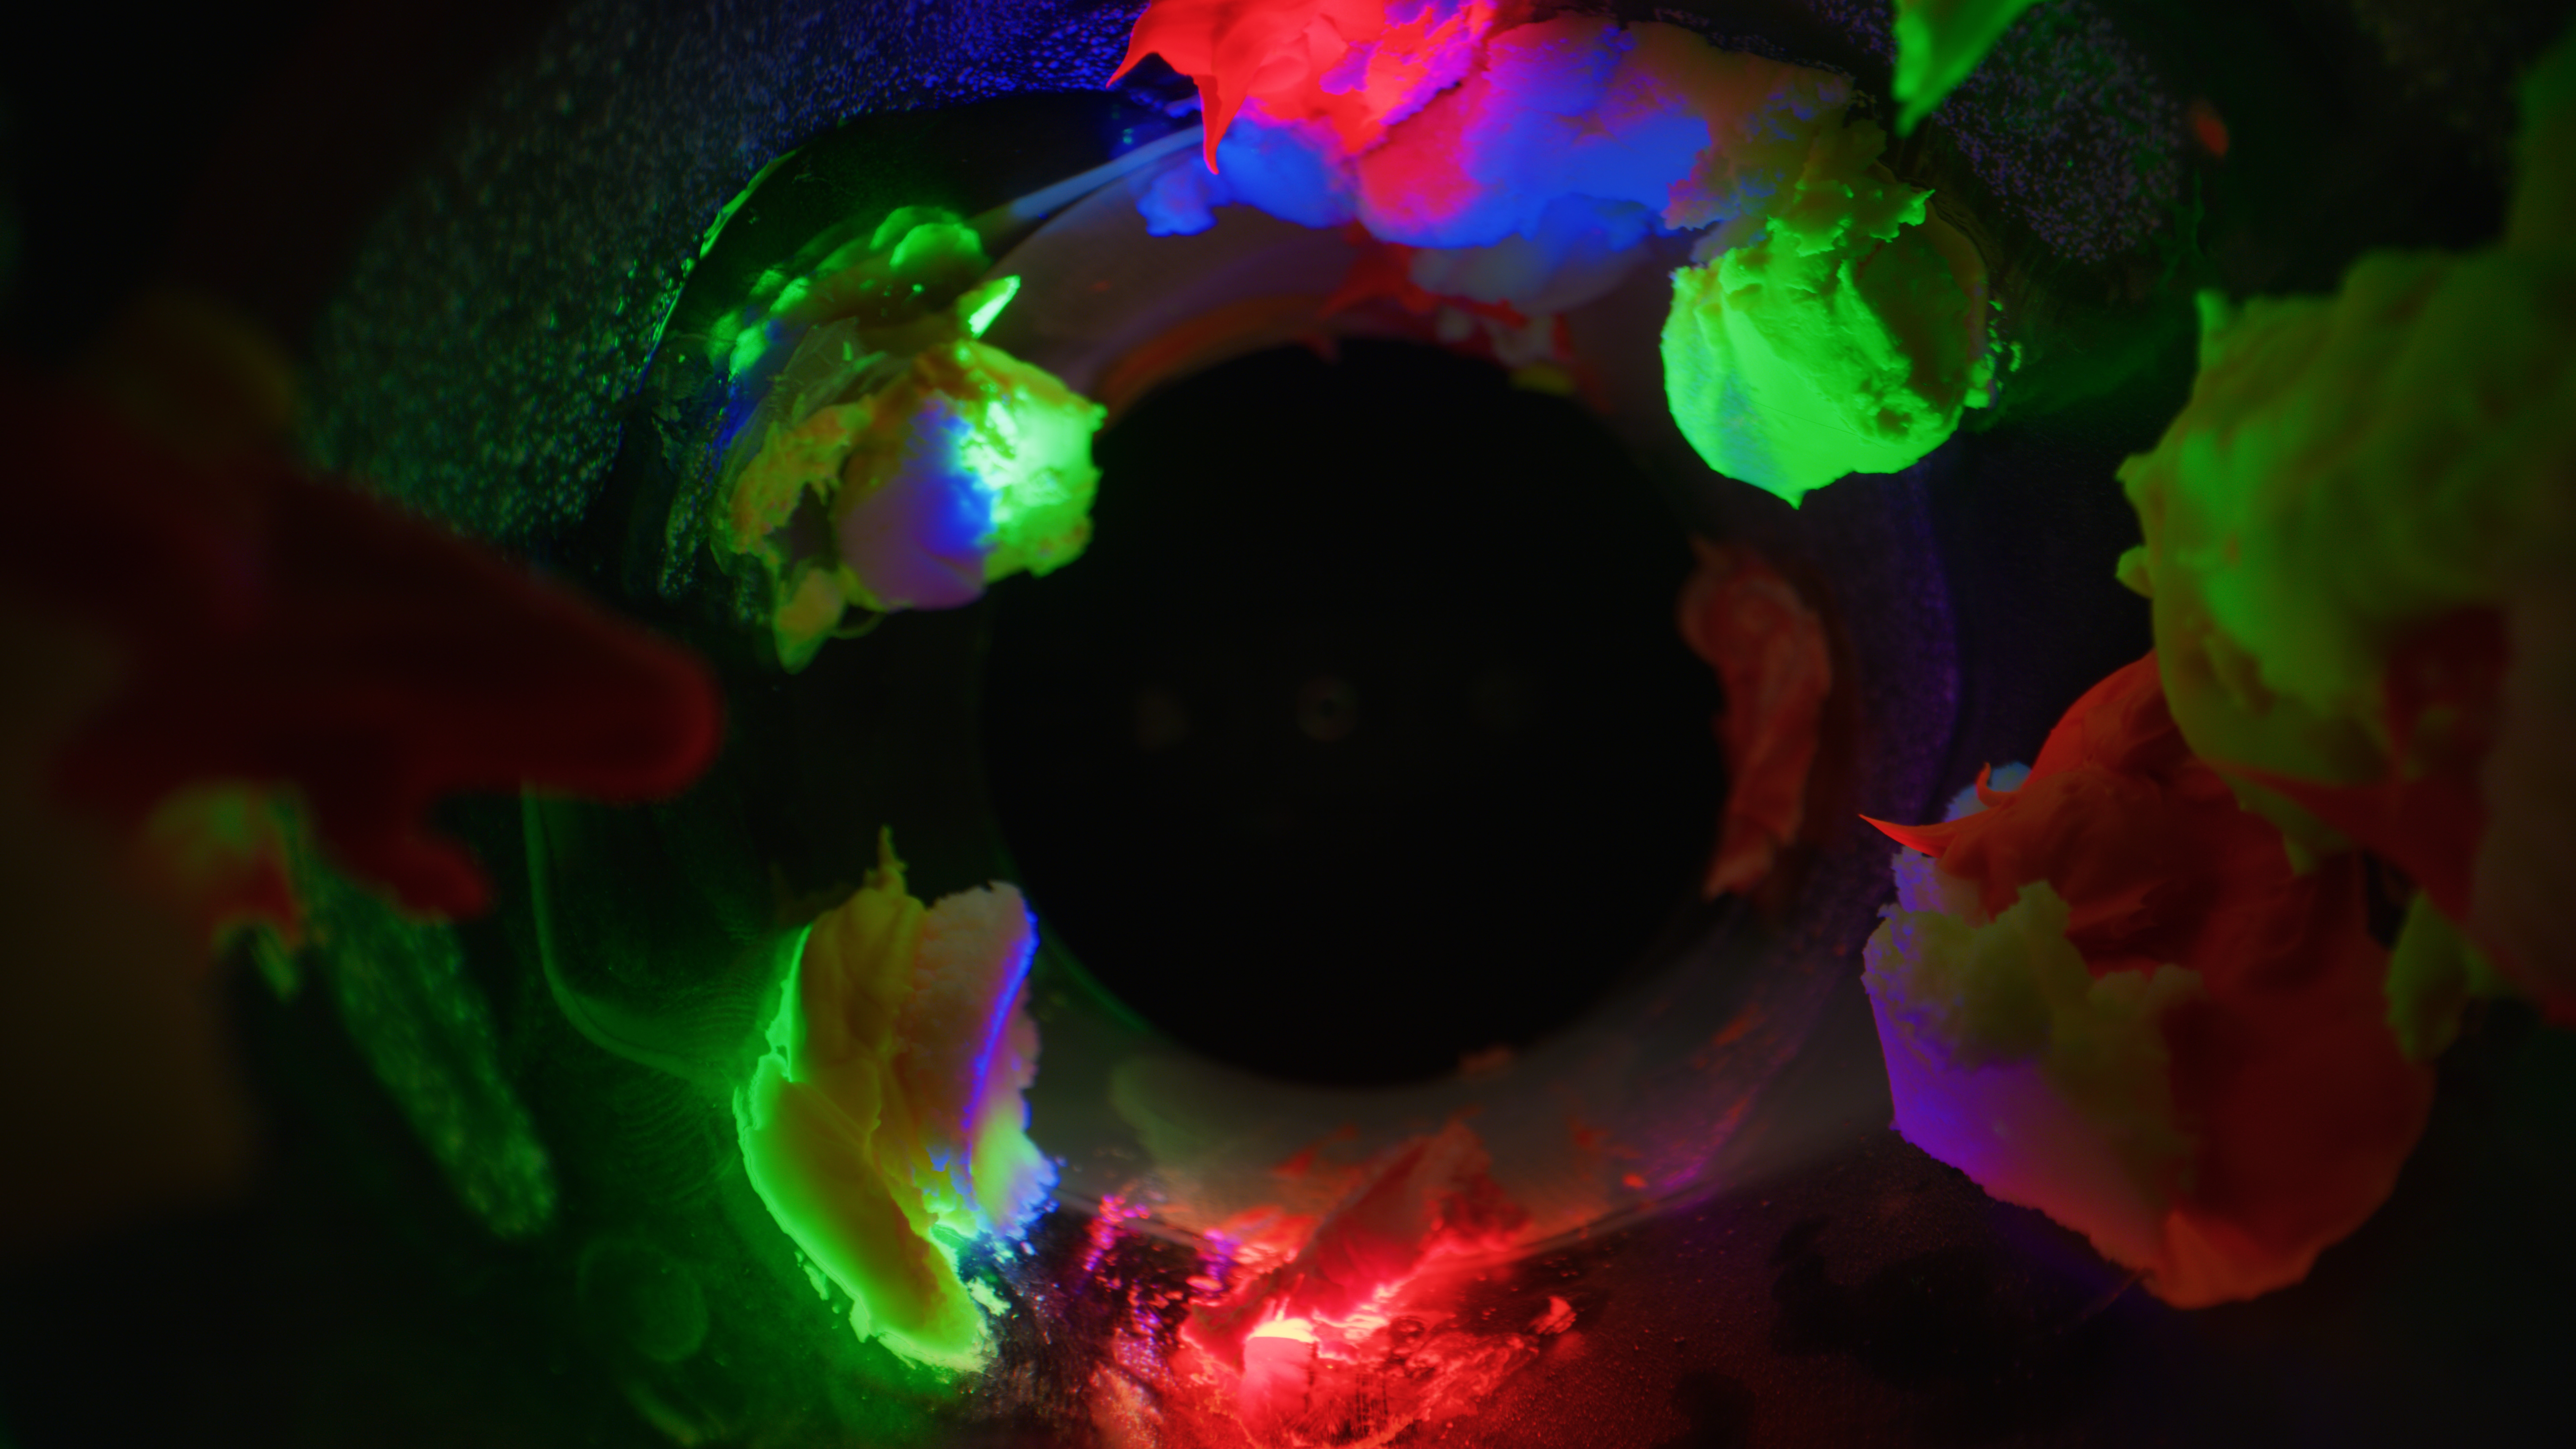
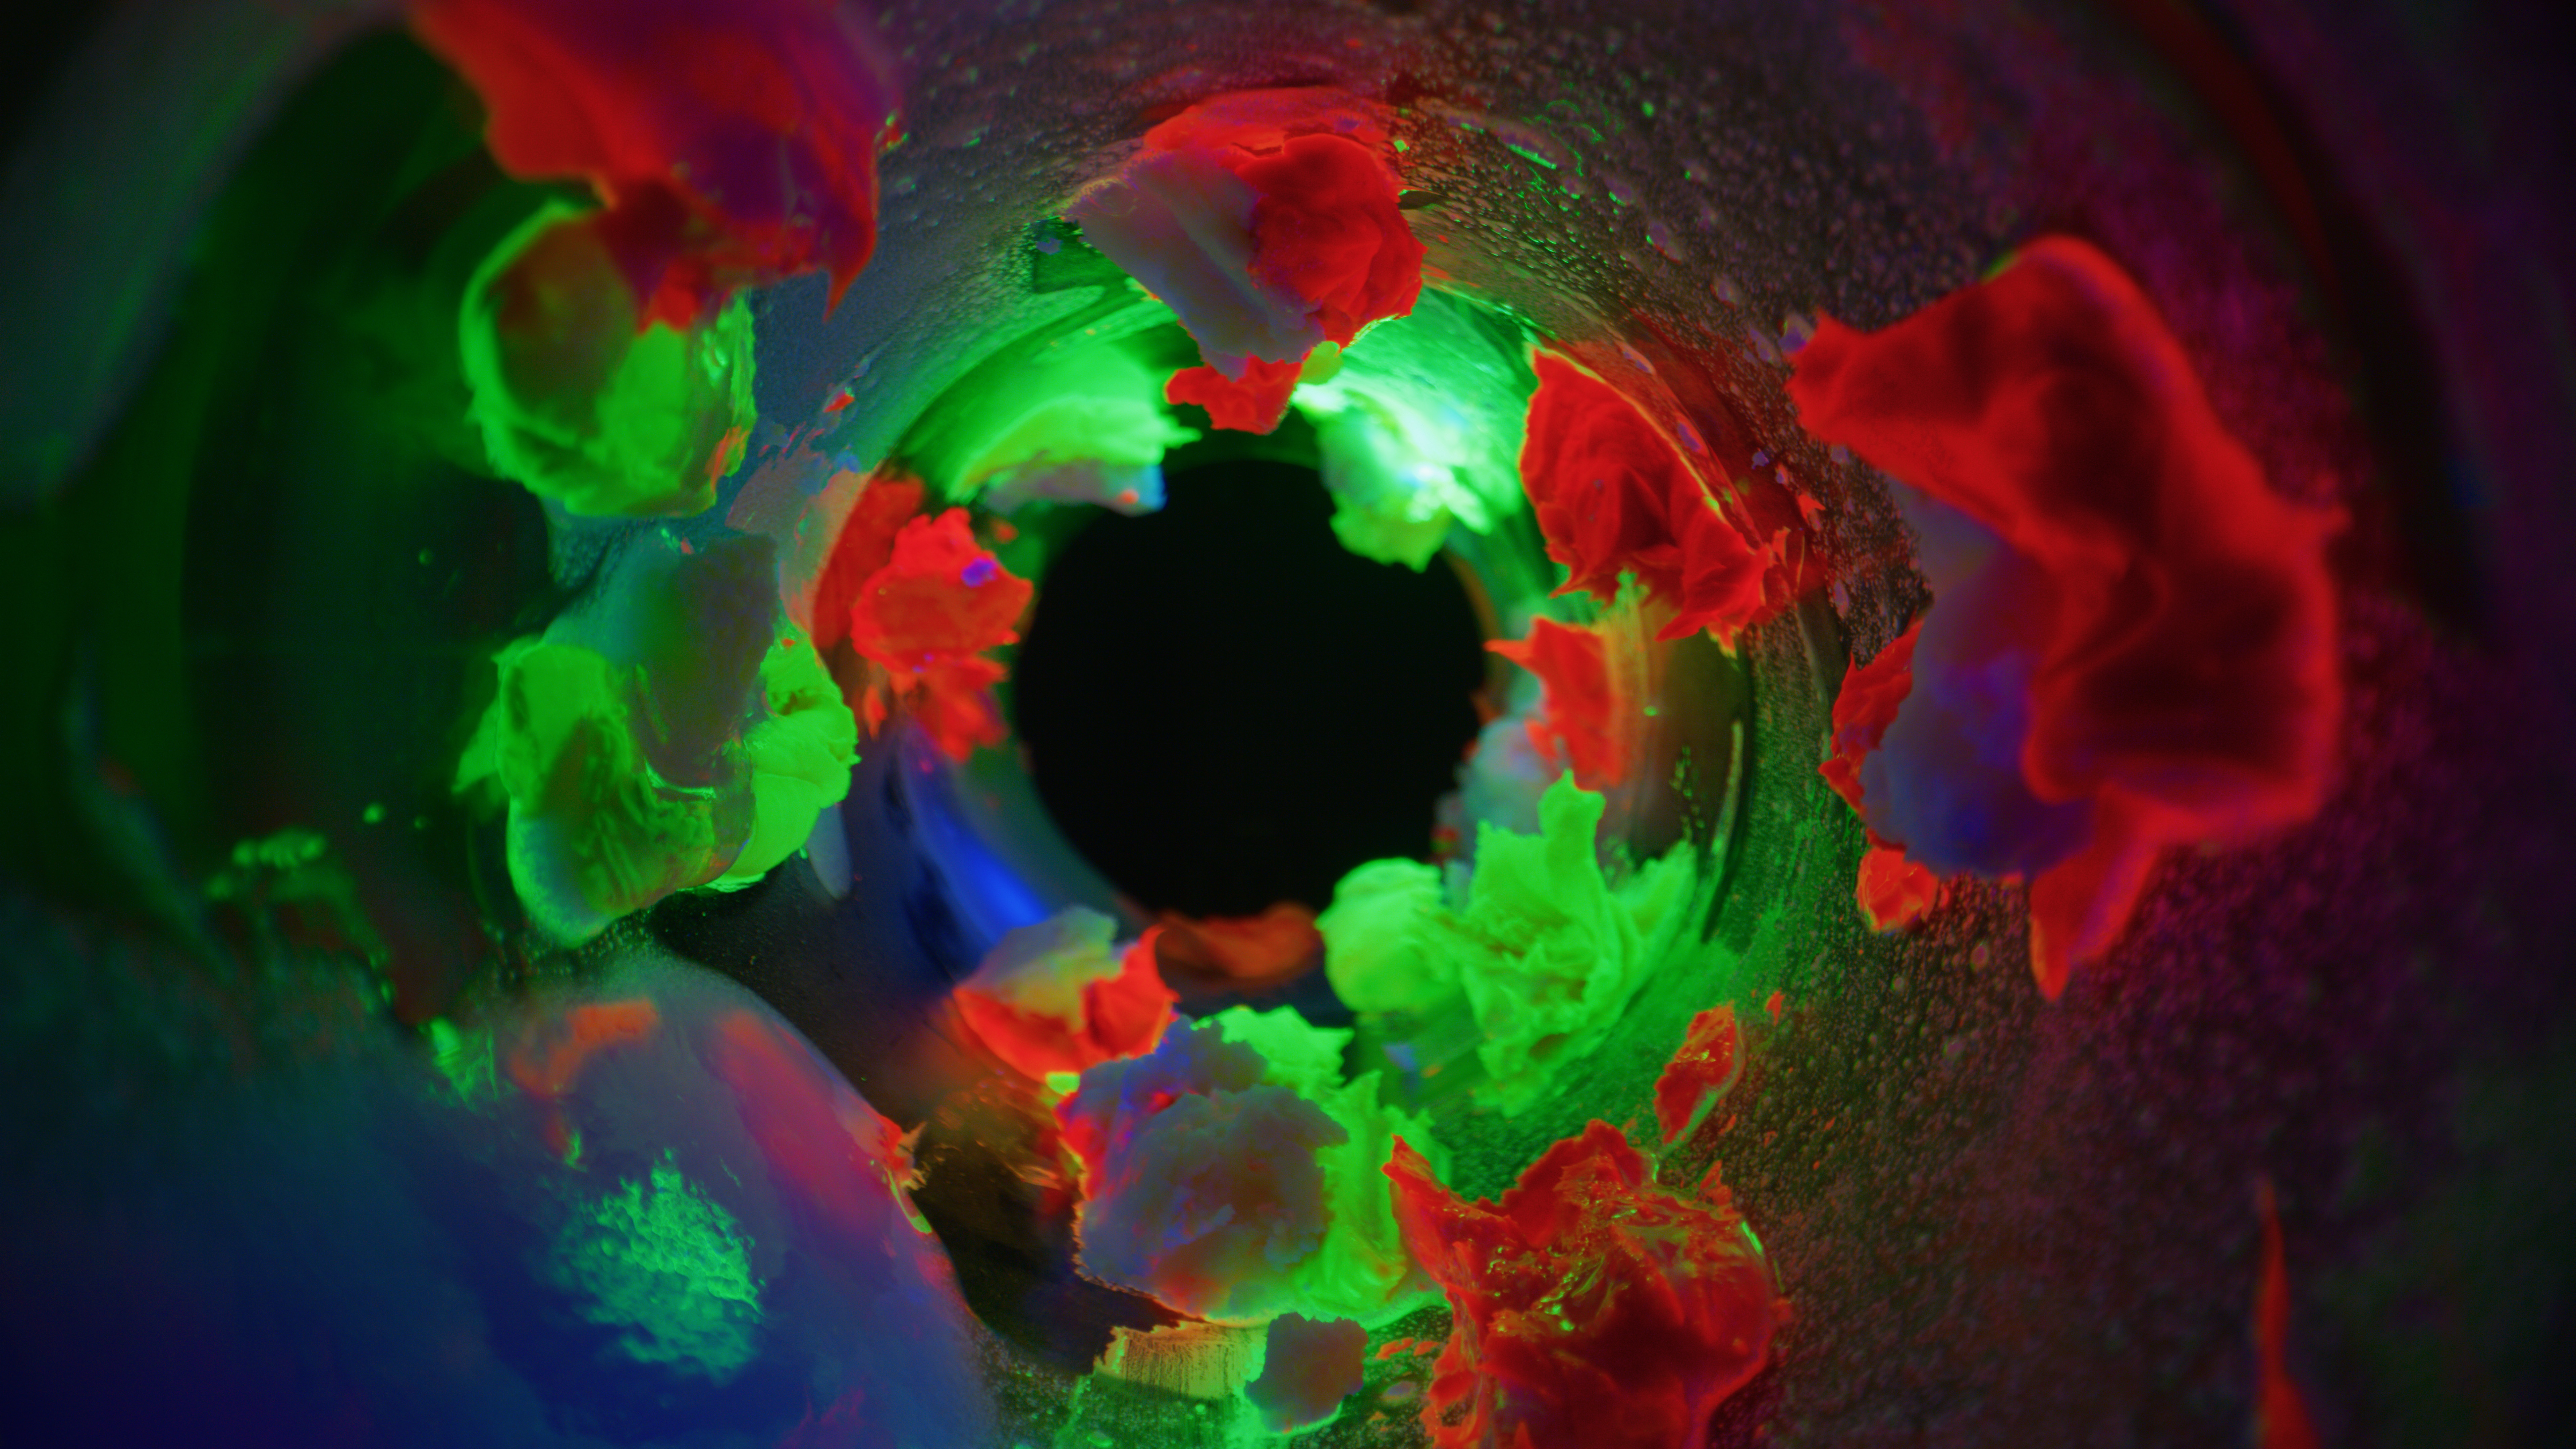
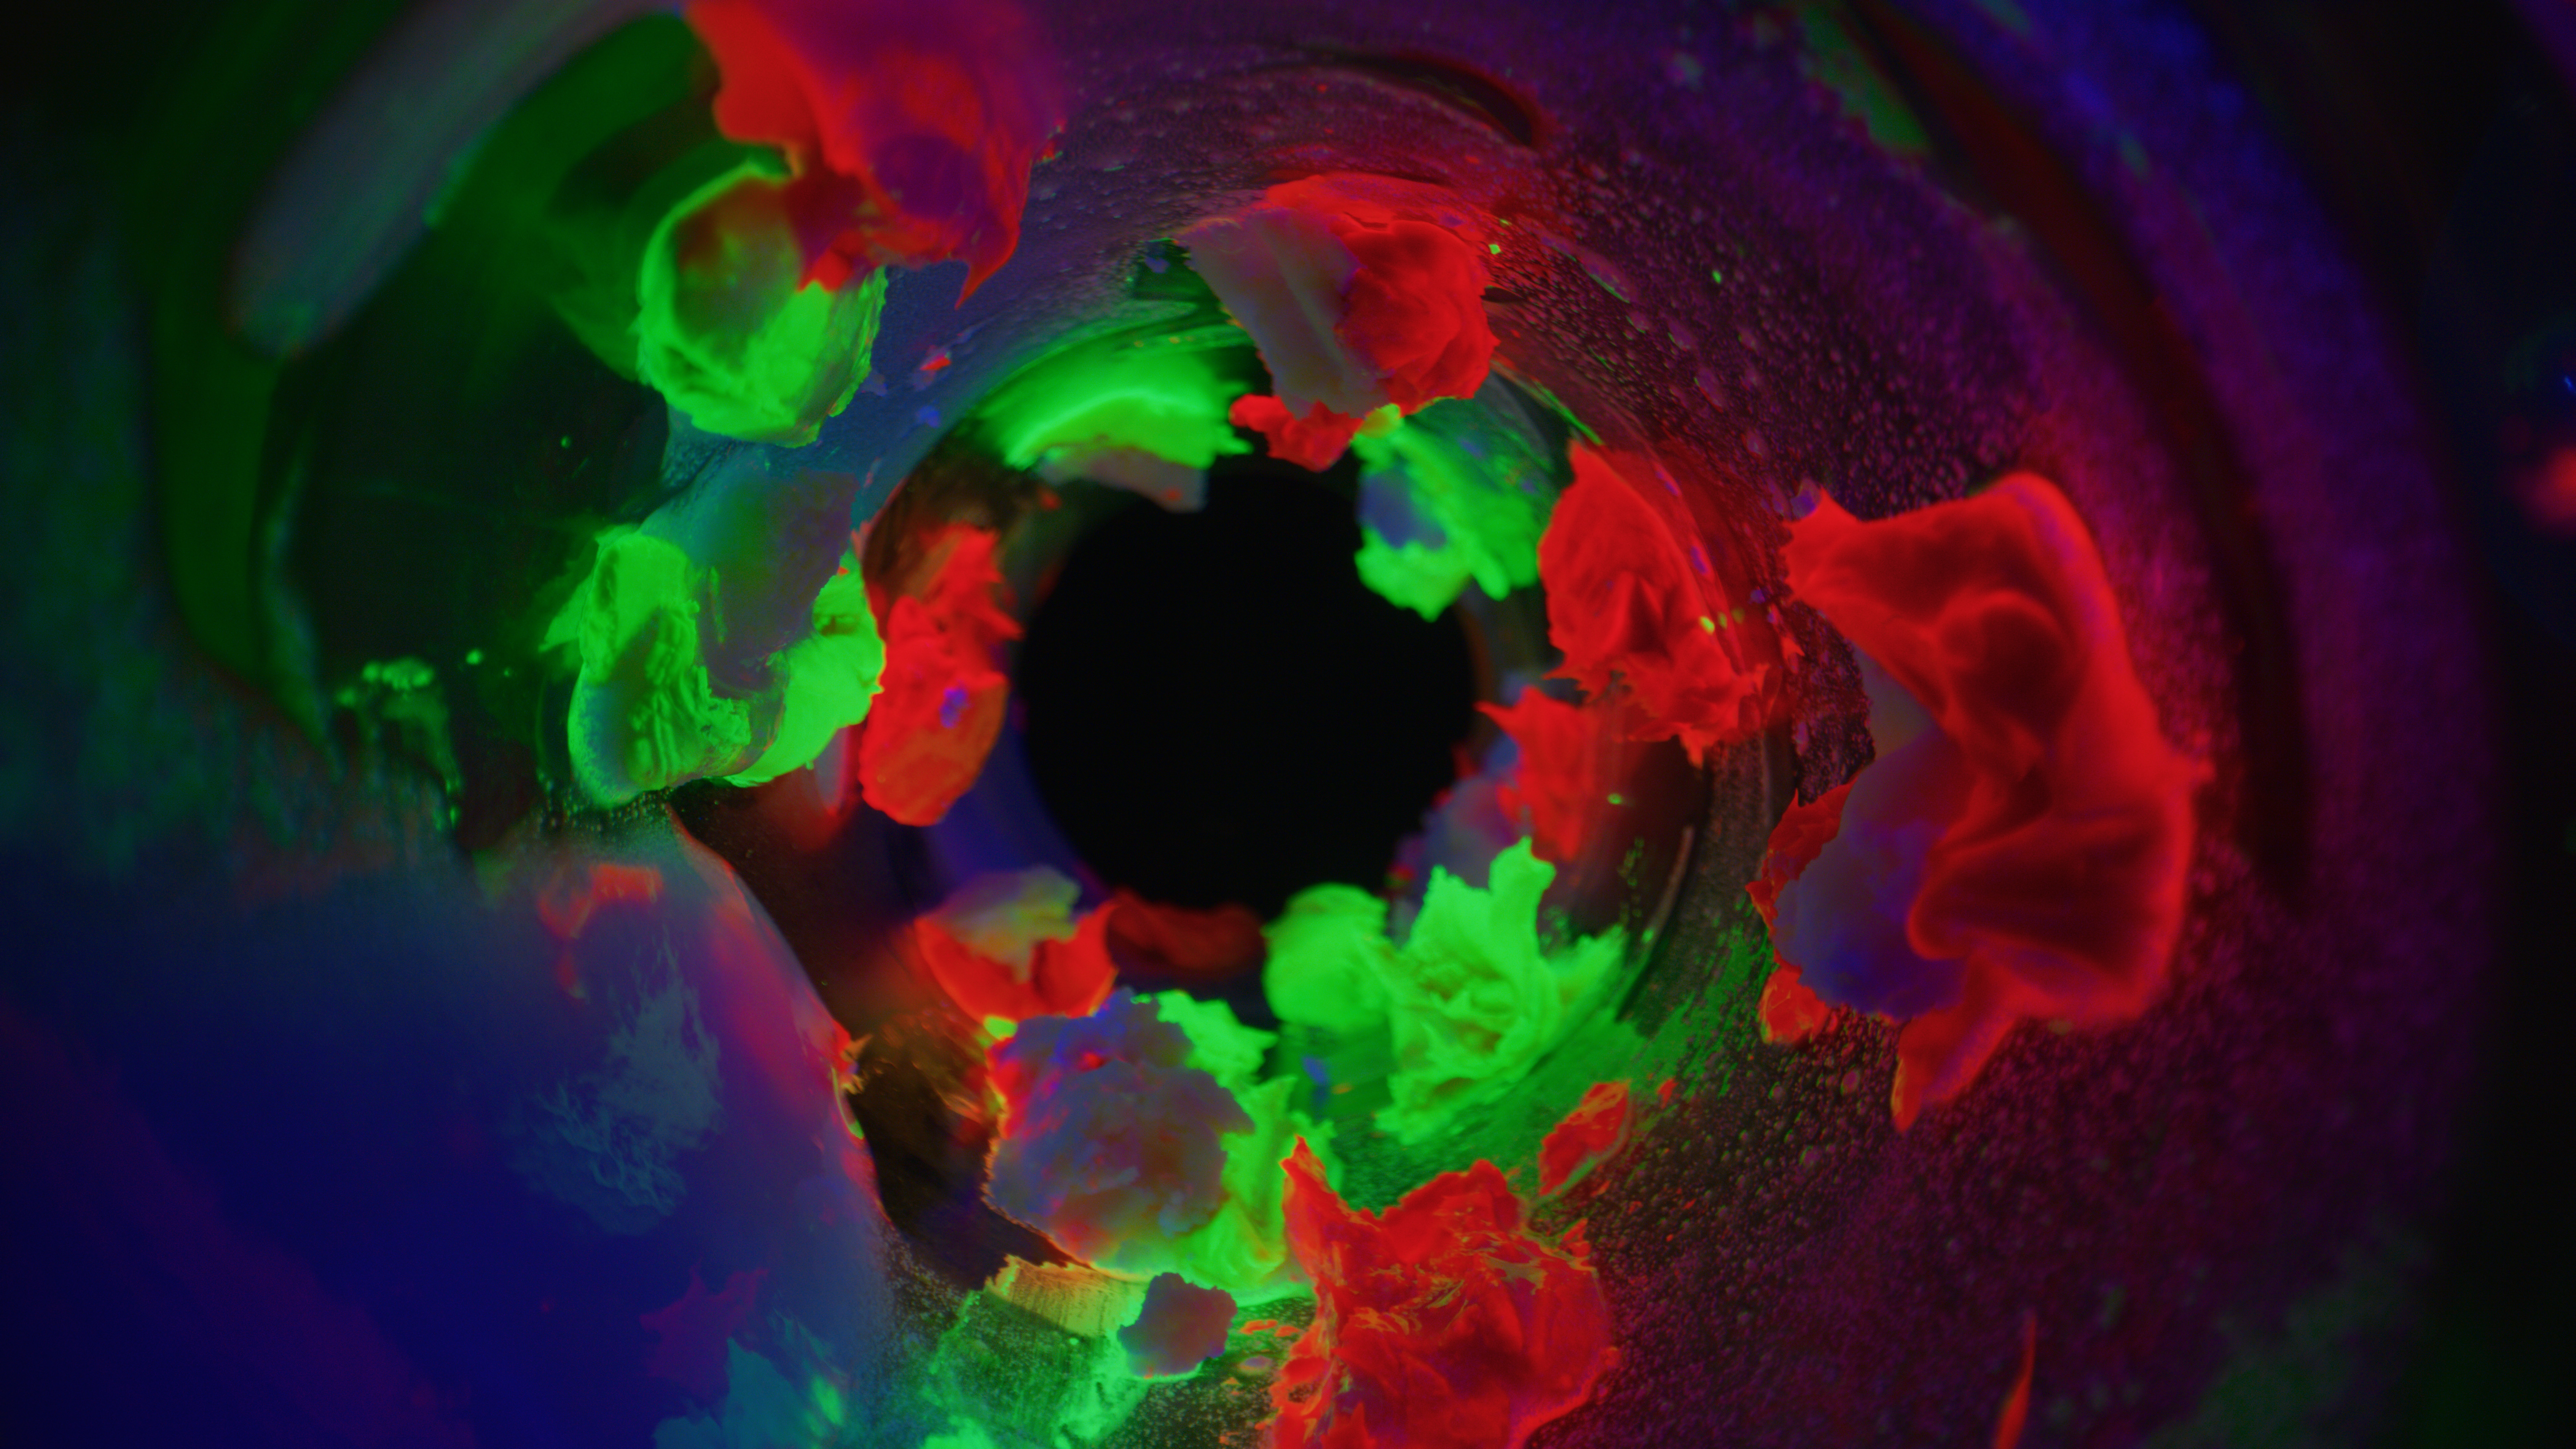
Nanosys Quantum Dot technology is typically used to produce high quality, vibrant images on Quantum Dot televisions from leading manufacturers including Hisense, Samsung, TCL, and Vizio. For the first time, this film shows the nanomaterials in their vividly colorful natural state, outside of the TV.

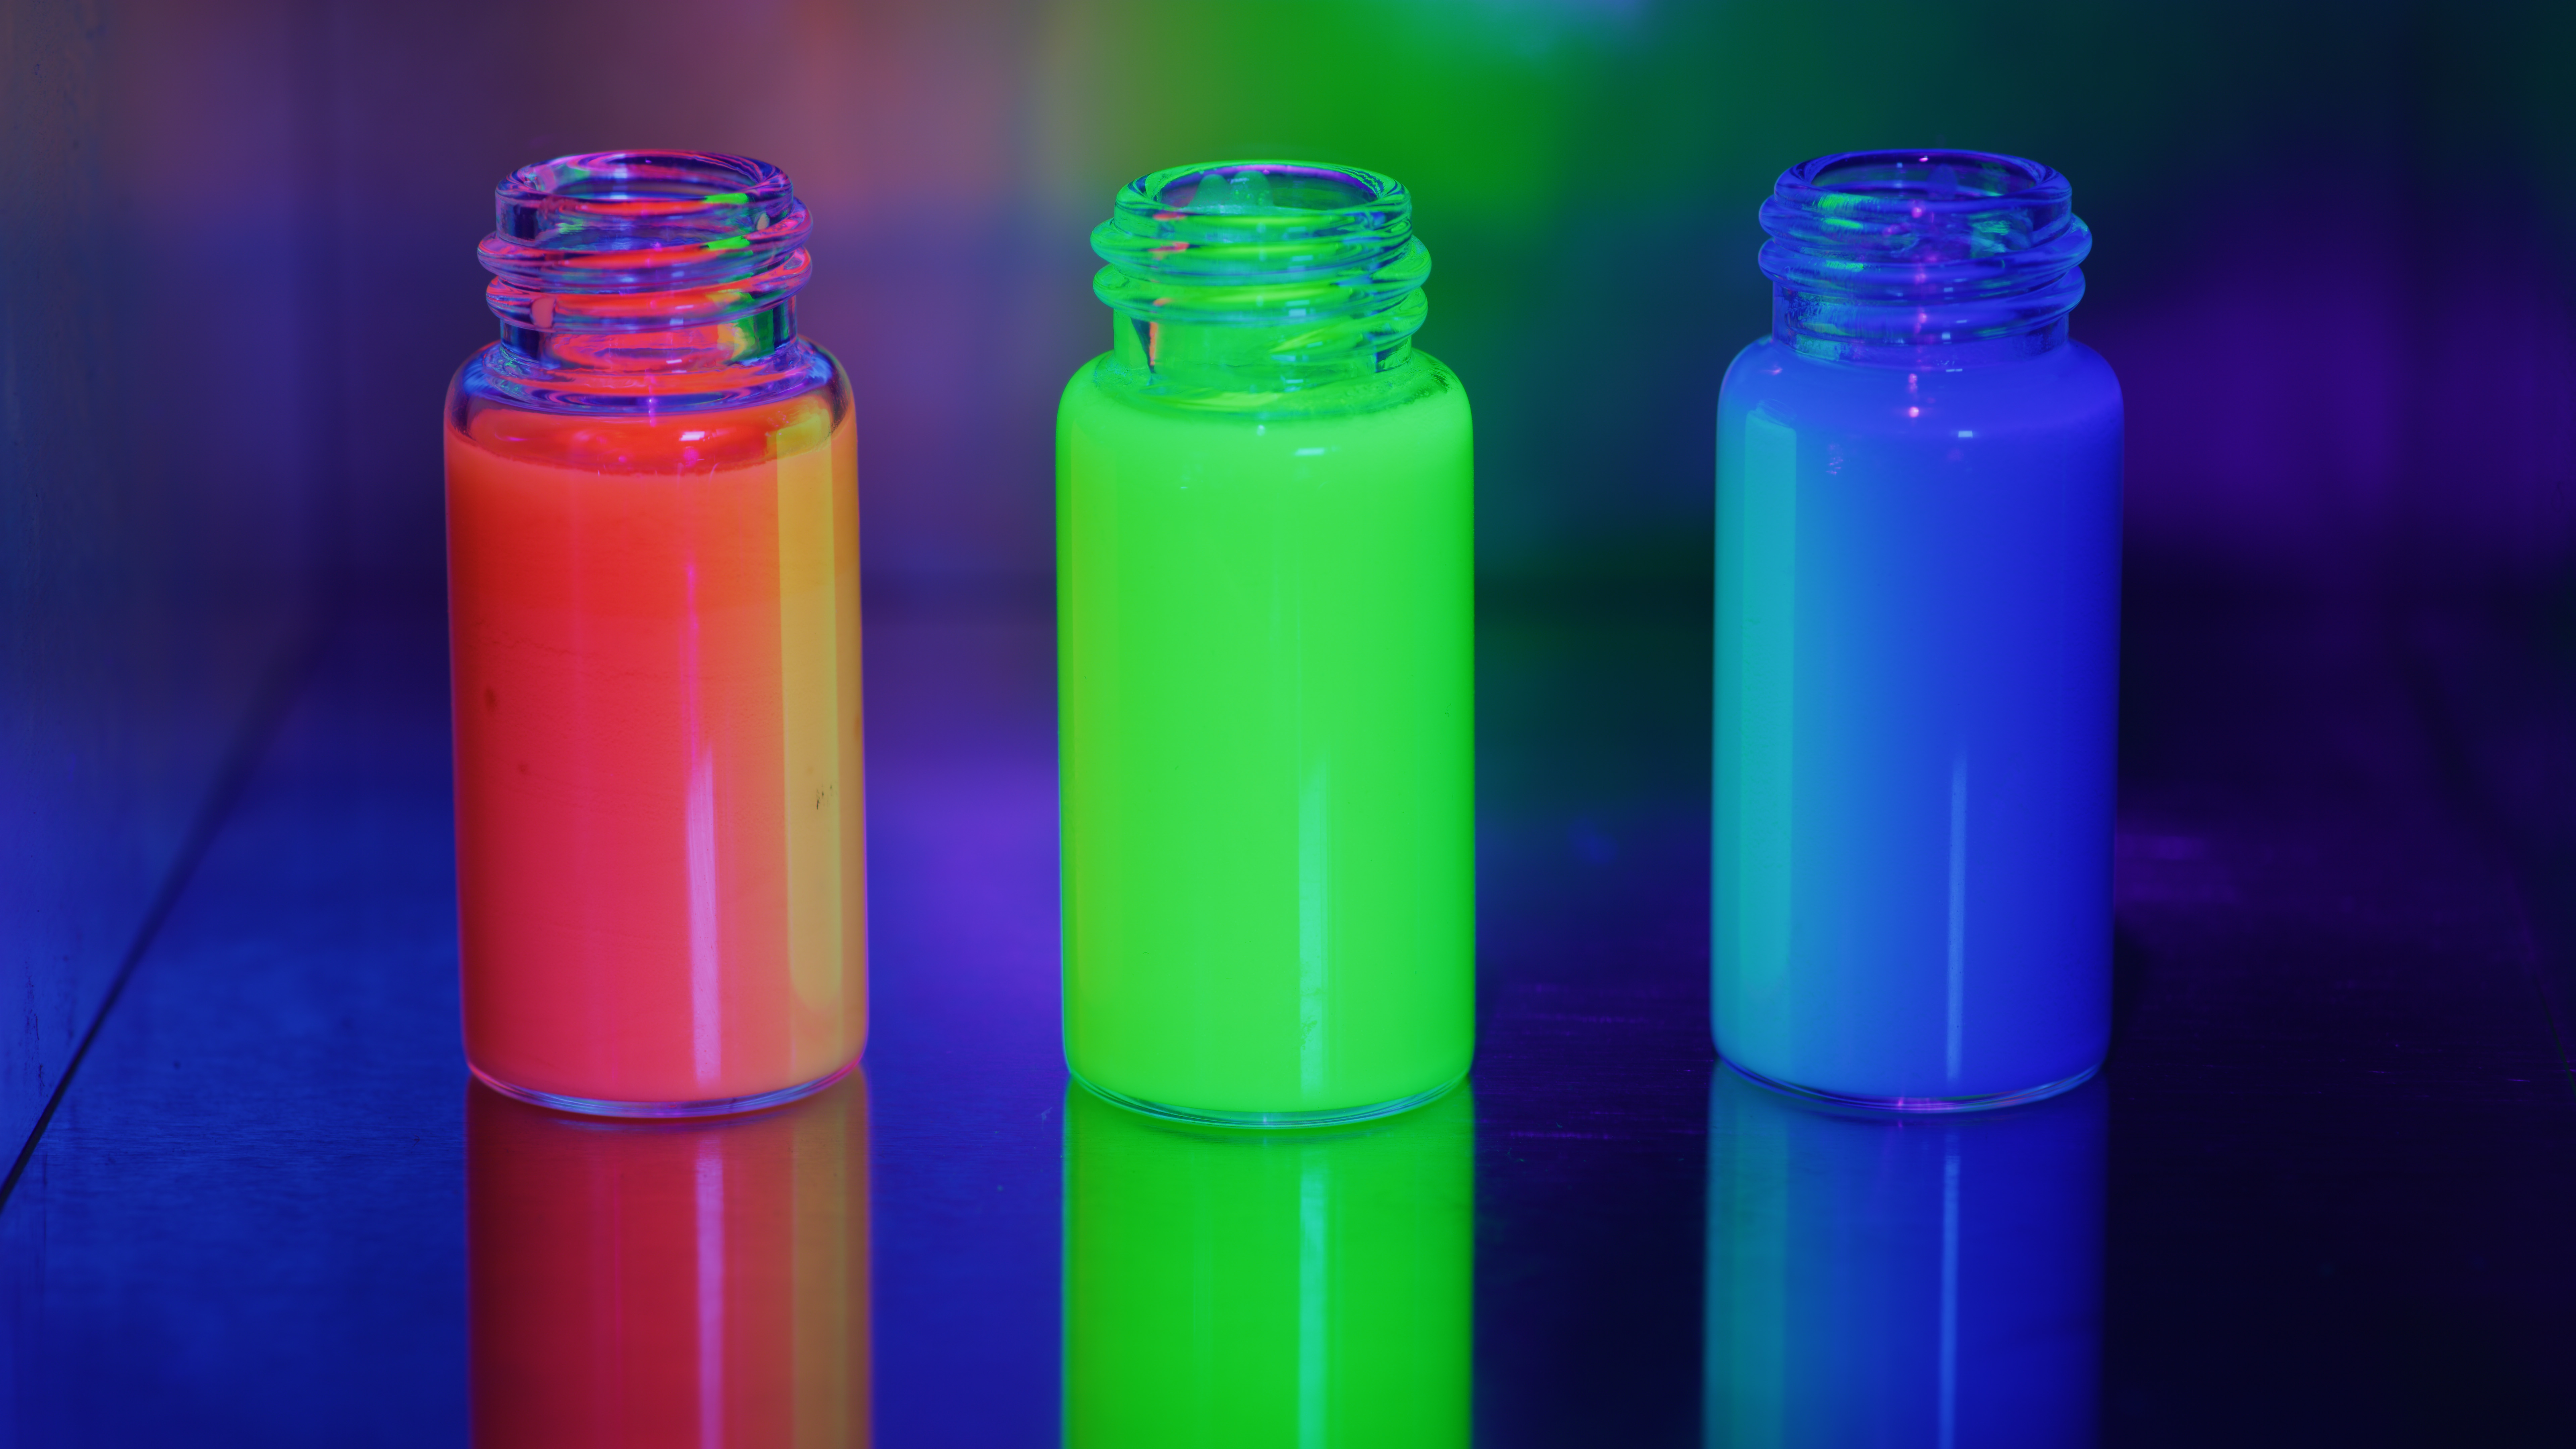
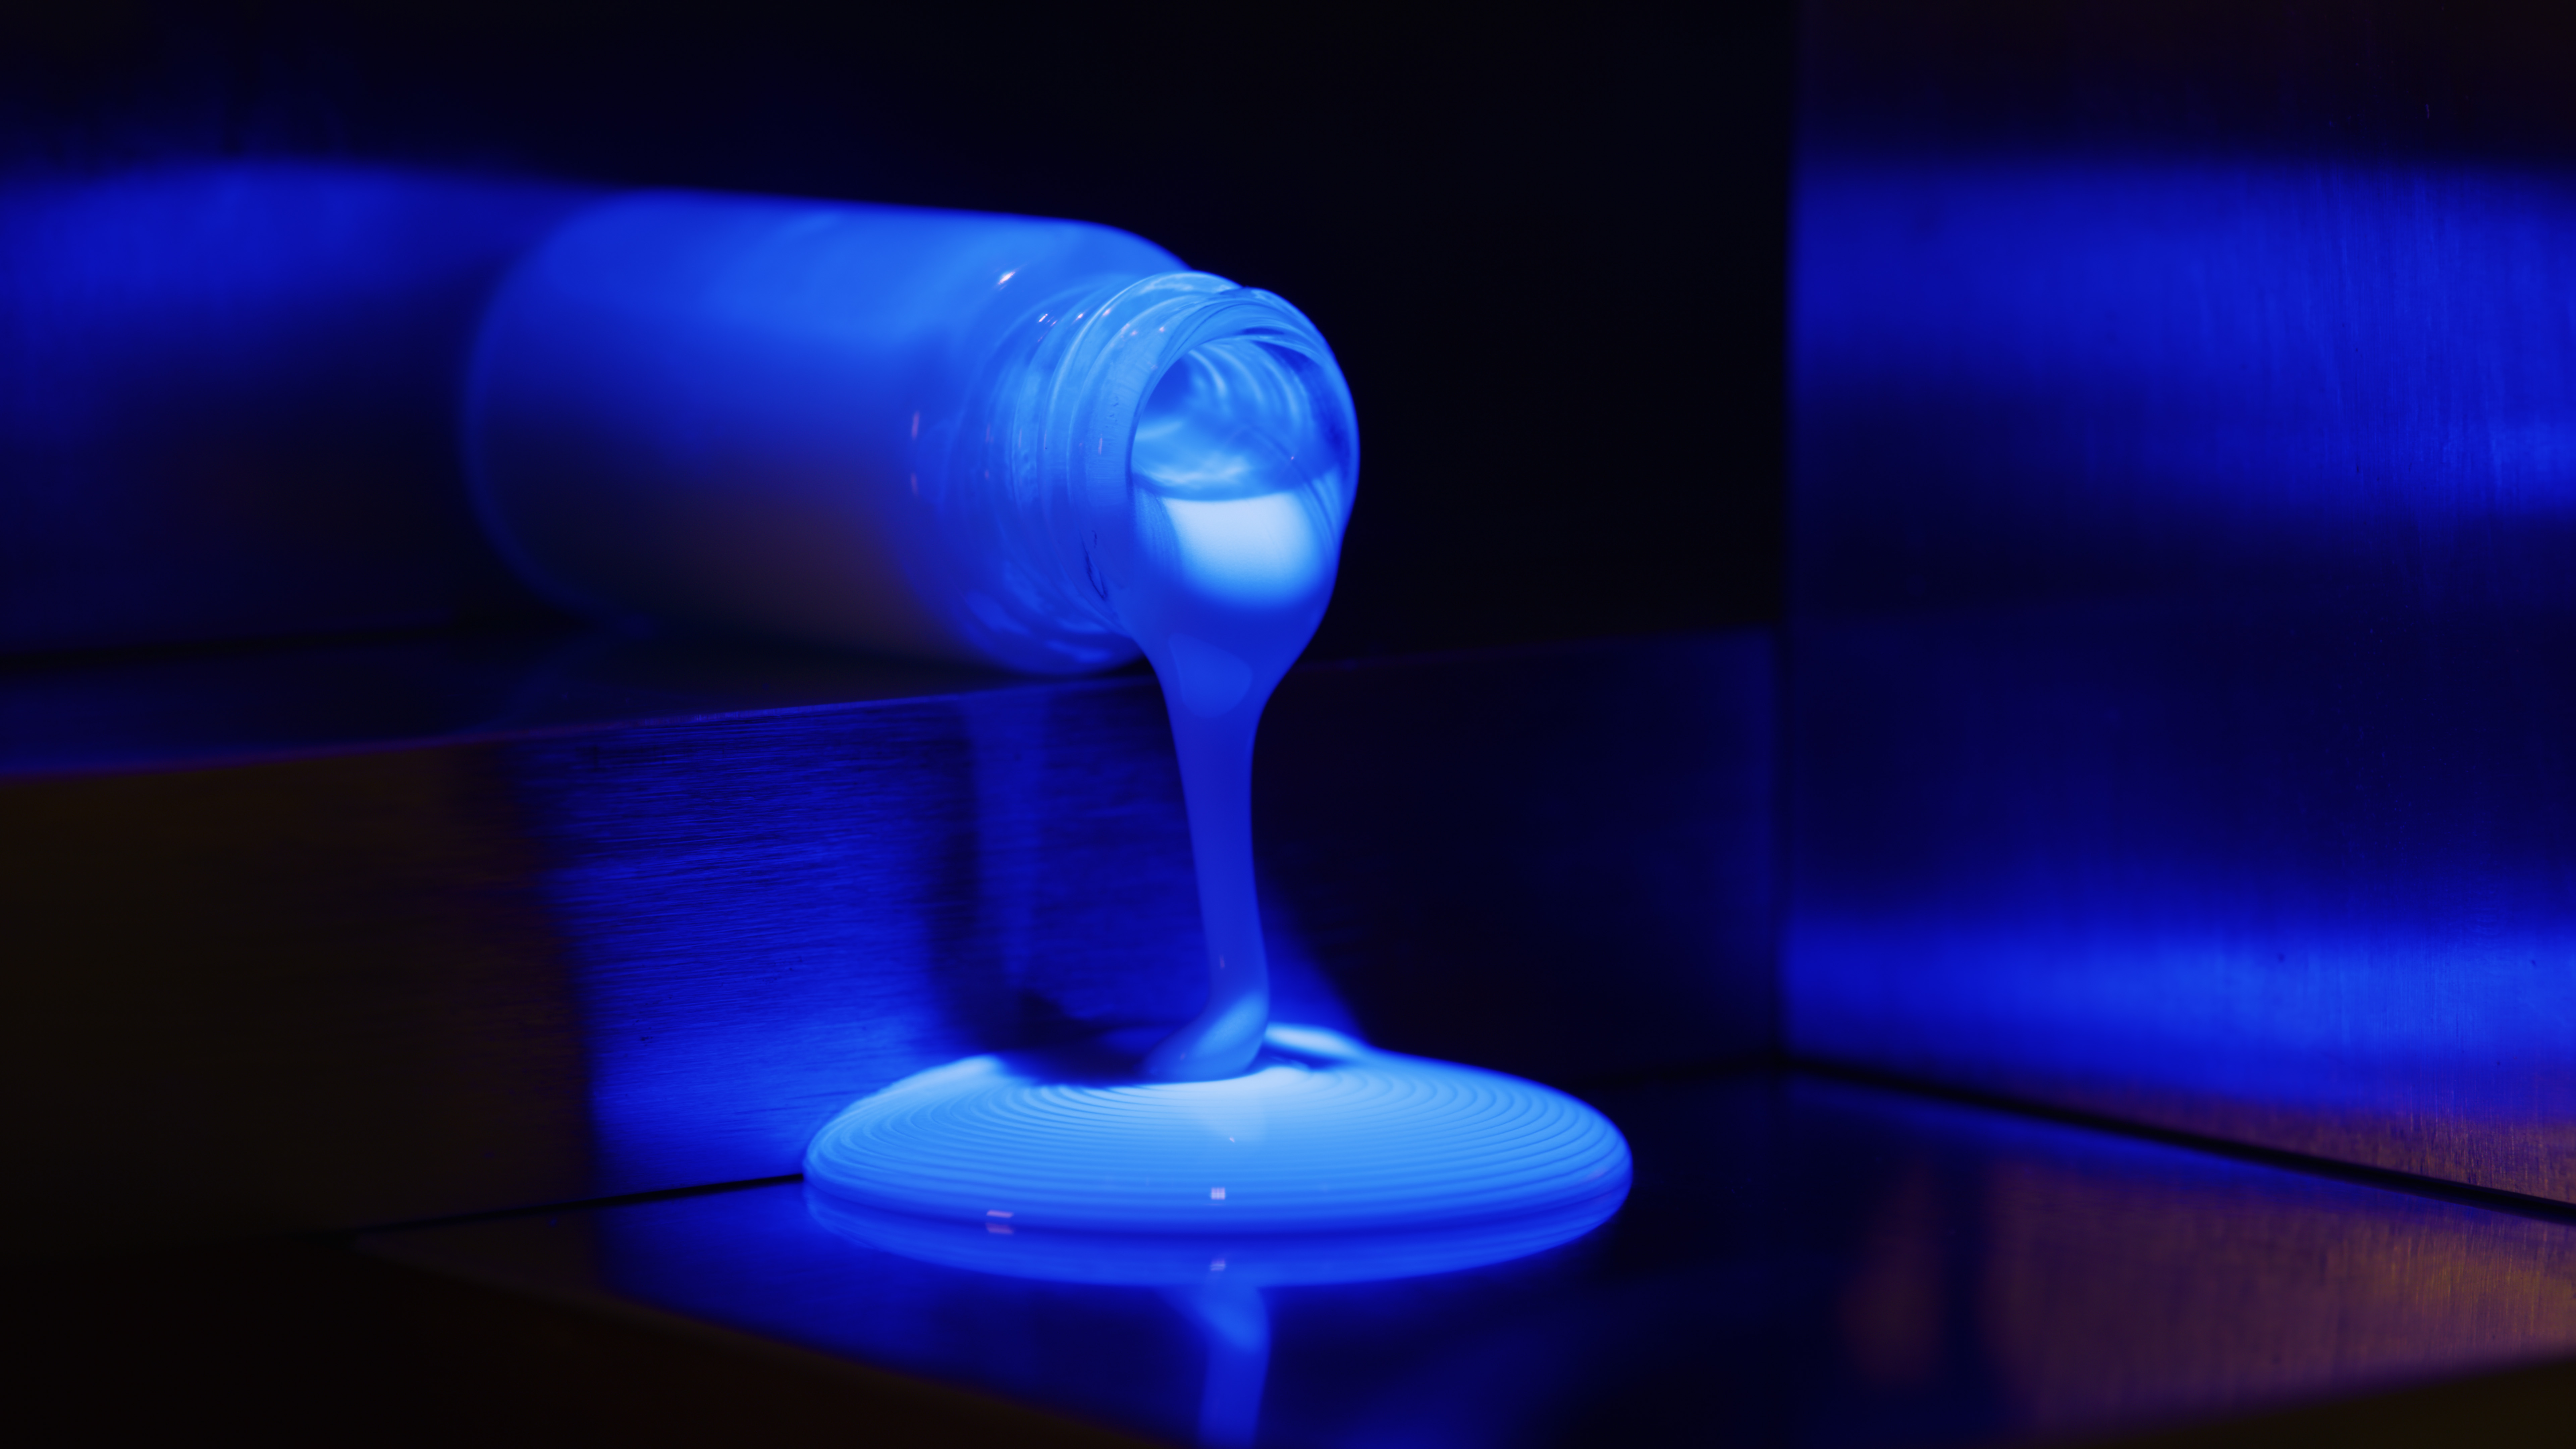
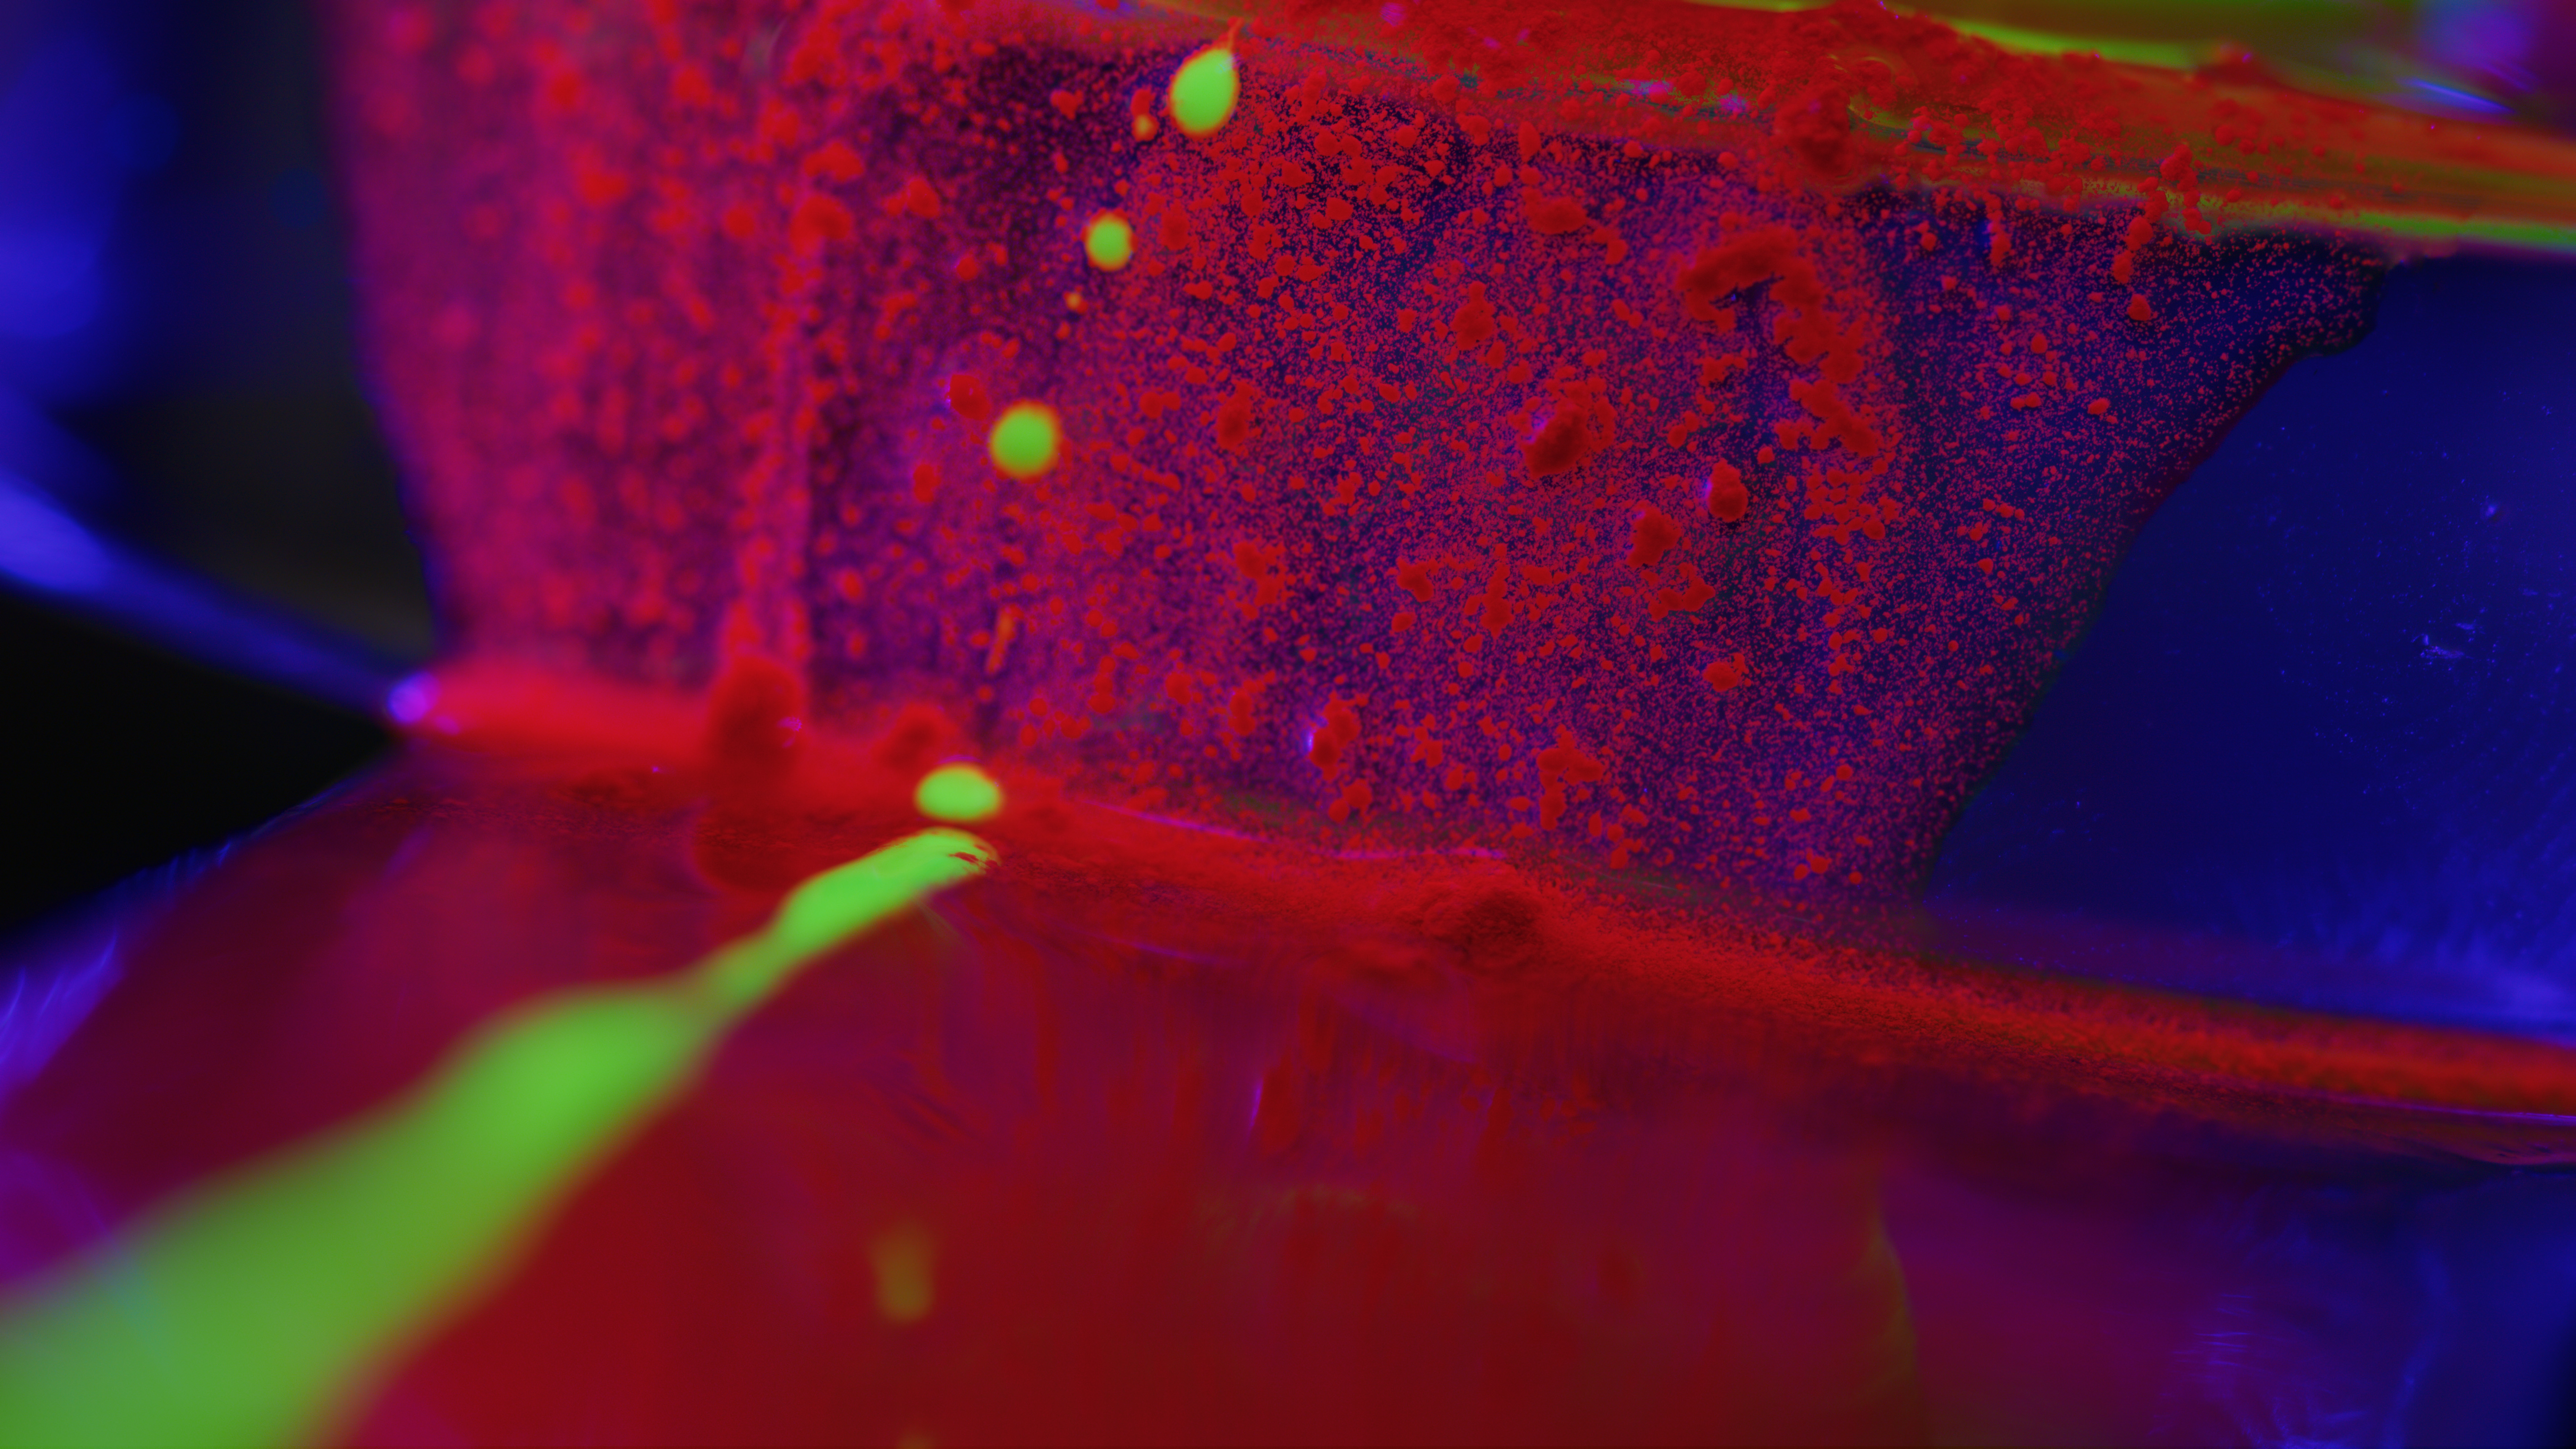
The pure blue Quantum Fluid with compliment color fill light from a Litepanels Gemini 2X1
What's very different here is that the nanocrystals are usually embedded into a hardened film inside a display sandwiched between several layers, including an oxygen barrier. They are reactive to UV light and emit light of the material's own unique wavelengths as designed. Typically when exposed to air Quantum Dots lose their intensity and purity. However, for this project Nanosys found a way to encapsulate the nanocrystals to make them "air stable" which protected them from oxygen and allowed for manipulating them for a good amount of time without losing their luminescence.
Conceptualizing, Planning, Execution
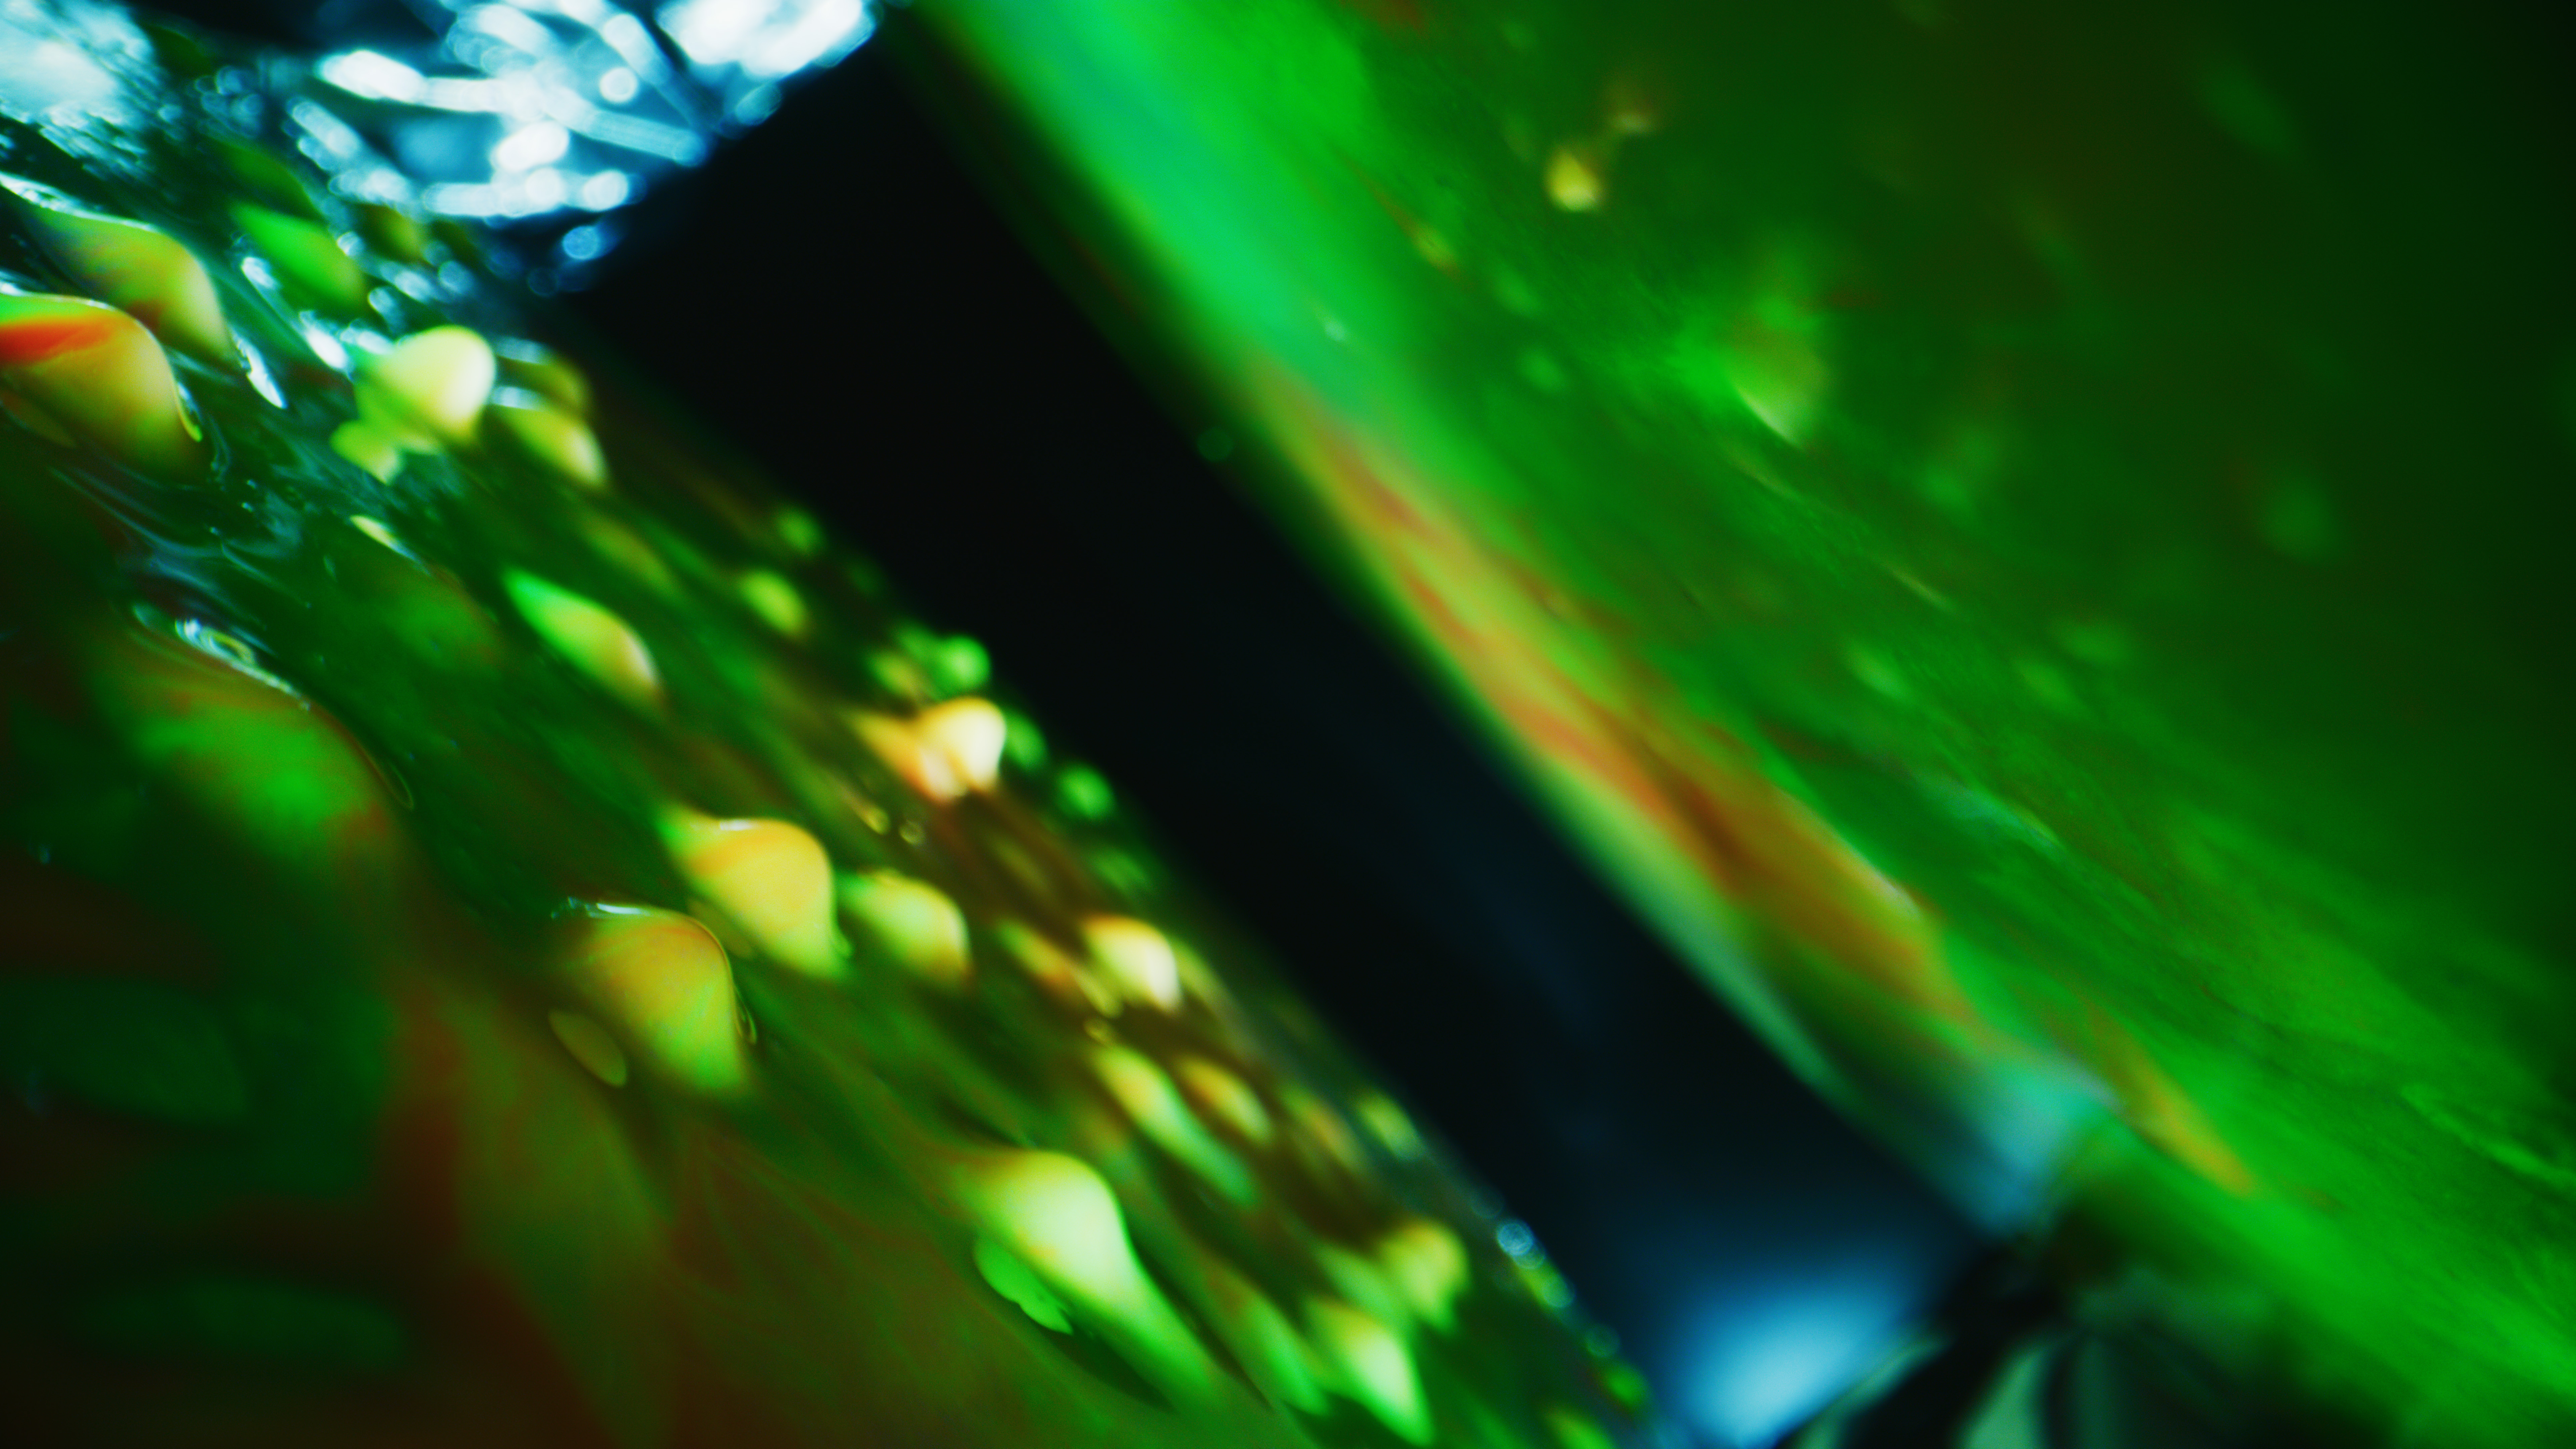
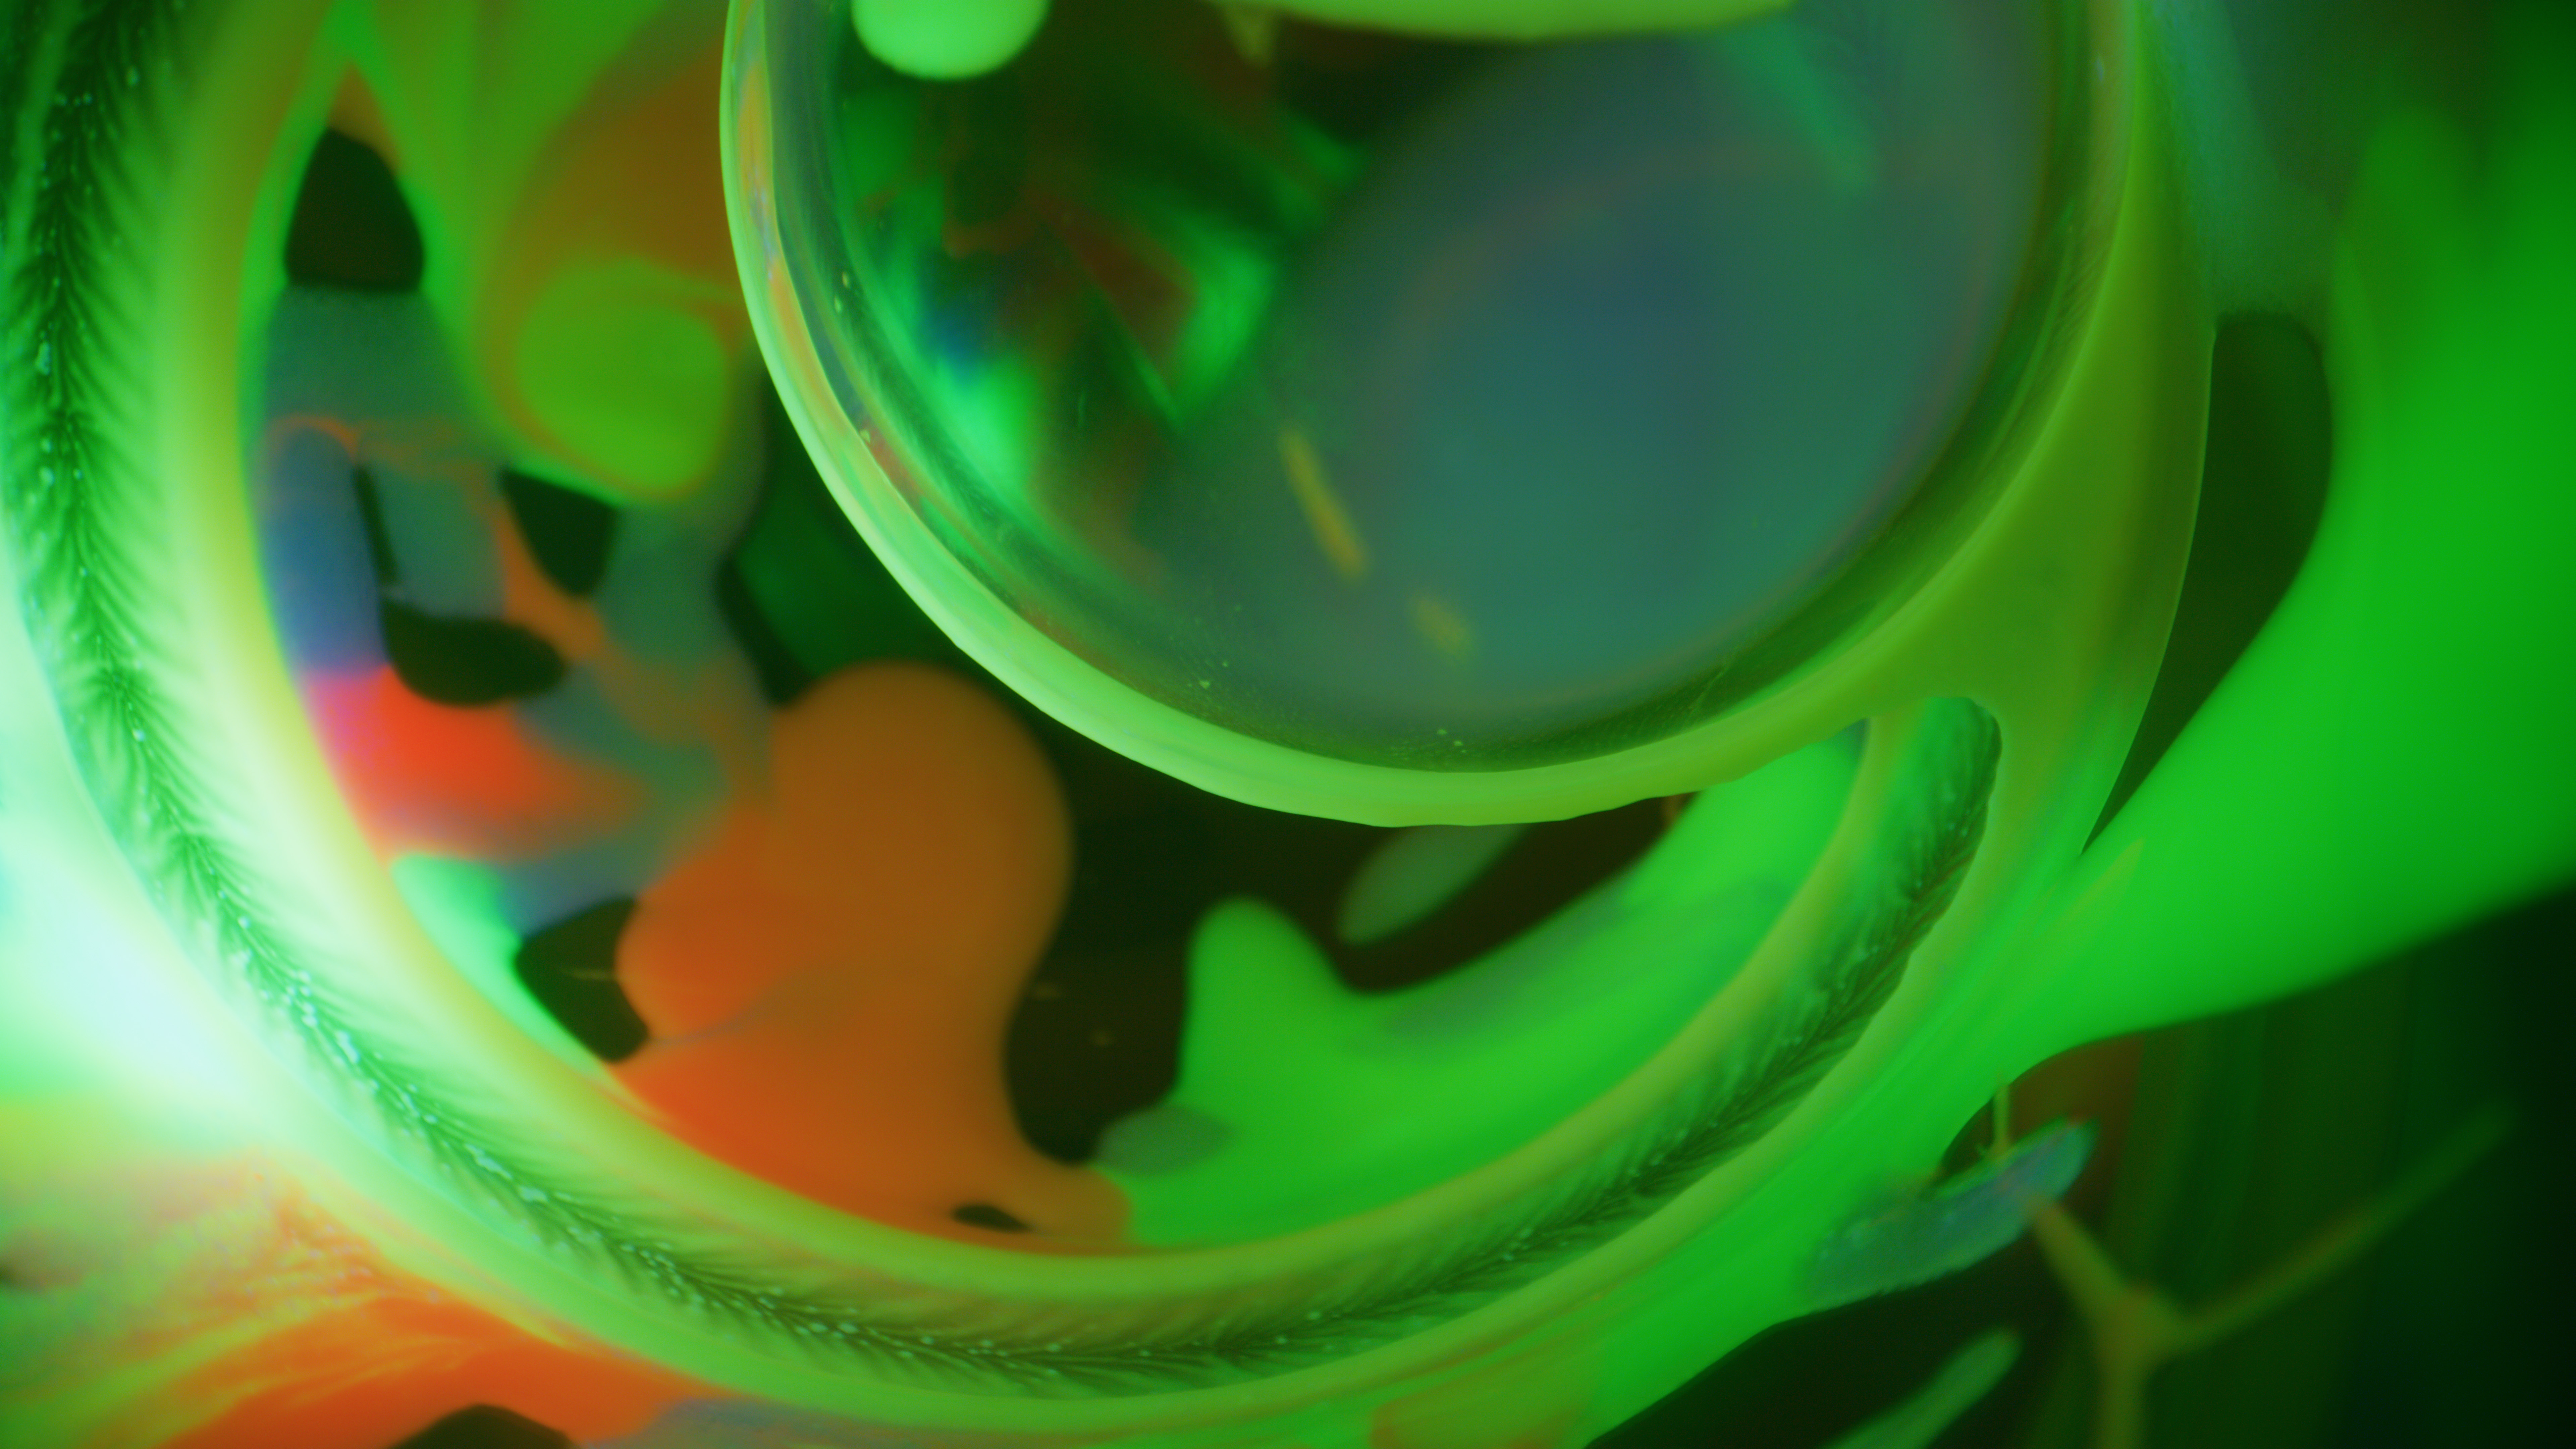
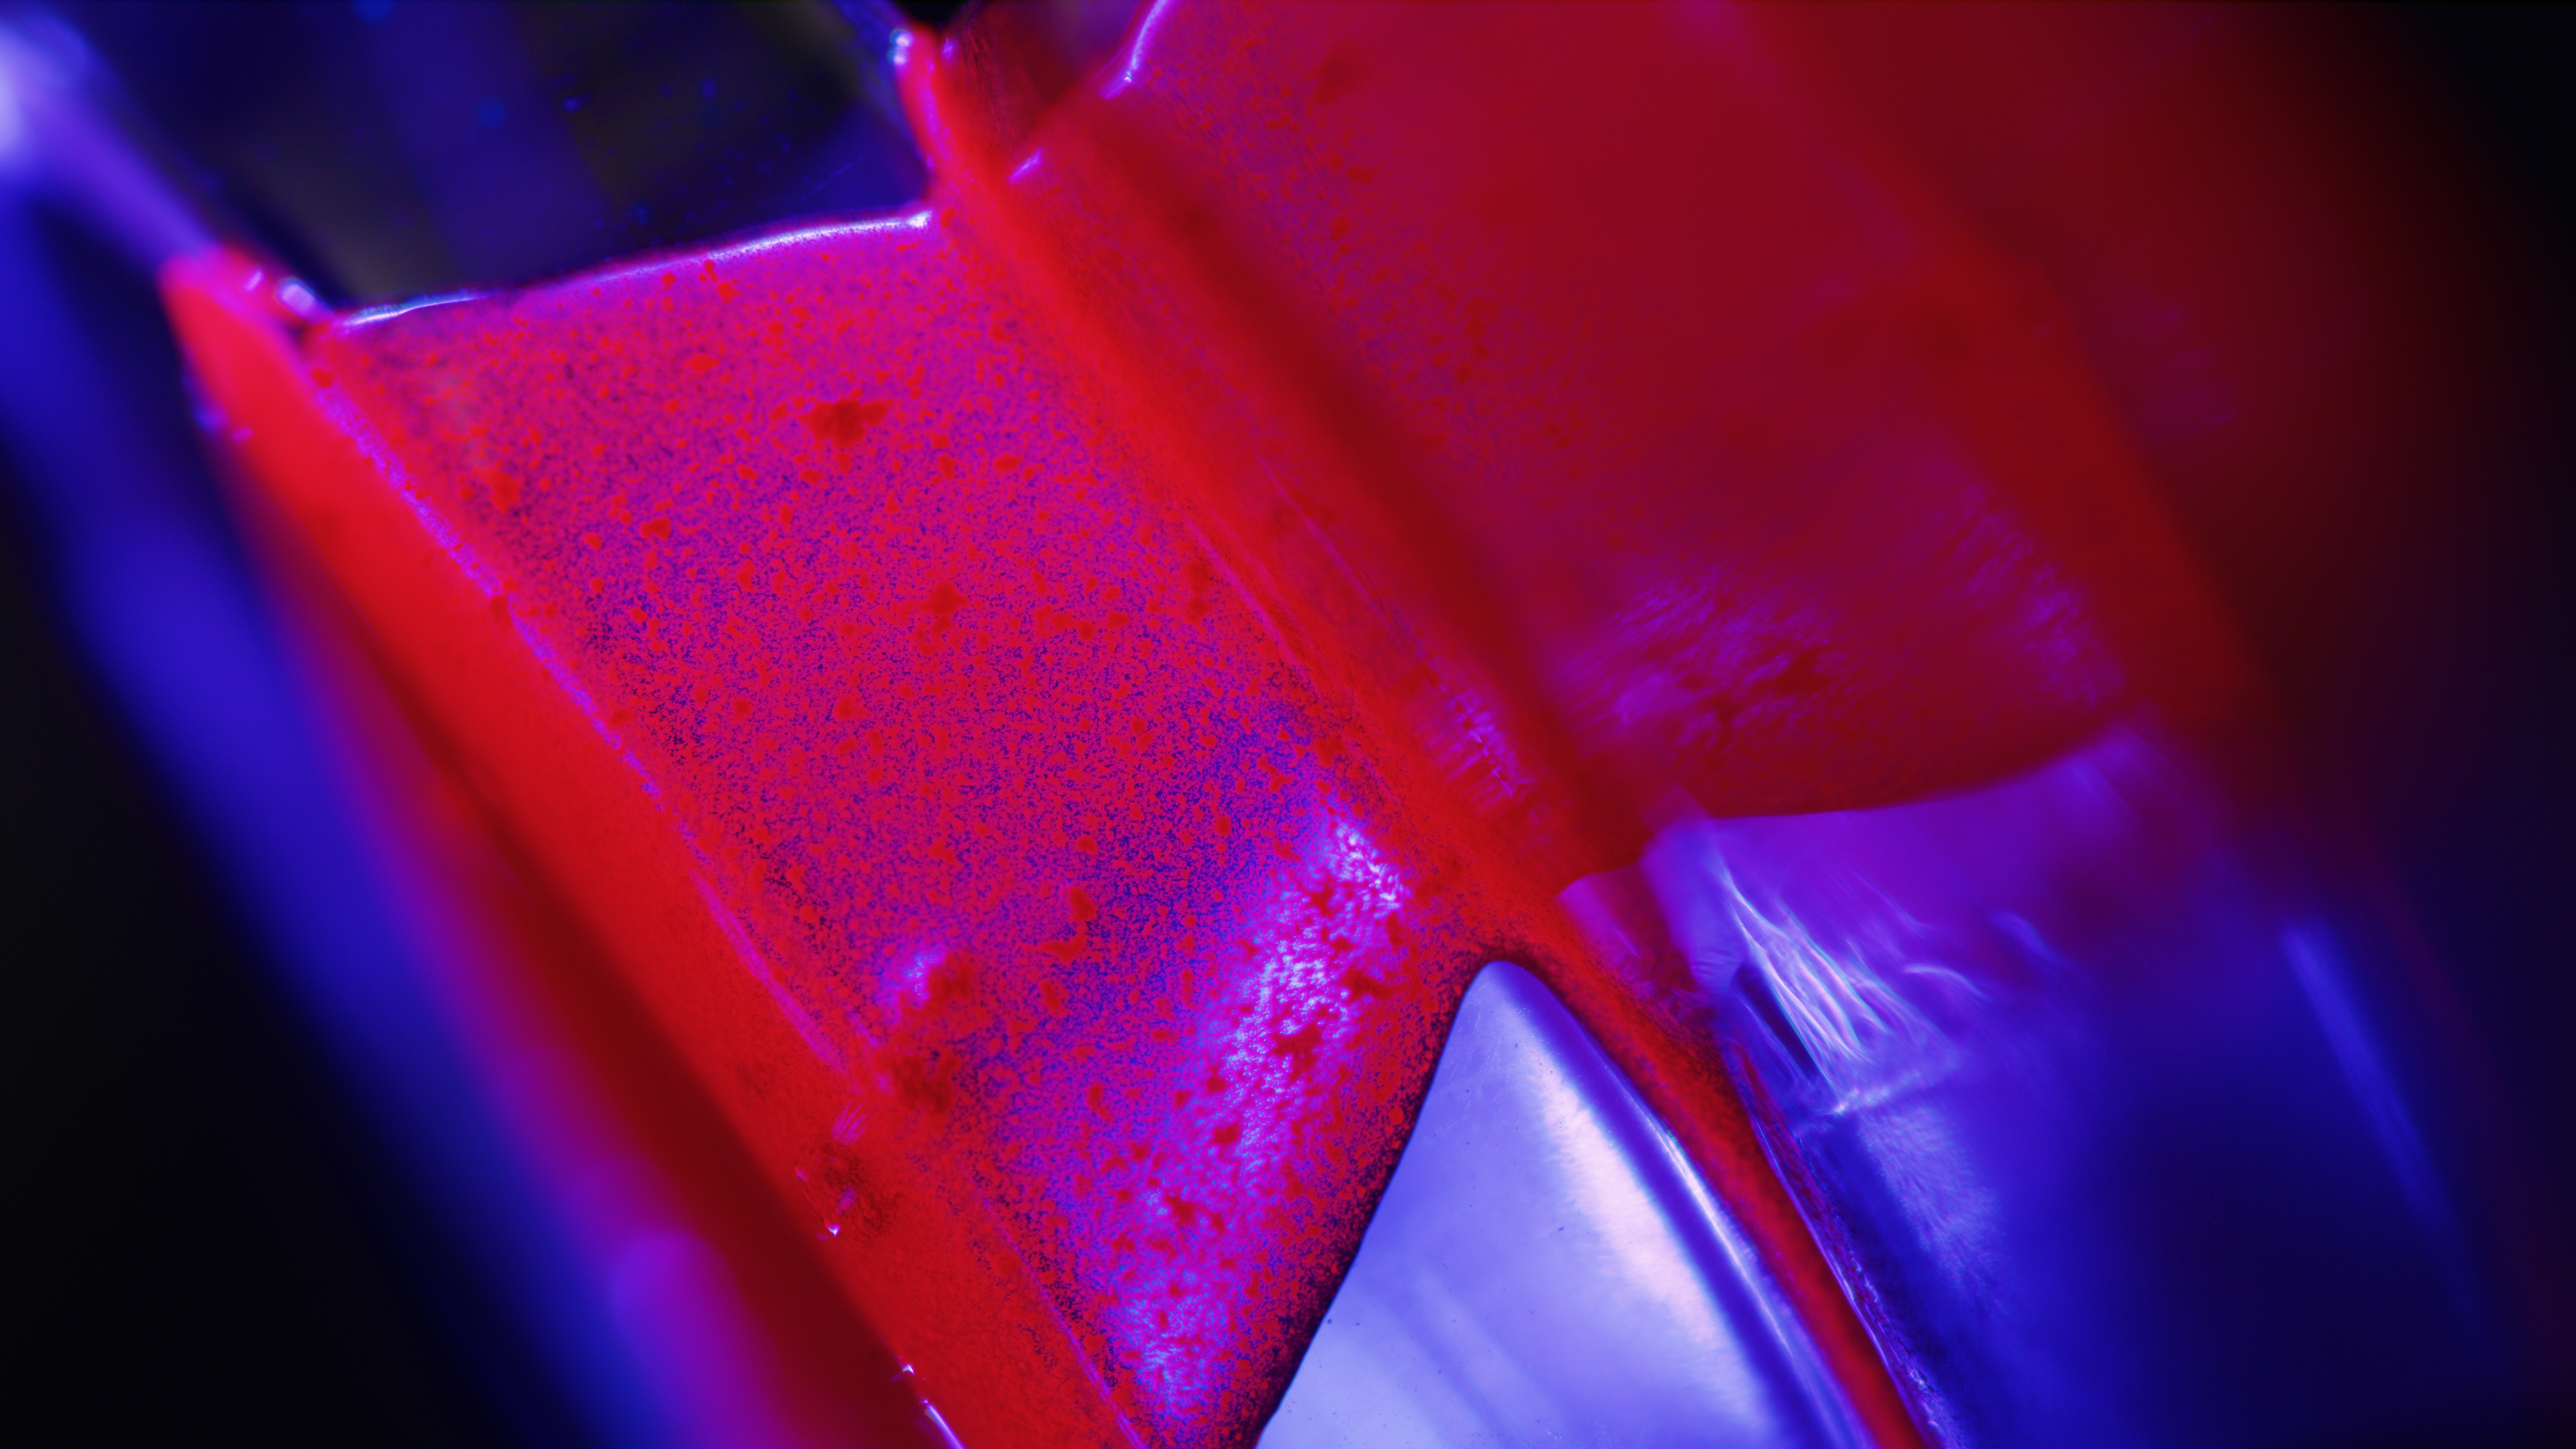
This project from the get go was about capturing bold color to be displayed in 8K resolution in HDR. The really new concept here was mixing and suspending the Quantum Dots in various materials to work with them in a brand new way. Initially some of the conversations surrounded painting with the Qds, which is very doable, but a bit of single note and perhaps an obvious path. After some initial brainstorming having the Qds perform and interact with each other was clear in my mind and the concept of mixing the Quantum Dots within fluids and focusing on that general theme became the clear direction. After that decisions we started discussing various fluids and fluids with textures. Oddly I had some experience working with silicon oil a bit ago, which you can get in a variety of consistencies to have control over their viscosity. This would provide for different levels of flow performances that could be created in a very deliberate manner. Somewhere around this point I decided two things. First, I think another obvious direction to go with this project would be to film in slow motion. I envisioned a different path of controlled sped up actions as well as realtime movement for Quantum Flows. And the second answer which was moderate inspired by that was the usage of Motion Control. In this case for every single shot.
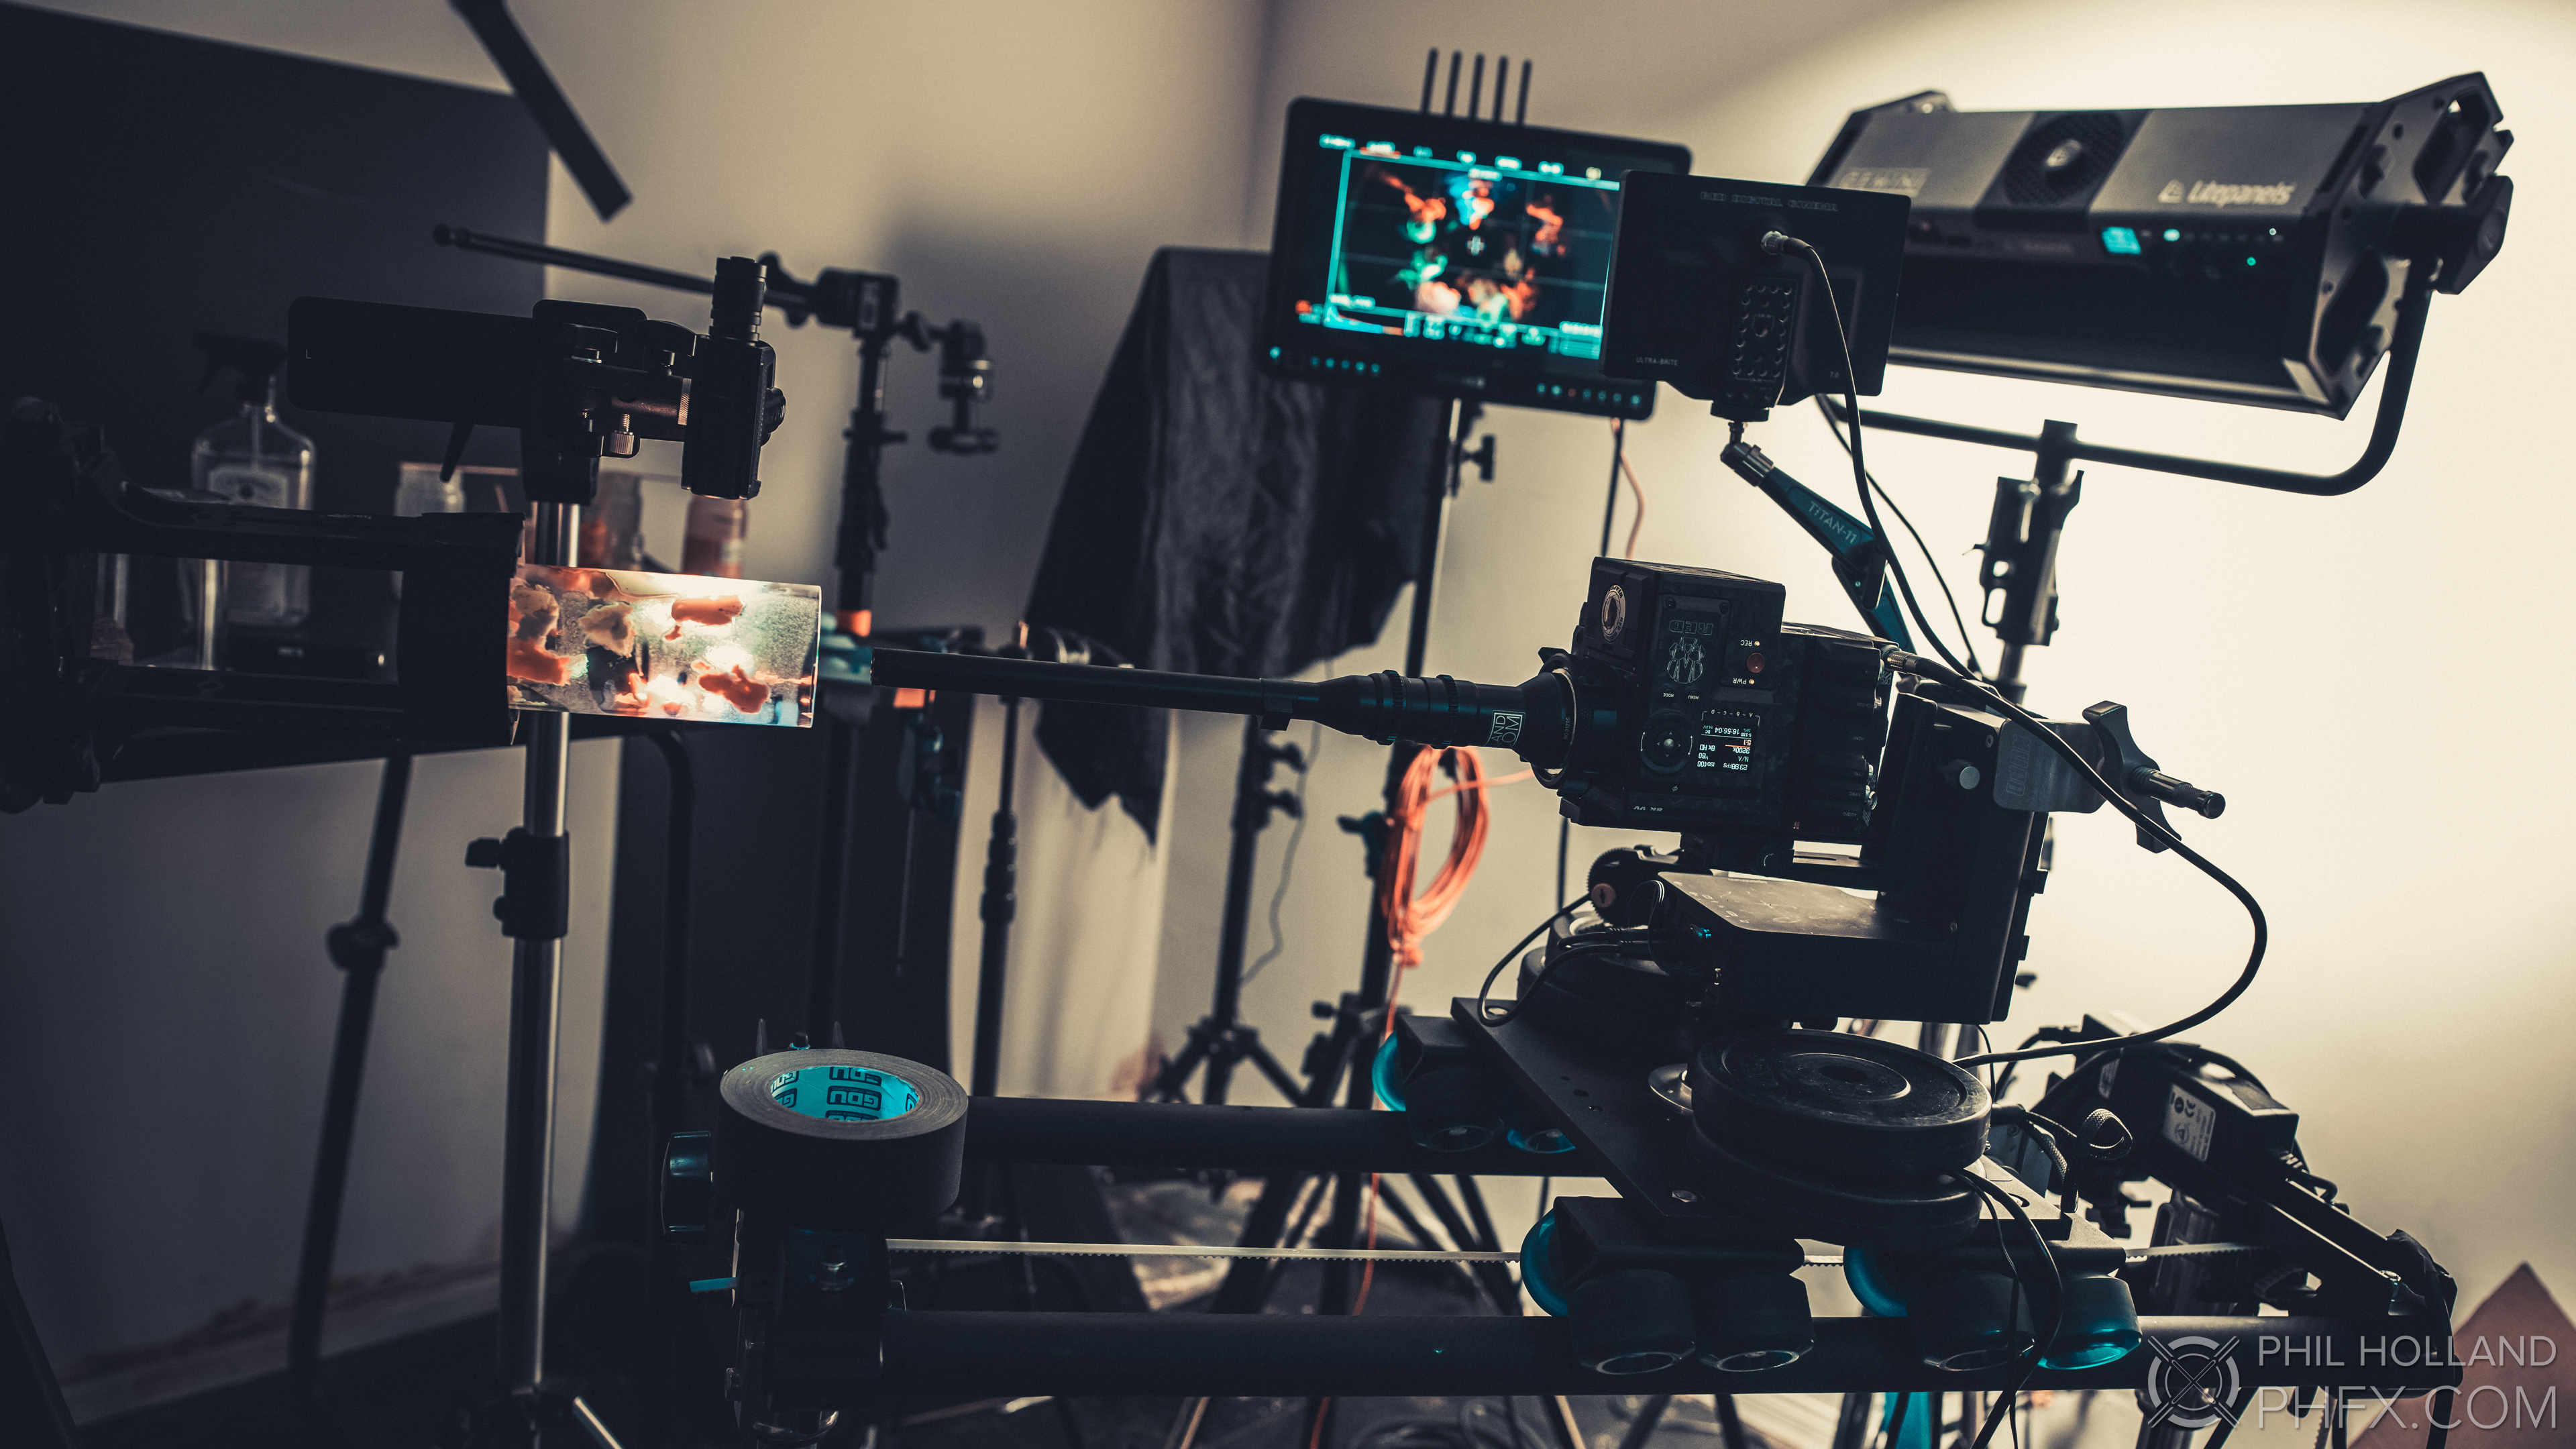
The hero MoCo rig was an eMotimo ST4 on a Dana Dolly for every shot
Though this piece is certainly a visual abstract journey, like anything I do with in motion pictures, at the heart a story must be developed and discovered. In this case not really in the traditional way as you would with a narrative project, but certainly influenced in a similar way. At it's core thematically I built a structure hinged around what the Quantum Dots provided on a chromatic level. Focusing on a simple Red, Green, Blue primary color theme and due to how the emitted light from the quantum dots blend light in an additive manner, I knew secondary colors would develop in frame. A natural progression from a simple core ideal was thinking about simple shapes and forms as well identifiable materials. Quantum Dots are developed in a laboratory environment at Nanosys and I know deeply that glass can be found there. In fact my first introduction to the material in person was indeed in vials. Similarly metal is used for a great deal tools found in lab settings, specifically Steel.

Early Lighting and Material Tests
After another conversation with Nanosys I was able to get a scale and scope of exactly how much material I would have access to. To maximize that volume working in the realm of macro cinematography would be the best use of the material and getting closeup to tiny fluid action was in line with that. This is where my R&D began on how to photograph this material and Nanosys shipped over some early samples for me to explore. I searched for specific low UV wavelengths and experimented with a good deal of light sources. This is far off from standard cinematography as you really can only use direct or very reflected UV light as diffusing would cut the wavelengths too much to get the Quantum Dots to react strongly to it. Also, some early camera tests revealed that all 3 core colors would be fairly different exposure levels. To tackle that I would sometimes have to light them uniquely all within the same shot. While lighting R&D was going on I was thinking of story and tone of the piece as well as figuring out the general range of lenses I'd be using.

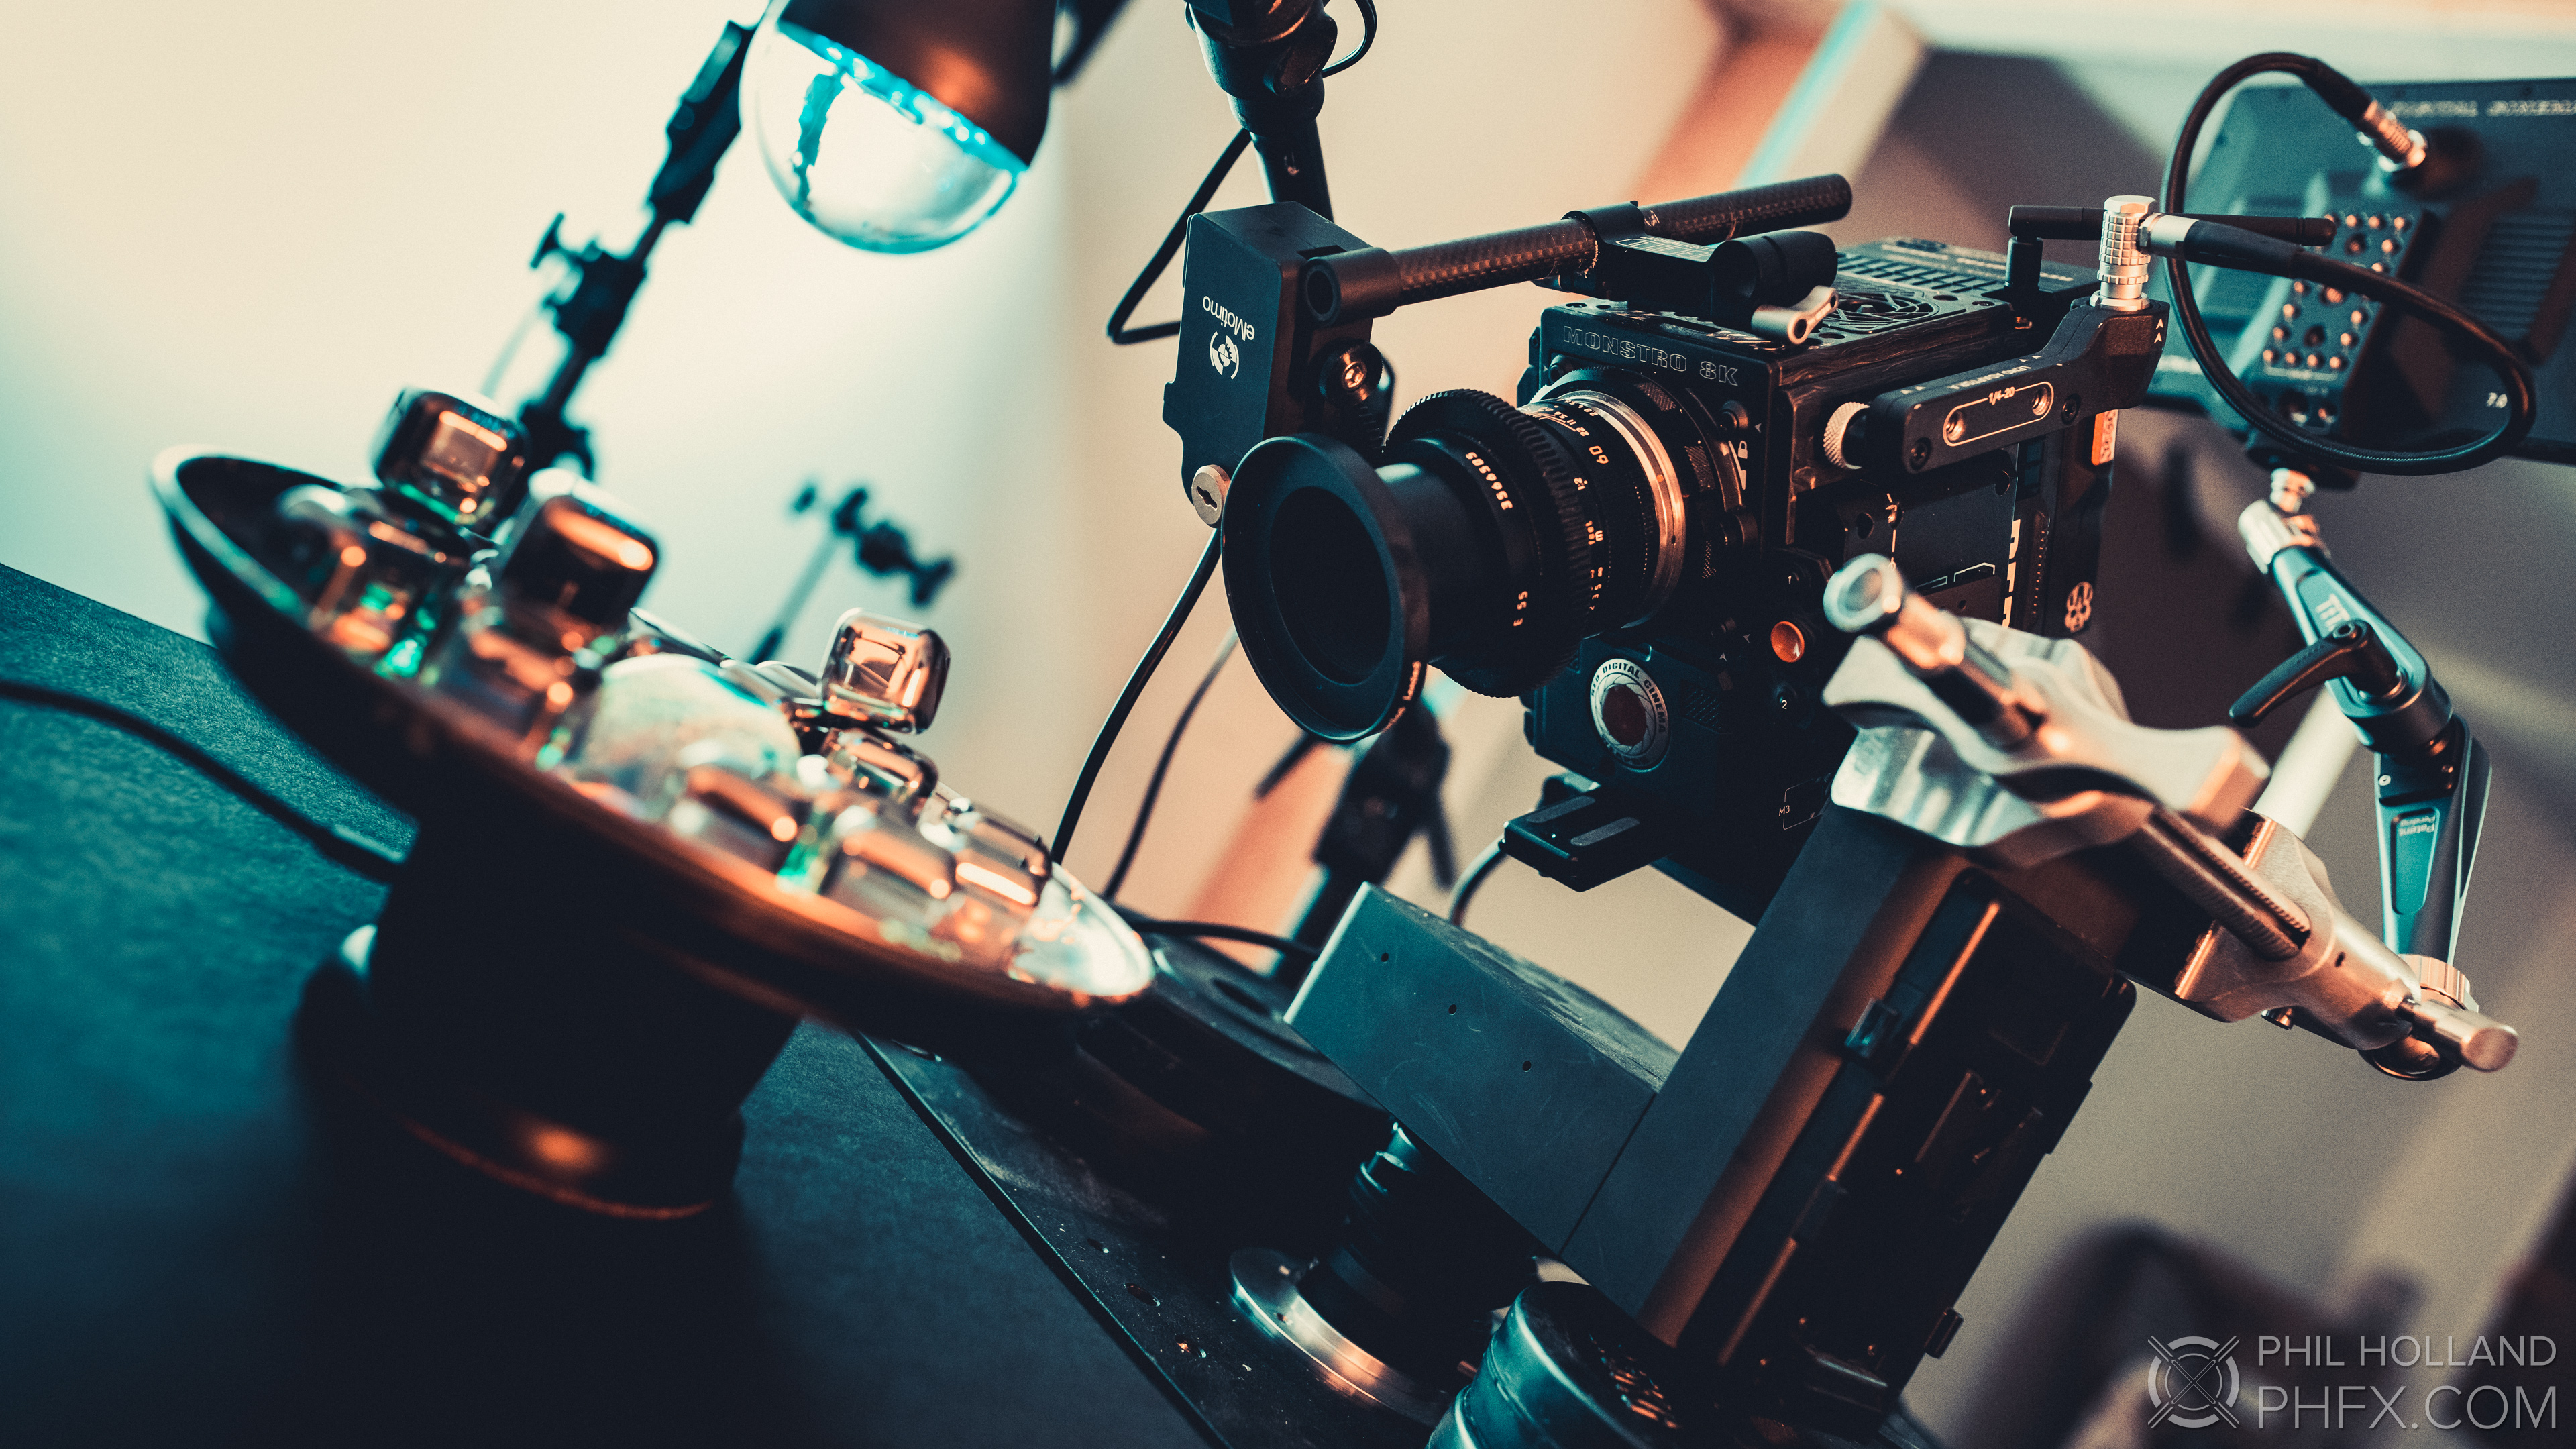
The Tokina 100mm T2.9 Macro was my hero lens
For lenses I wanted to shoot this much like I'd shoot any production, with a variety of shots ranging from wide to tight. I chose to film on RED Monstro 8K VV, a large format camera mainly for it's tremendous dynamic range and ability to capture color. And side note, I decided to film with the Skin Tone - Highlight OLPF. With this being a large format camera I put together a set of macro prime lenses ranging from 15mm to 200mm that could cover the full 8K resolution of the sensor. Some were off the beaten path or very new. For lenses from the still world I modified them at Duclos Lenses with gears to be used with the Motion Control focus gear, I also tapped Duclos for PL Extension Tubes to get even an even closer focus than some of the macro lenses could perform. The general hero lens was the Tokina 100mm T2.9 PL. You'll see use of the 24mm f/14 Laowa Probe Lens as well as a couple older vintage lenses from Leica and Olympus being used for their unique character. The rest of the glass were all very modern and clean macro lenses as this project mainly was aiming this way.
The Leica-R 60mm f/2.8 Elmarit in one of the simpler setups
Back to the lighting. After a bit of R&D I discovered 3 main sources that really inspired me. UV LED Bulbs, UV LED Flashlights, and a special UV Laser. Experimenting with light, I had story on my mind constantly thinking about themes and possibilities. I knew I wanted a fairly kicking beat to move this edit to and since this wasn't about slow motion, it needed to be fairly up tempo. After searching for several evenings a track jumped out at me that really tuned into where I was feeling. I felt it had the right tone for the piece I began to get pretty abstract in my creative head space to develop the rest of the story. Mainly I thought about how Quantum Dots are used in combination to produce a palette of colors on screen. Looking at the spatial amount of material, looking back at the music track, thinking about some of my visual concepts, sketching down a few thumbnails; I was able to sort of divide the music track into chapters and develop a story progression from rather clean and sterile then navigate all the way to the end in a large chaotic mess of color. Once I had those notes made I actually went into Adobe Premiere Pro and assembled a rough animatic of notes, storyboards, and just ideas and put them to the edit.

The PreViz Adobe Premiere Pro CC Timeline
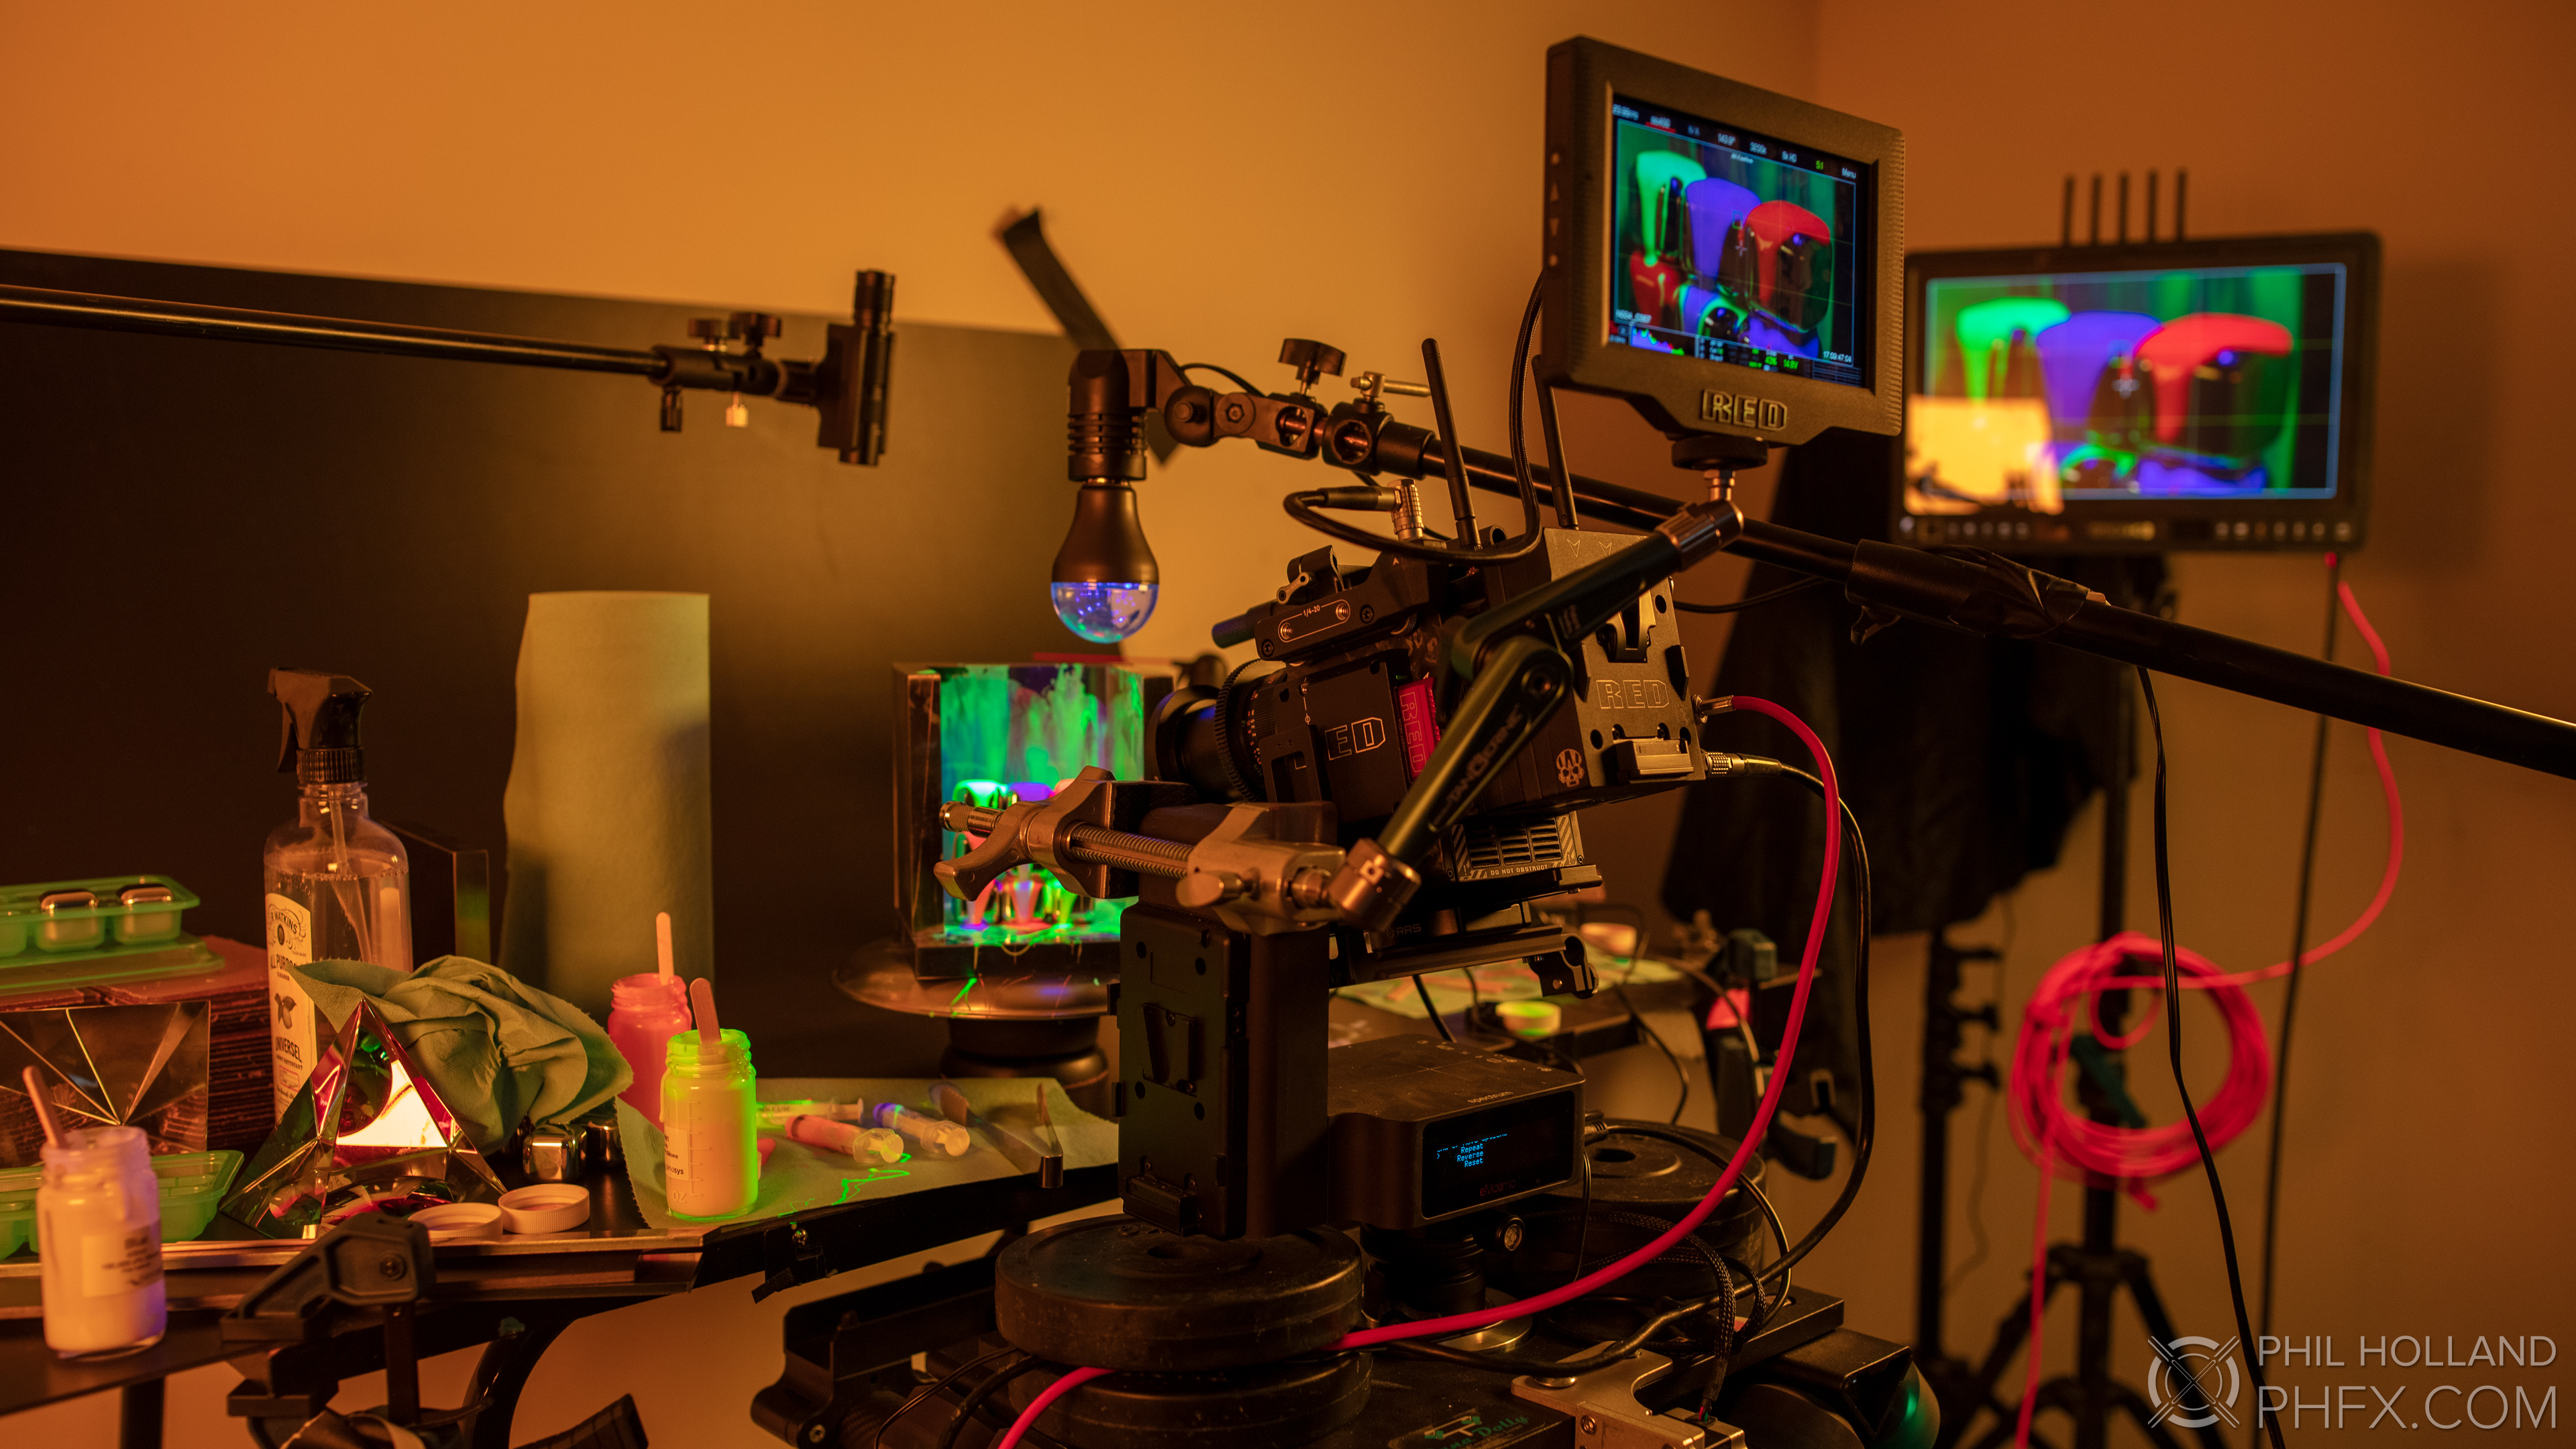
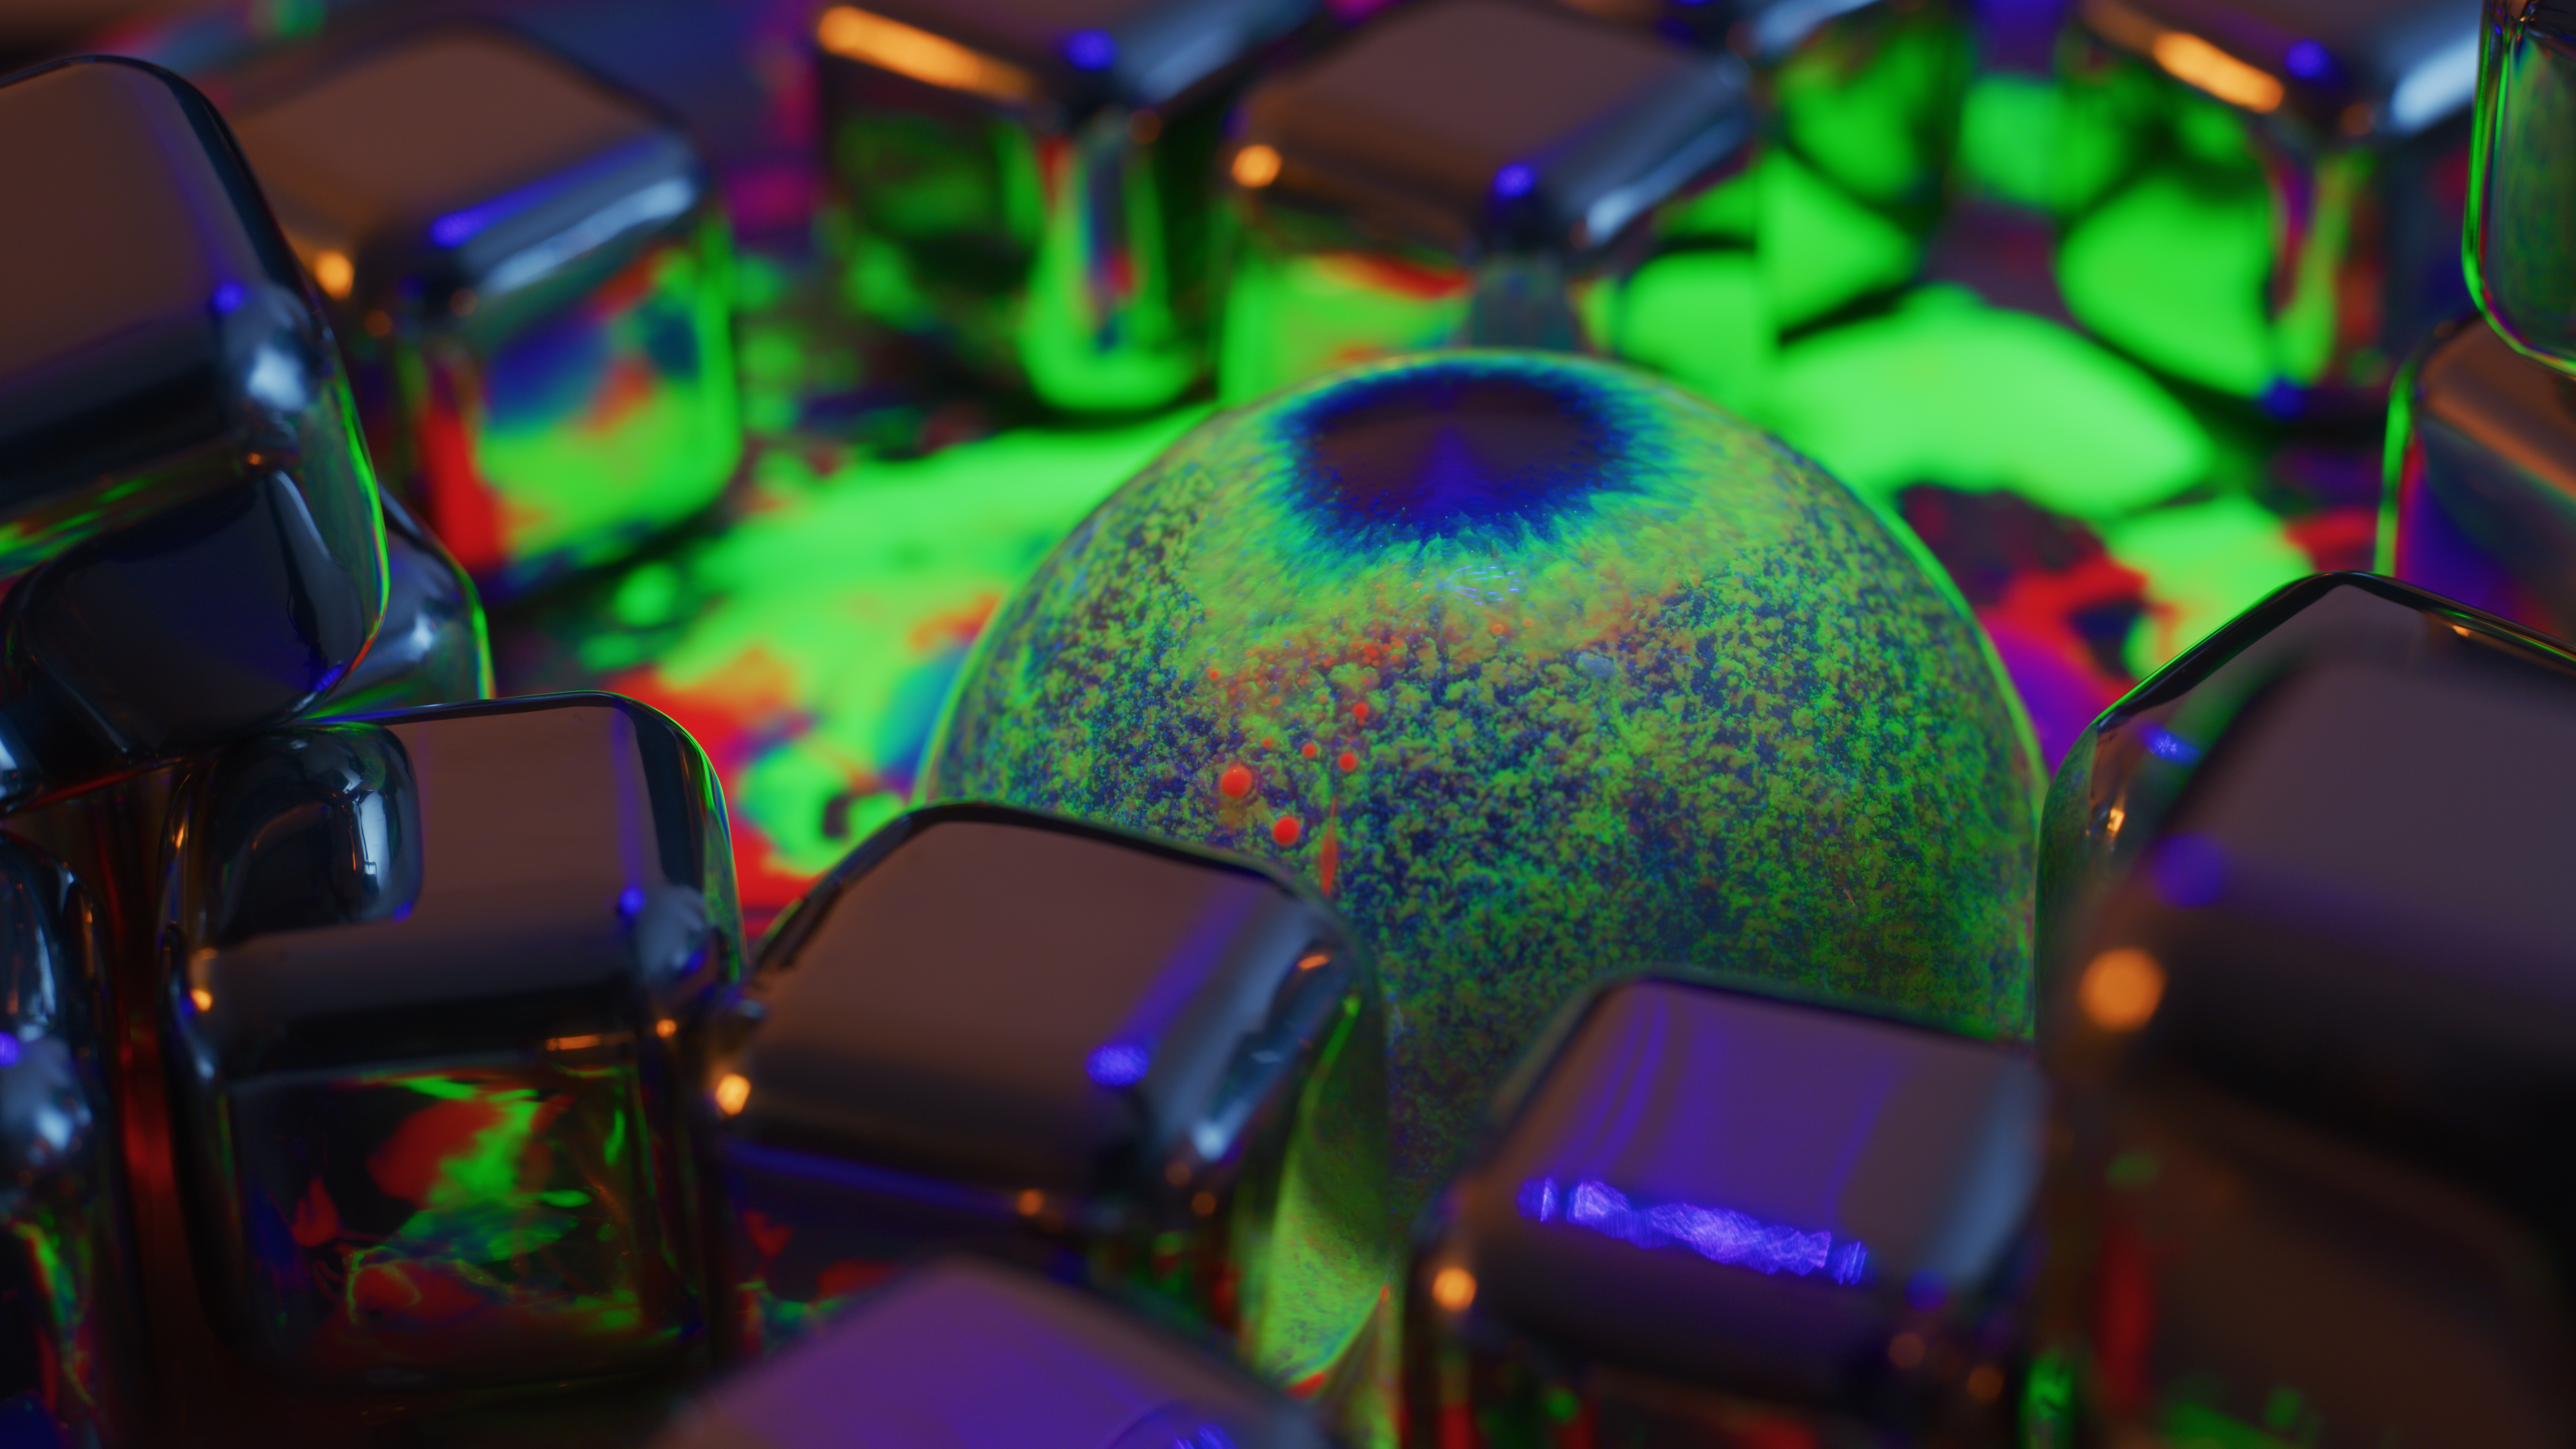
Previsualizing the piece and more or less locking the edit before filming a single frame at this stage was key for a few reasons. One, I was working with a specific amount of the Quantum Dots and getting an idea of how many takes it would take to pull off each "chapter" would set me up to not run out of material. Second it allowed me to really plan out the shooting days. This was going to be a tricky shoot as each of the over 70 shots required Unique Motion Control programming of typically 1-3 robots and up to 5. Outside of that the miniature sets for each chapter needed to be constructed and forensically cleaned between each take to leave no trace of Quantum Dots on surfaces intended to be clean. The other tricky concept was building various contraptions to move the camera, the sets, the lights, the Quantum Dots to interact and mount to the various Motion Control Devices. A good amount of harvesting odd bits from other clamps and objects went into the shot design. And it was around this time after I had a really good grasp on the story, edit, and process I ordered all of the set decoration props. All the steel blocks and spheres, glass in a variety of shapes, and even one very round and reflective Titanium Ball.

Some custom rigging, cleaning the sets between takes, and a creative colorful mess
I came up with some hard rules. No CG was to be used, every shot needed to have a motion controlled element to keep action moving. I also wanted to use regular visible light especially in scenes with a pure hue to have it's compliment as ambiance, but slowly develop into a world entirely lit by the Quantum Dots themselves. The RGB flexibility of the Litepanels Gemini 2X1 allowed me to dial in that very specific color for each setup, as many as 3 were used in specific scenes. At this point I started looking closely at the opening shot. The story of starting clean and using the primative shapes and forms to develop the set pieces to progressively get to a more chaotic end was hammered down with a "going into the test tube" sort of concept as being the crescendo of the 3rd act. Circles and Spheres, Squares and Cubes, Triangles and Pyramids would all be seen. Thinking in a very nonlinear fashion I was inspired to produce a long 30+ second opening shot that would hint at all that was to come. I try to inject a level of rewatchability in all that I do and provide moments within the compositions and shot design for individuals to discover something new upon multiple viewings. This opening shot concept was very much in line with a lot of those intentions. The other fun tidbit is literally my first note on this project when I started visualizing was "we start on blue, the deepest blue".
Some custom rigging, a good deal of cleaning, and a creative mess
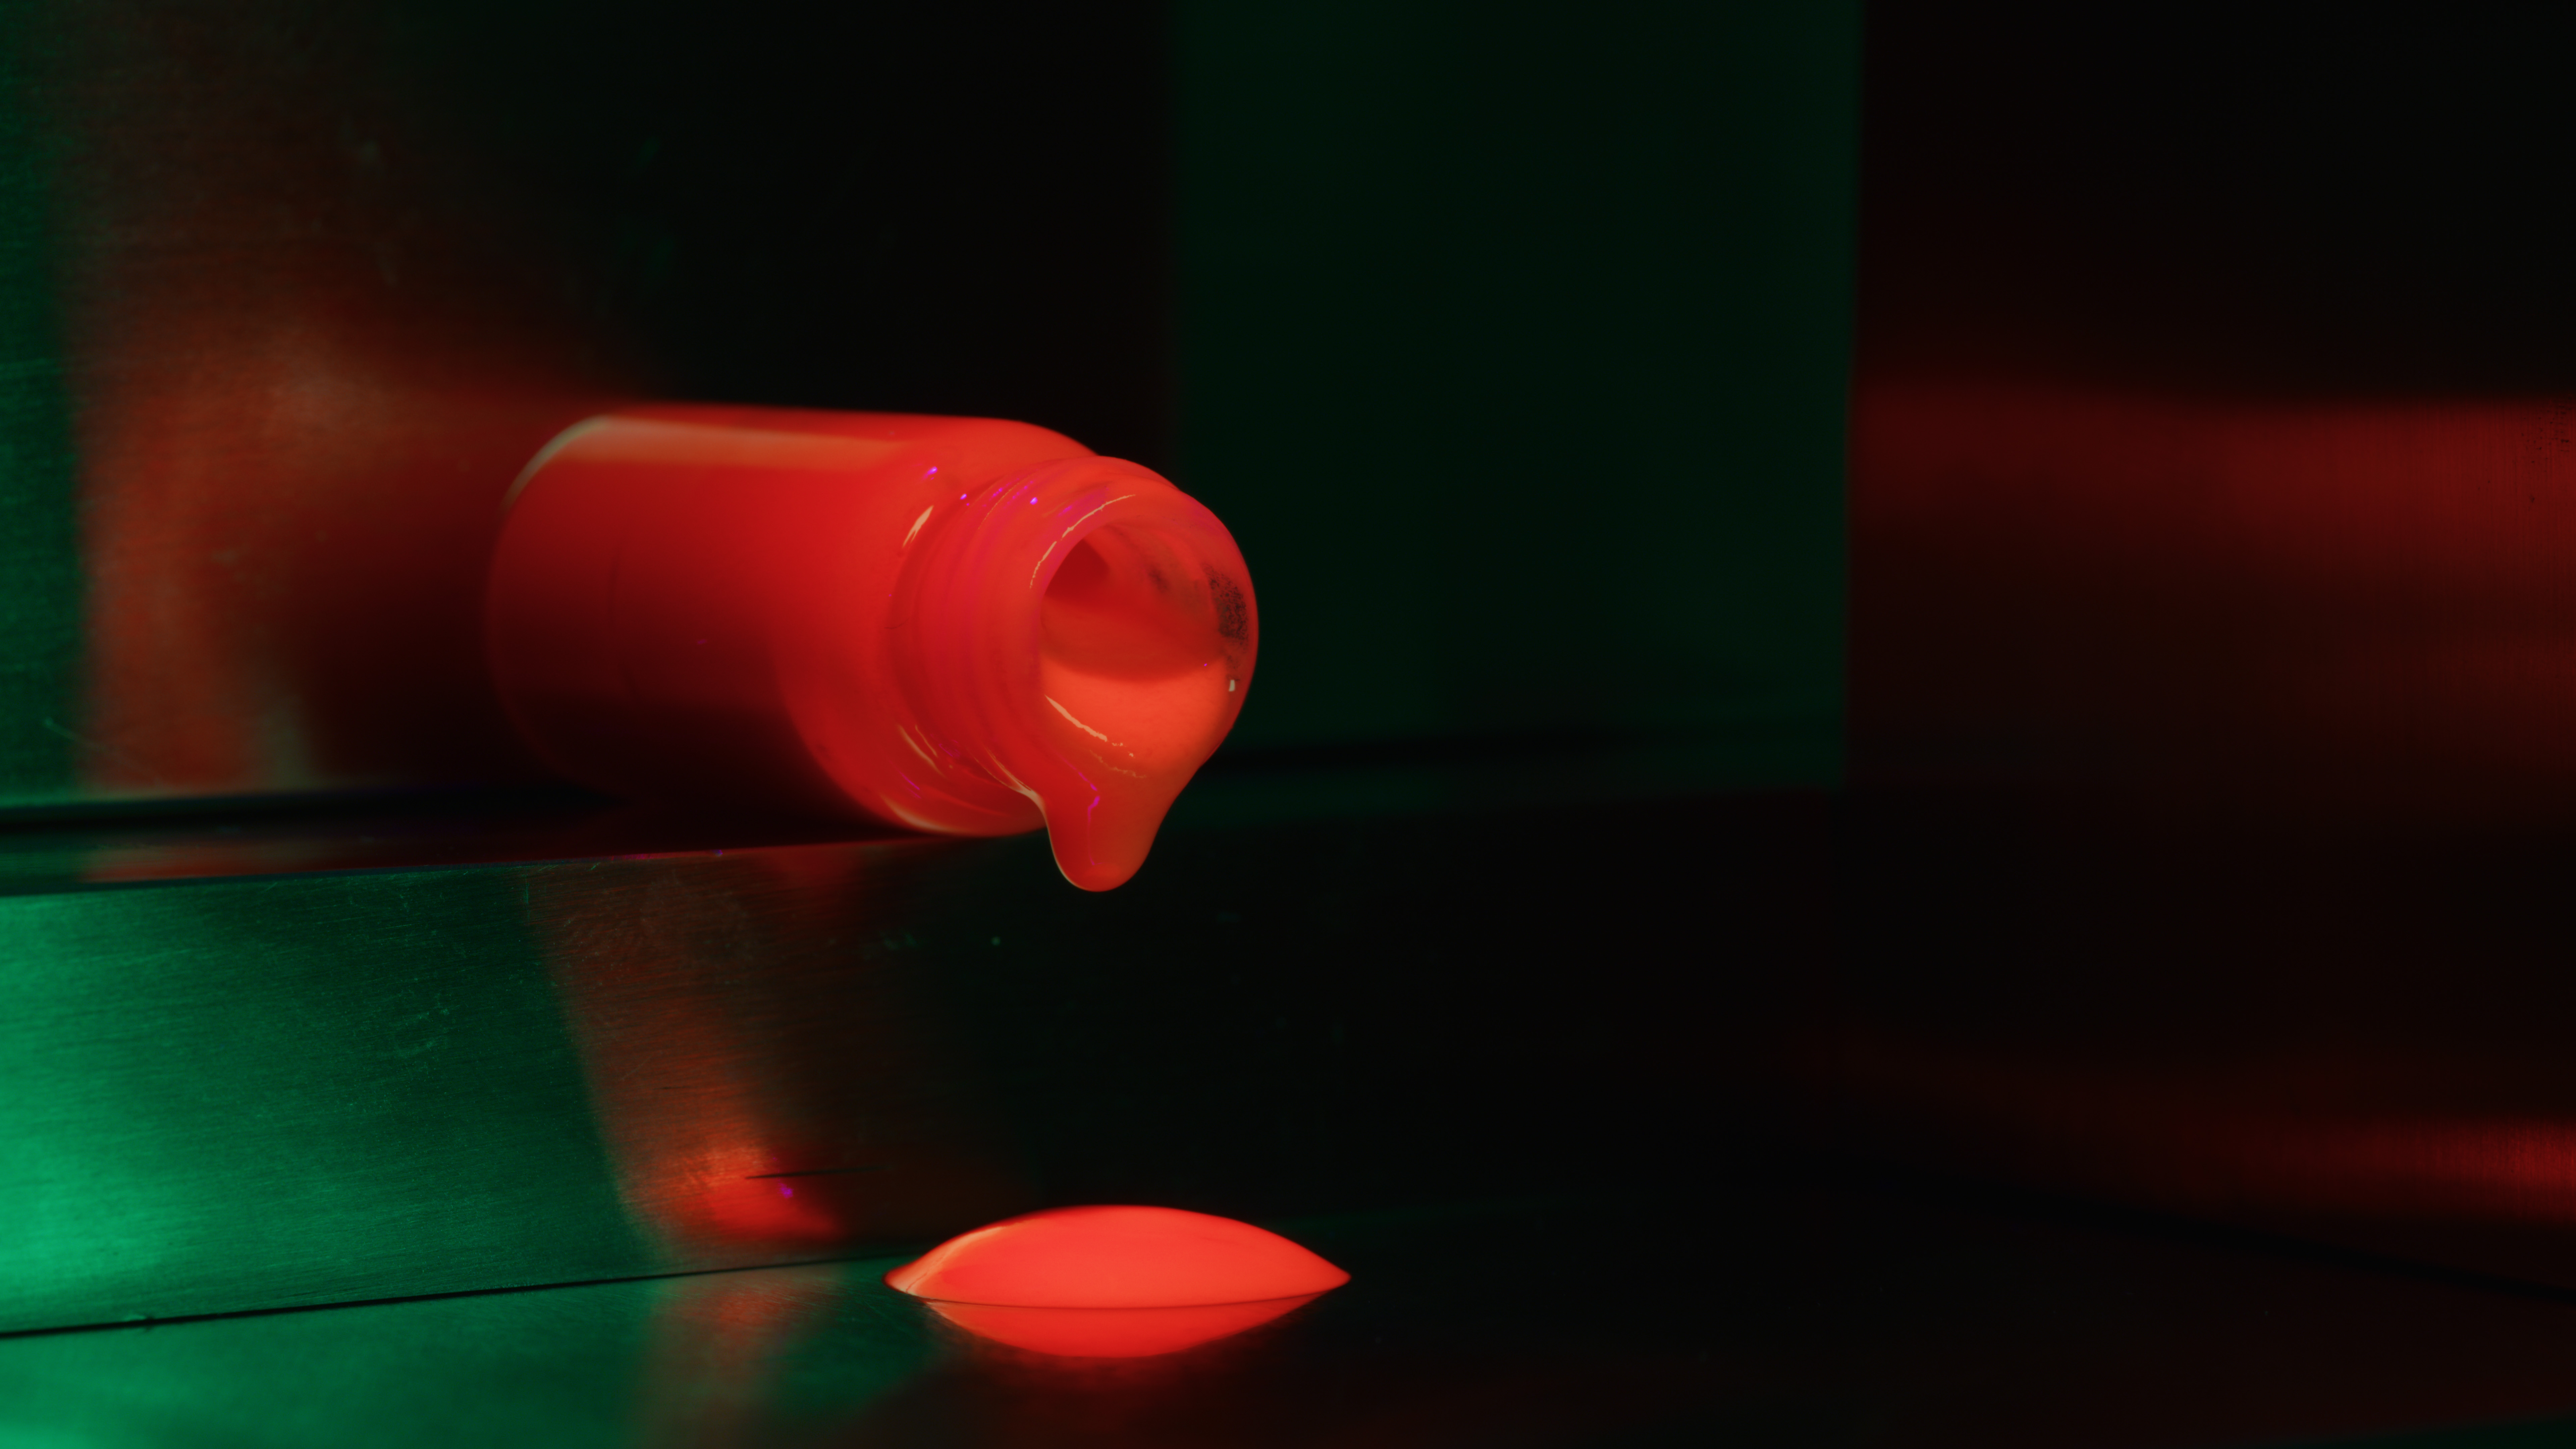
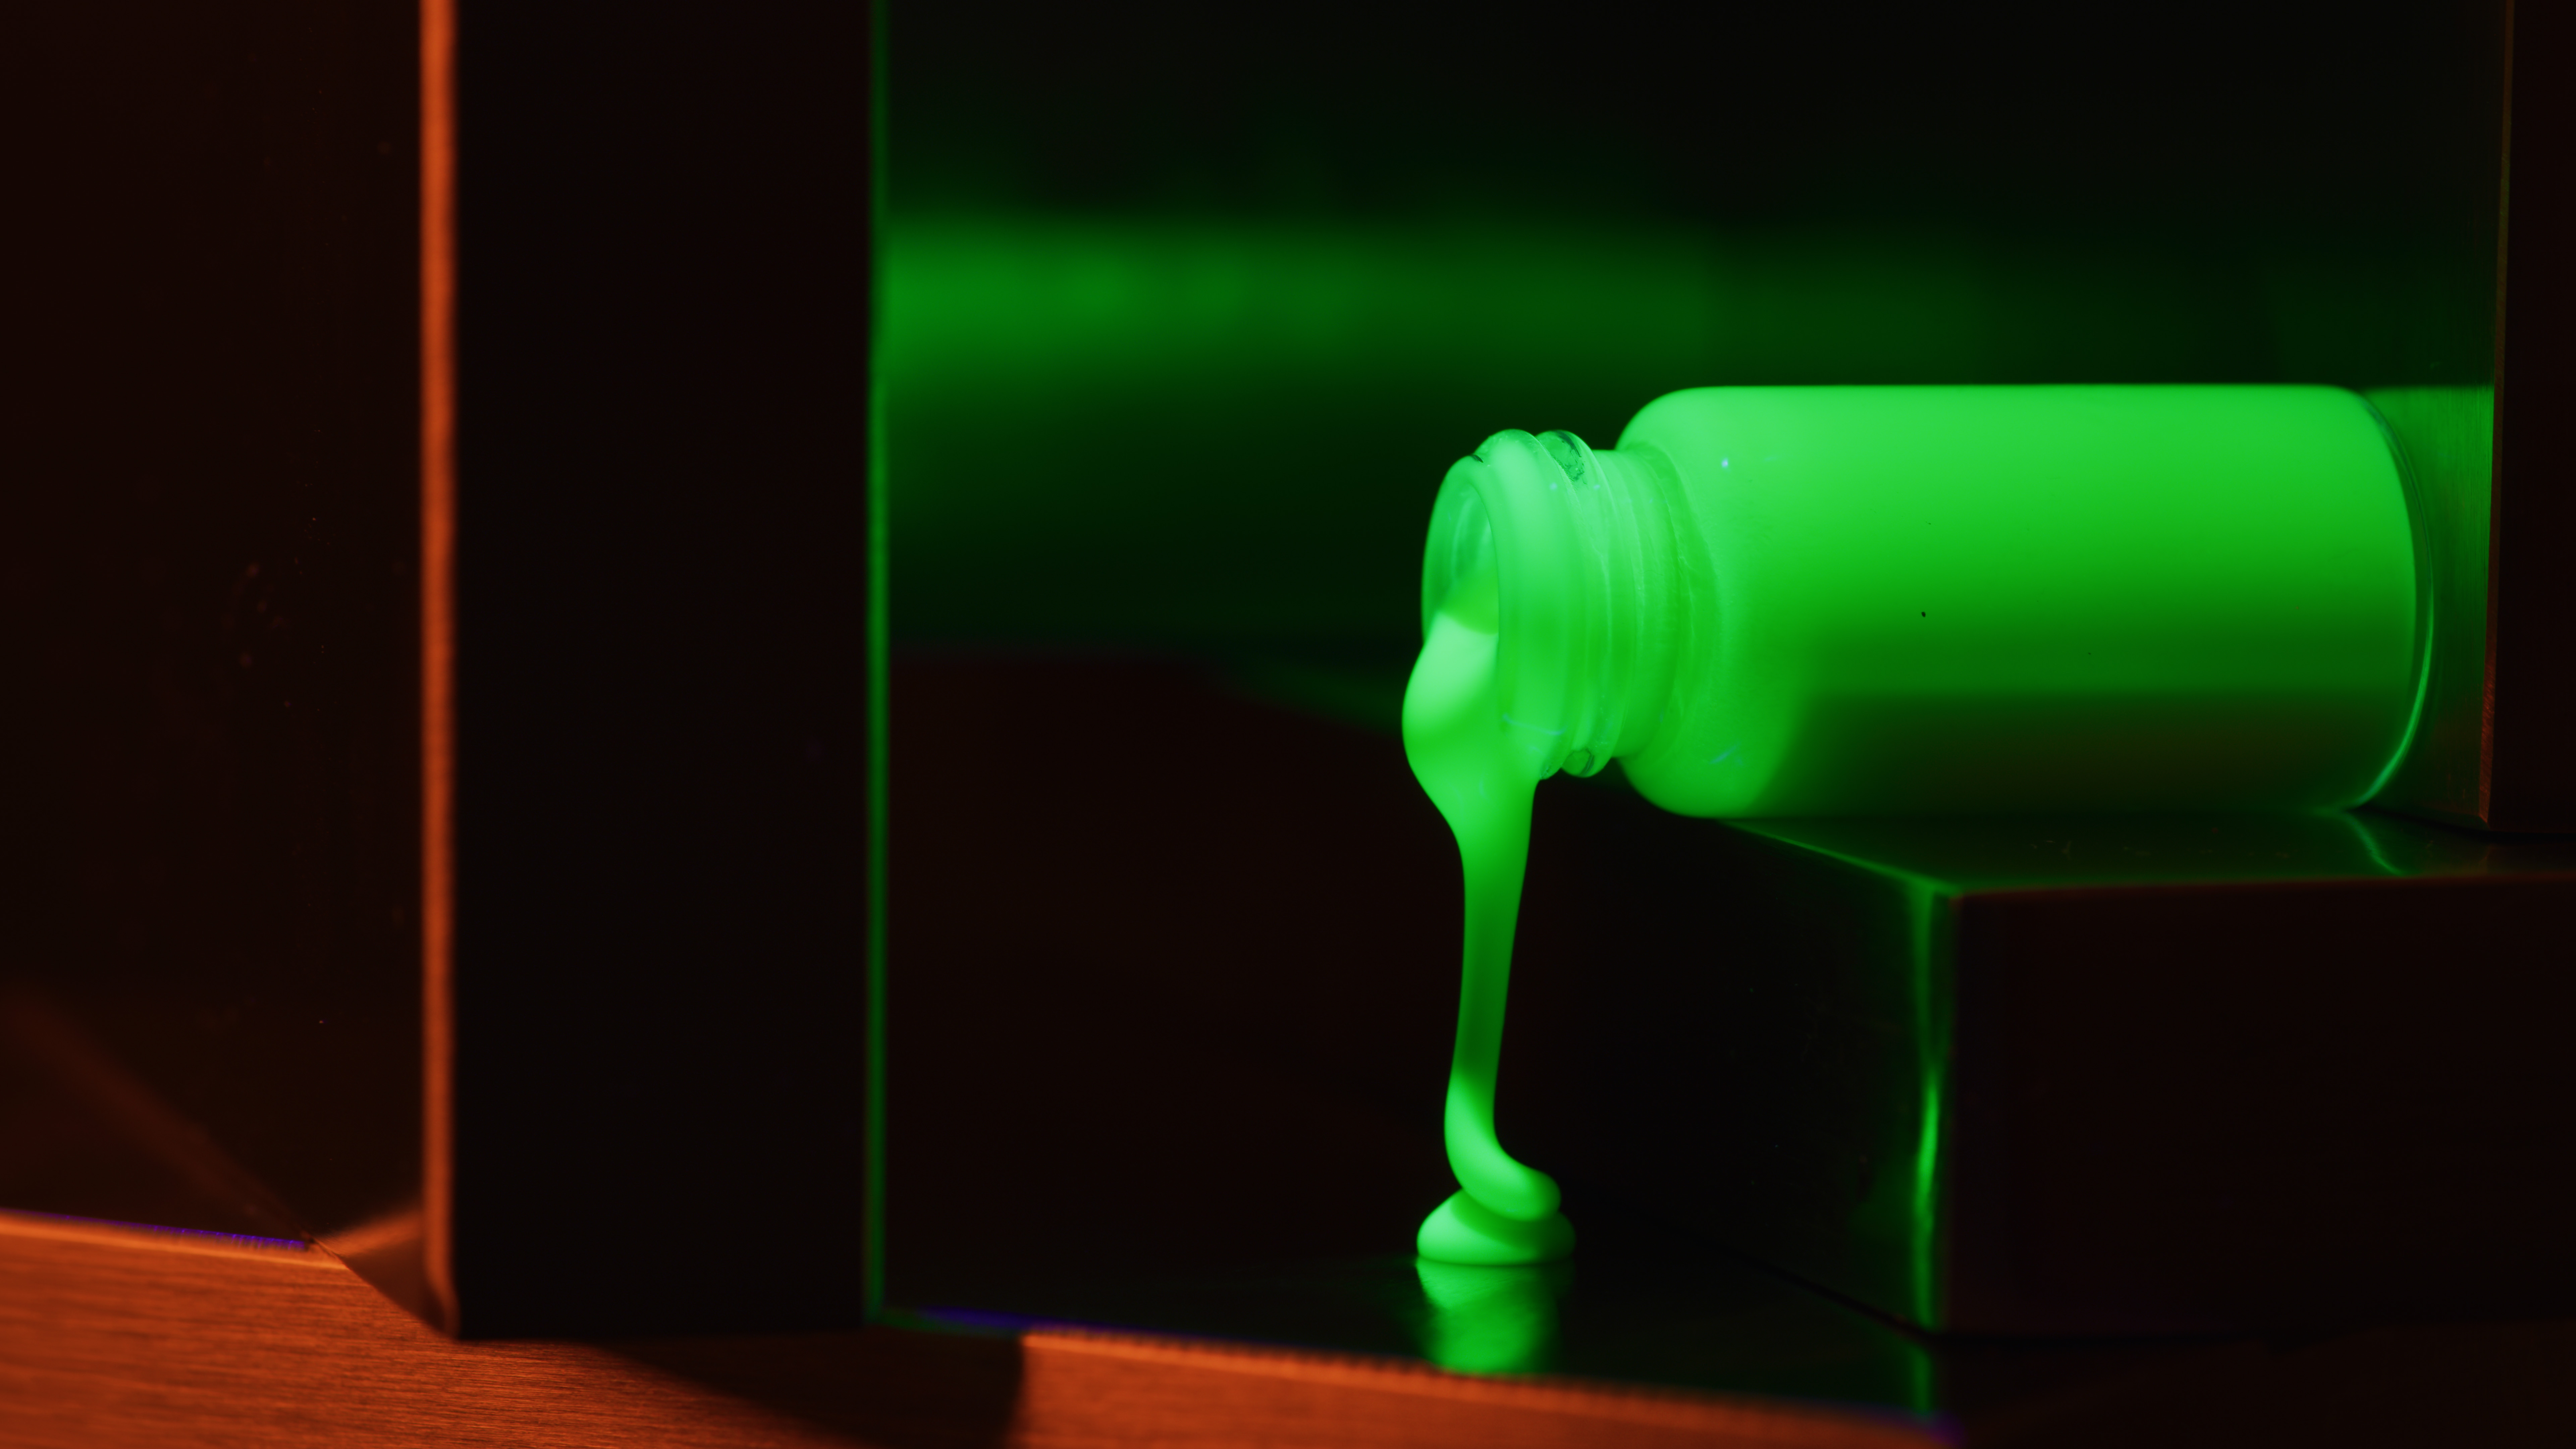
The filming process from there was fairly linear and straight forward. Some days were trickier than others. For instance, the opening shot took two full days to capture due to a rather picky eye for composition. On additional level of difficulty was discovered however in the few shots that explore the fast motion ramping and getting the fluid to perform to the beat. This was a bit of trial and error getting familiar with the viscosities and flow as well as the song. Most shots seen in this piece were between 10-30 takes, and with cleaning, that added a fair amount of work even before you could roll the next take. I did bring my clips into the edit to ensure I really got the shot before truly destroying a complicated setup. Which helped inspired new timings within the shot. Though each shot is fairly short in this piece some were accelerated as much as 1000% to achieve the correct combination of camera movement and fluid movement. Most takes were typically in the 18-112 second range though there are a few in there that are indeed just realtime.

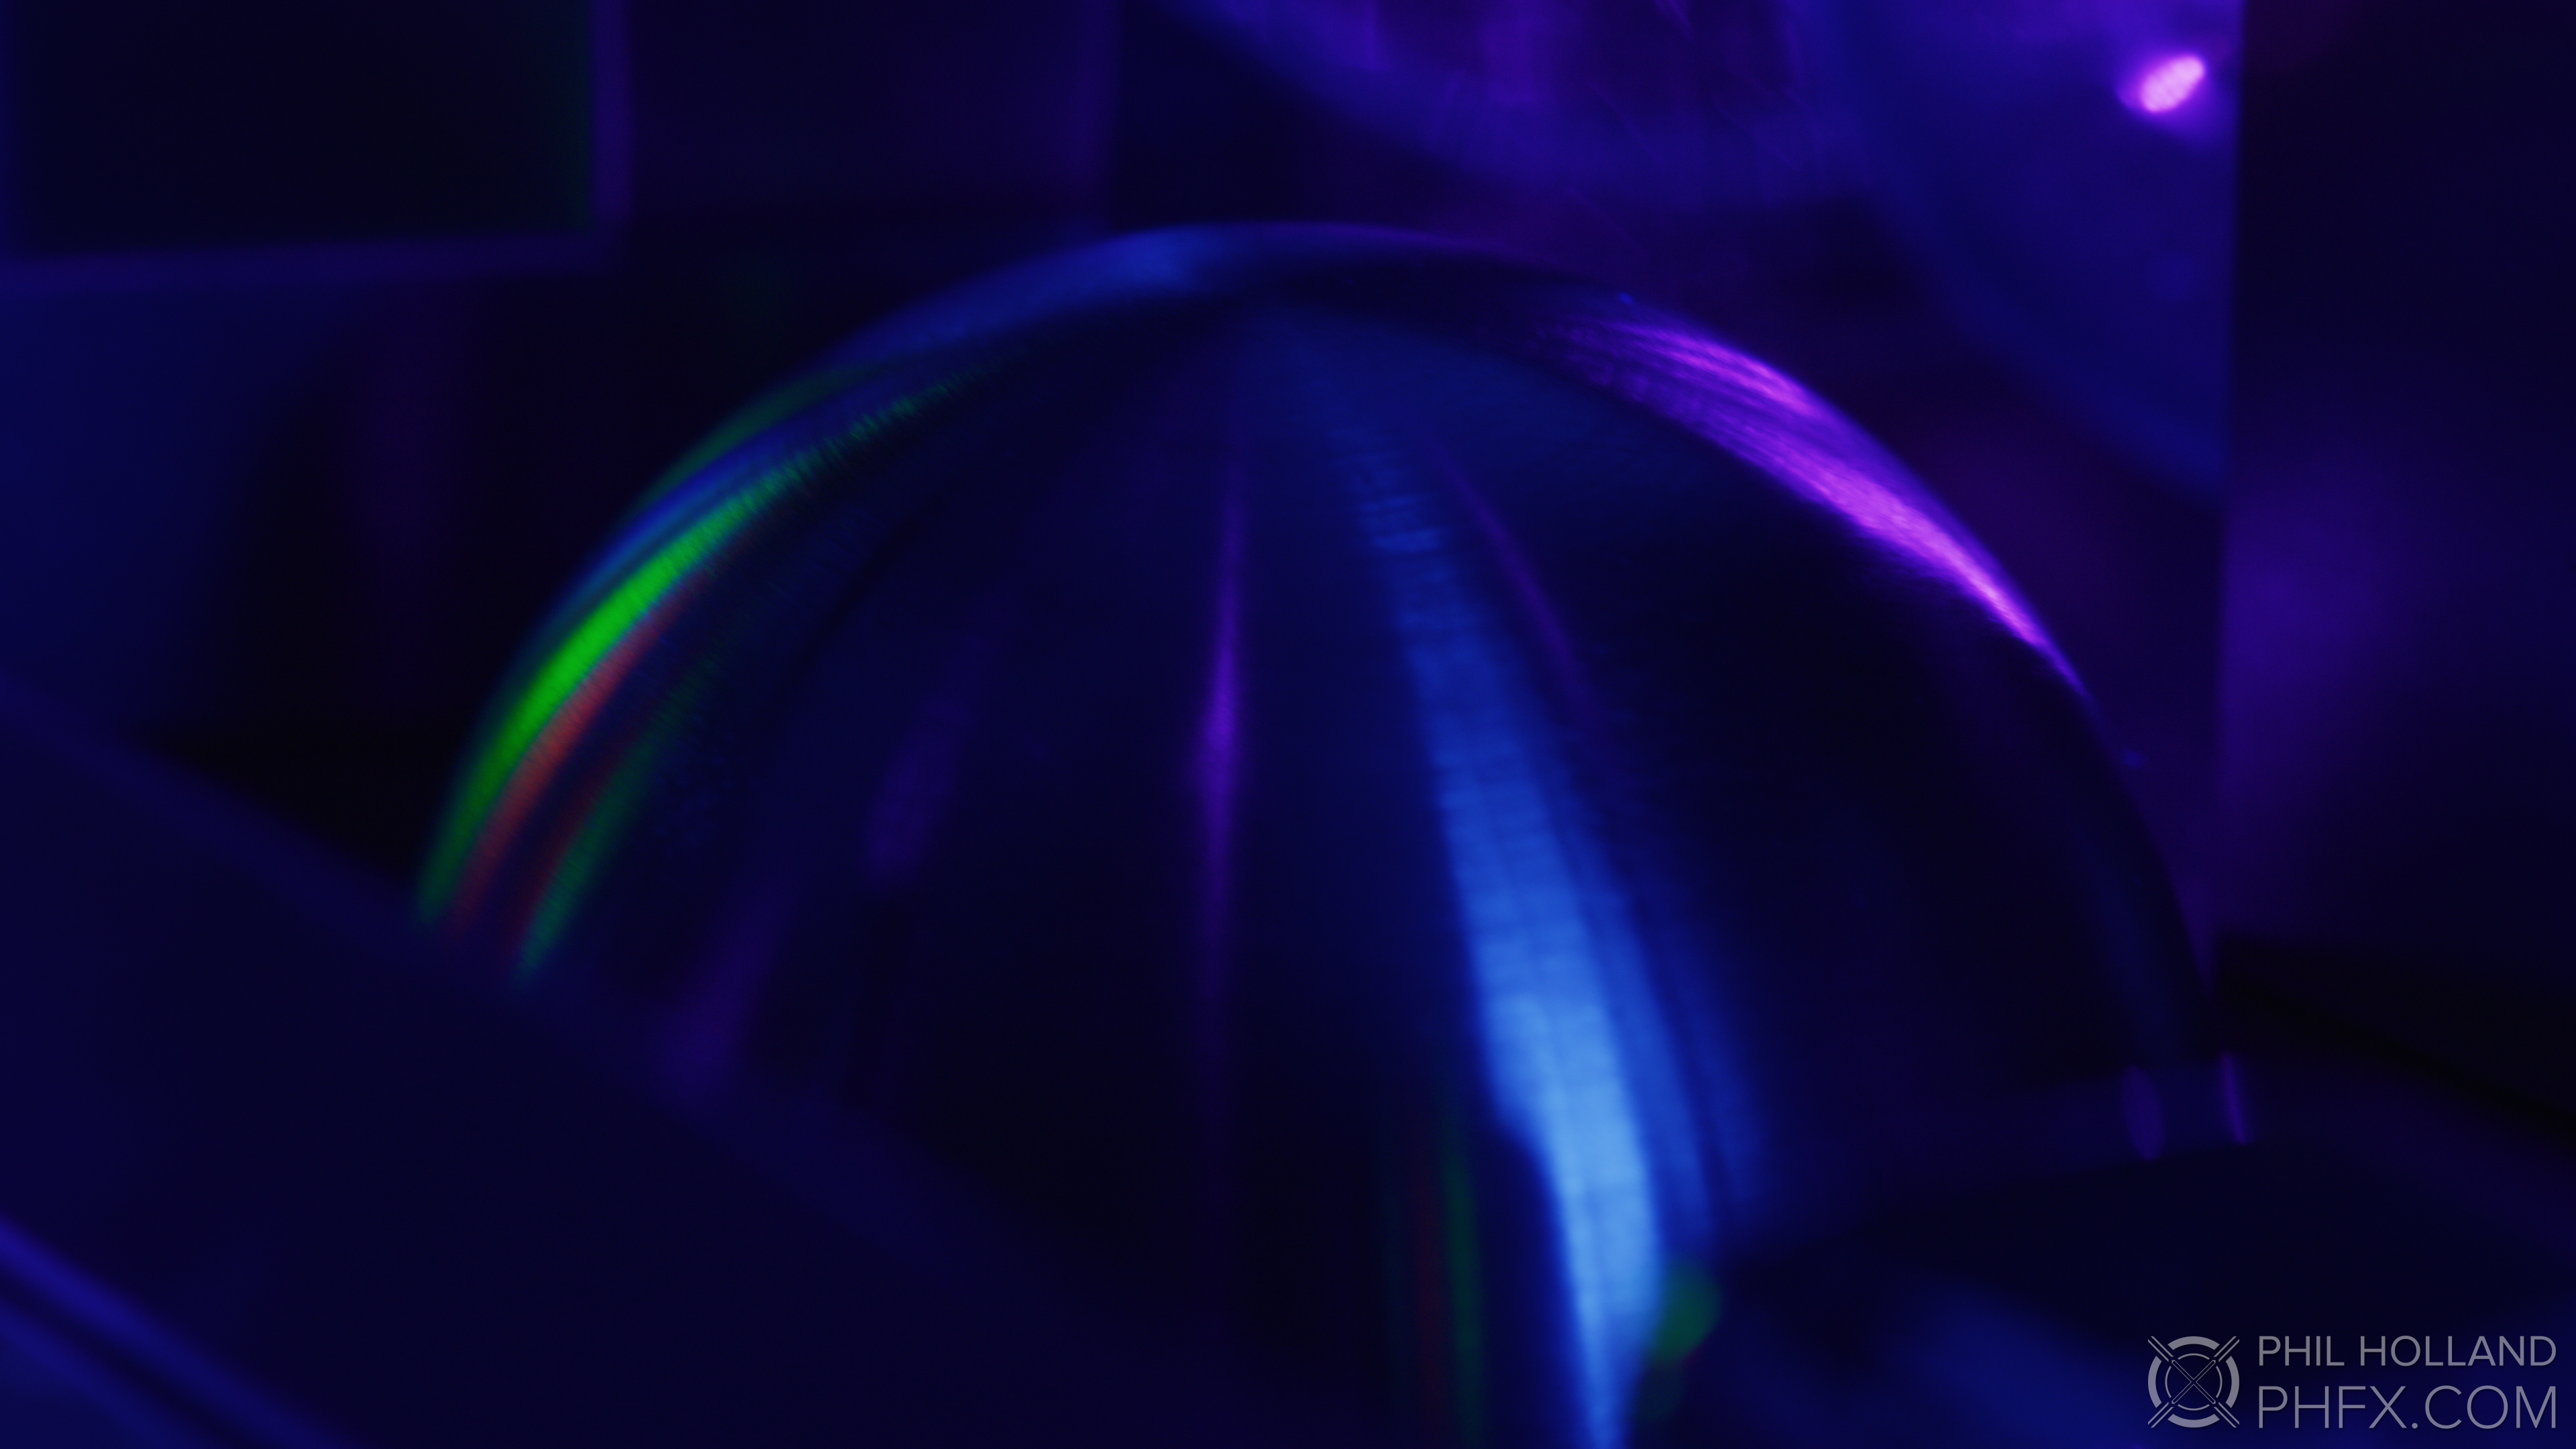
Some shots were tricky to time the flow, drip, and lighting to the beat
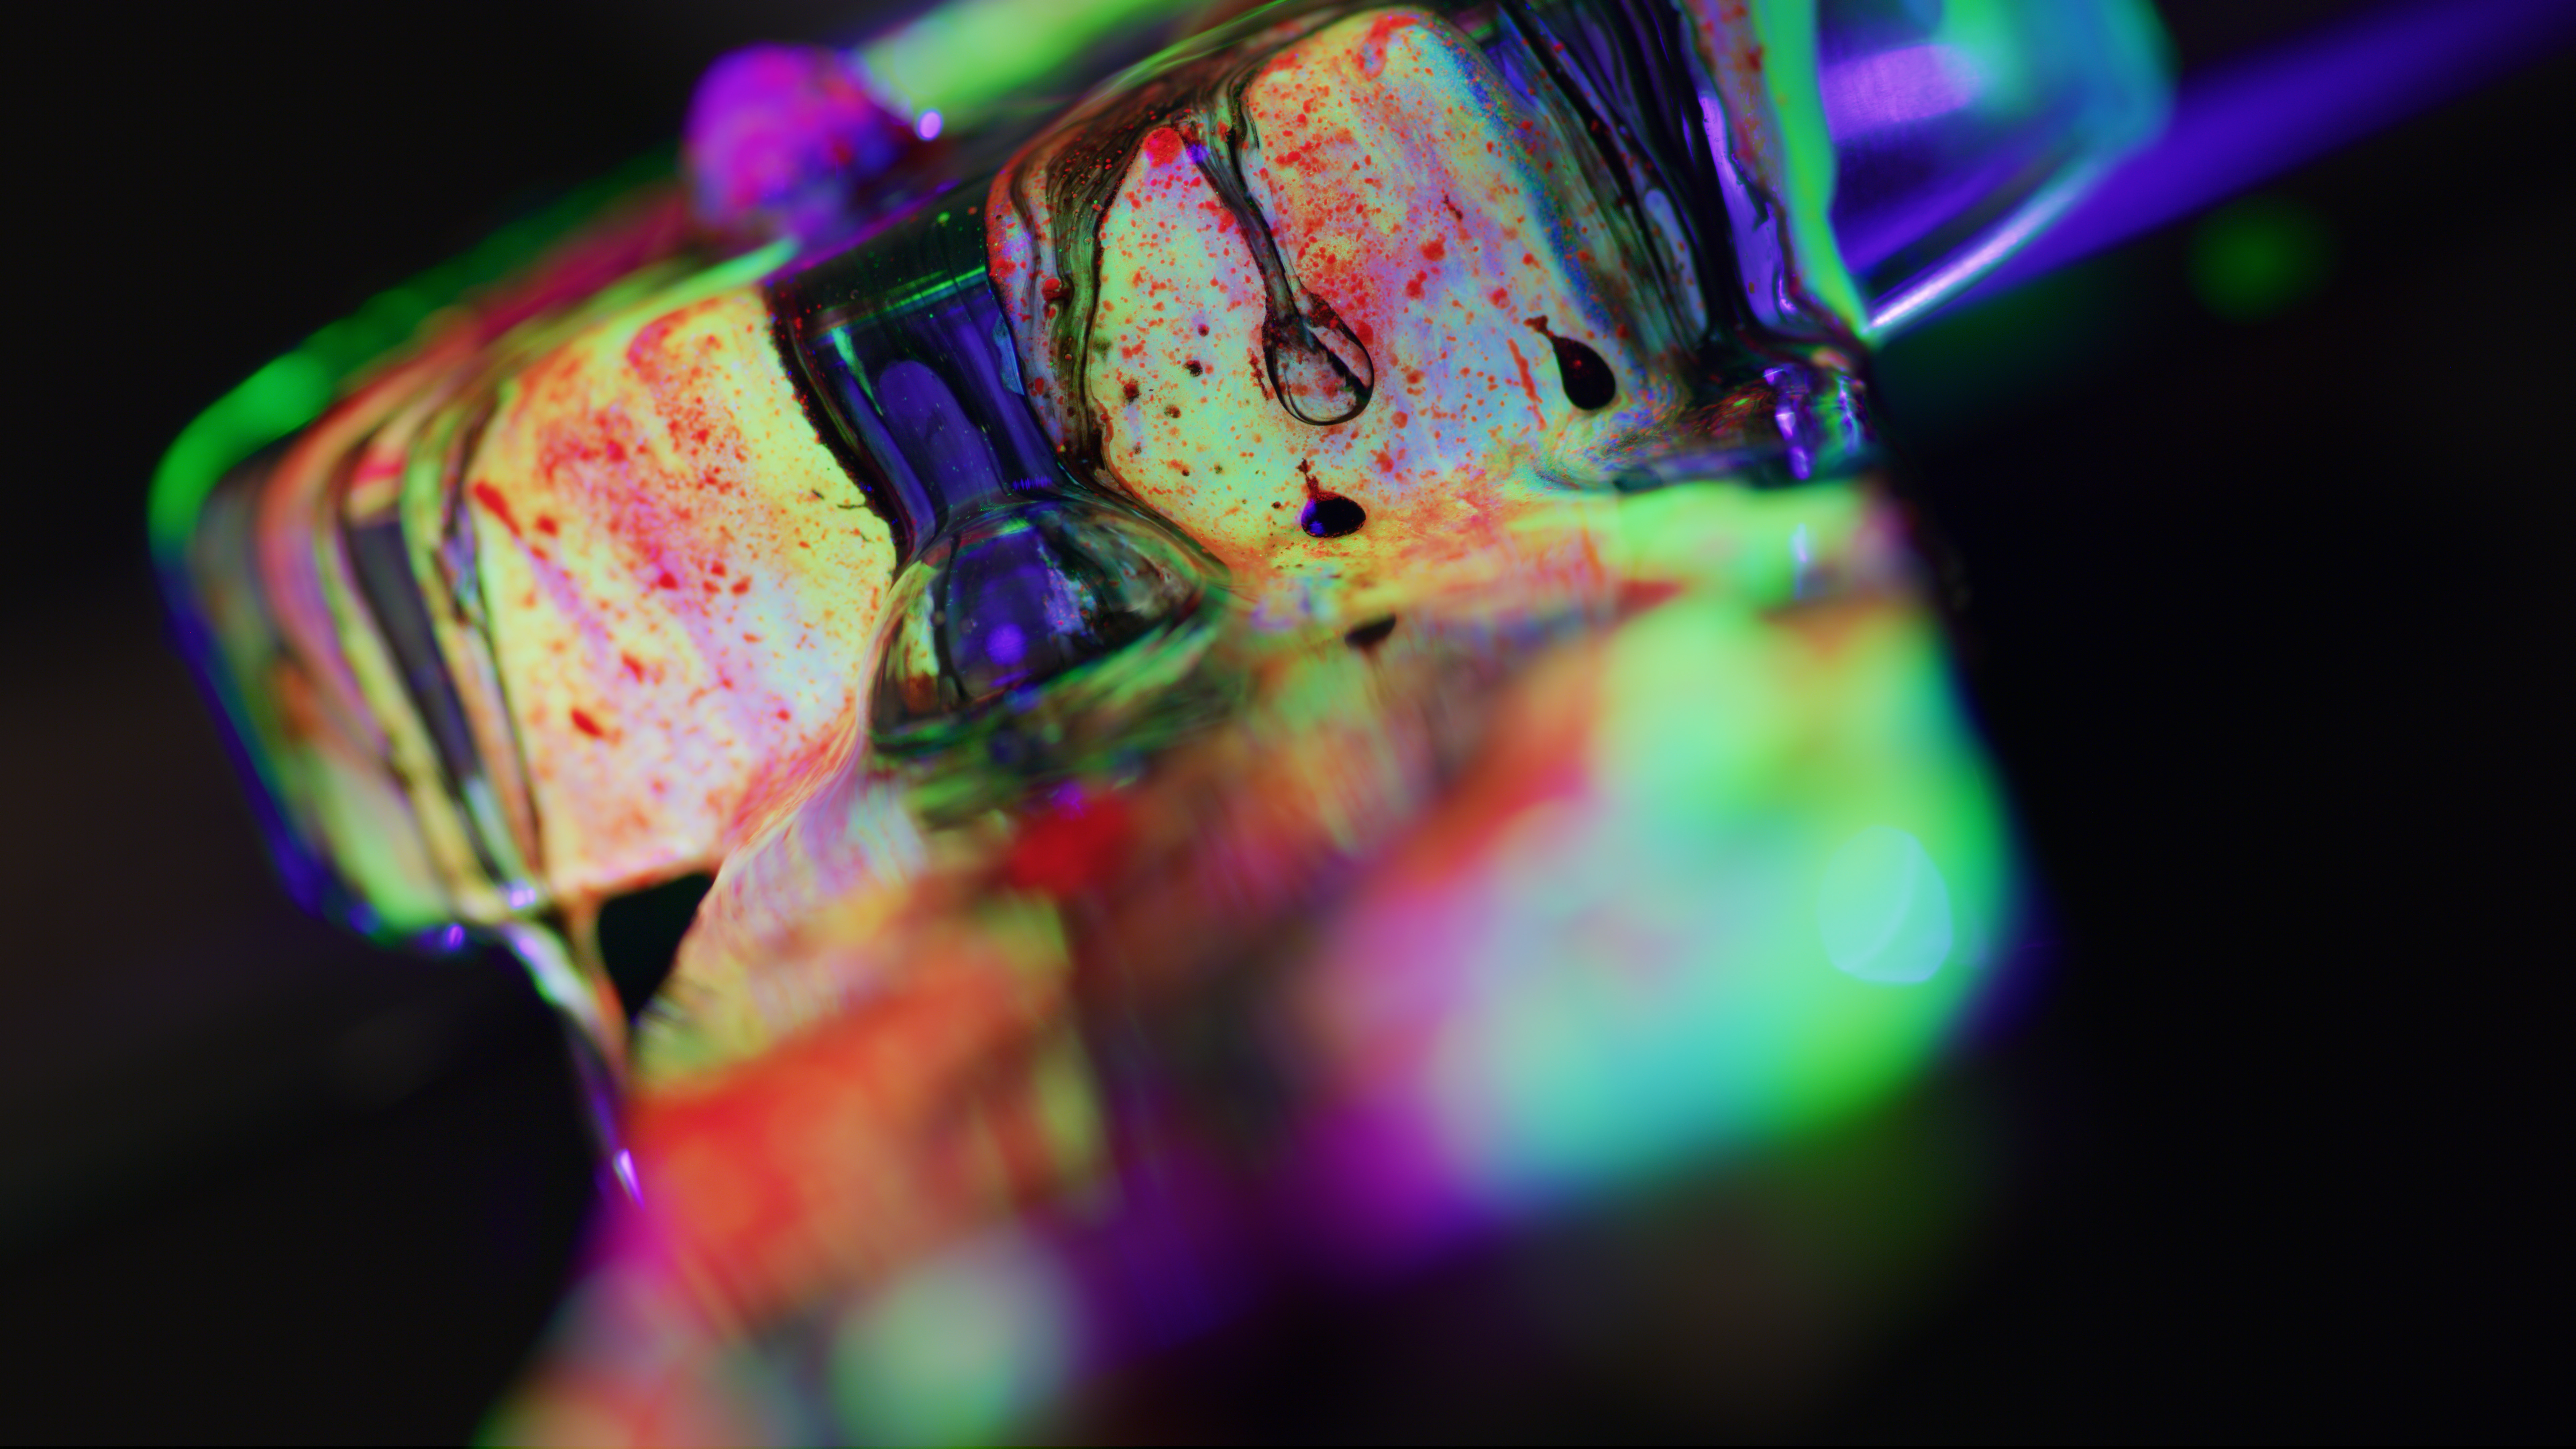
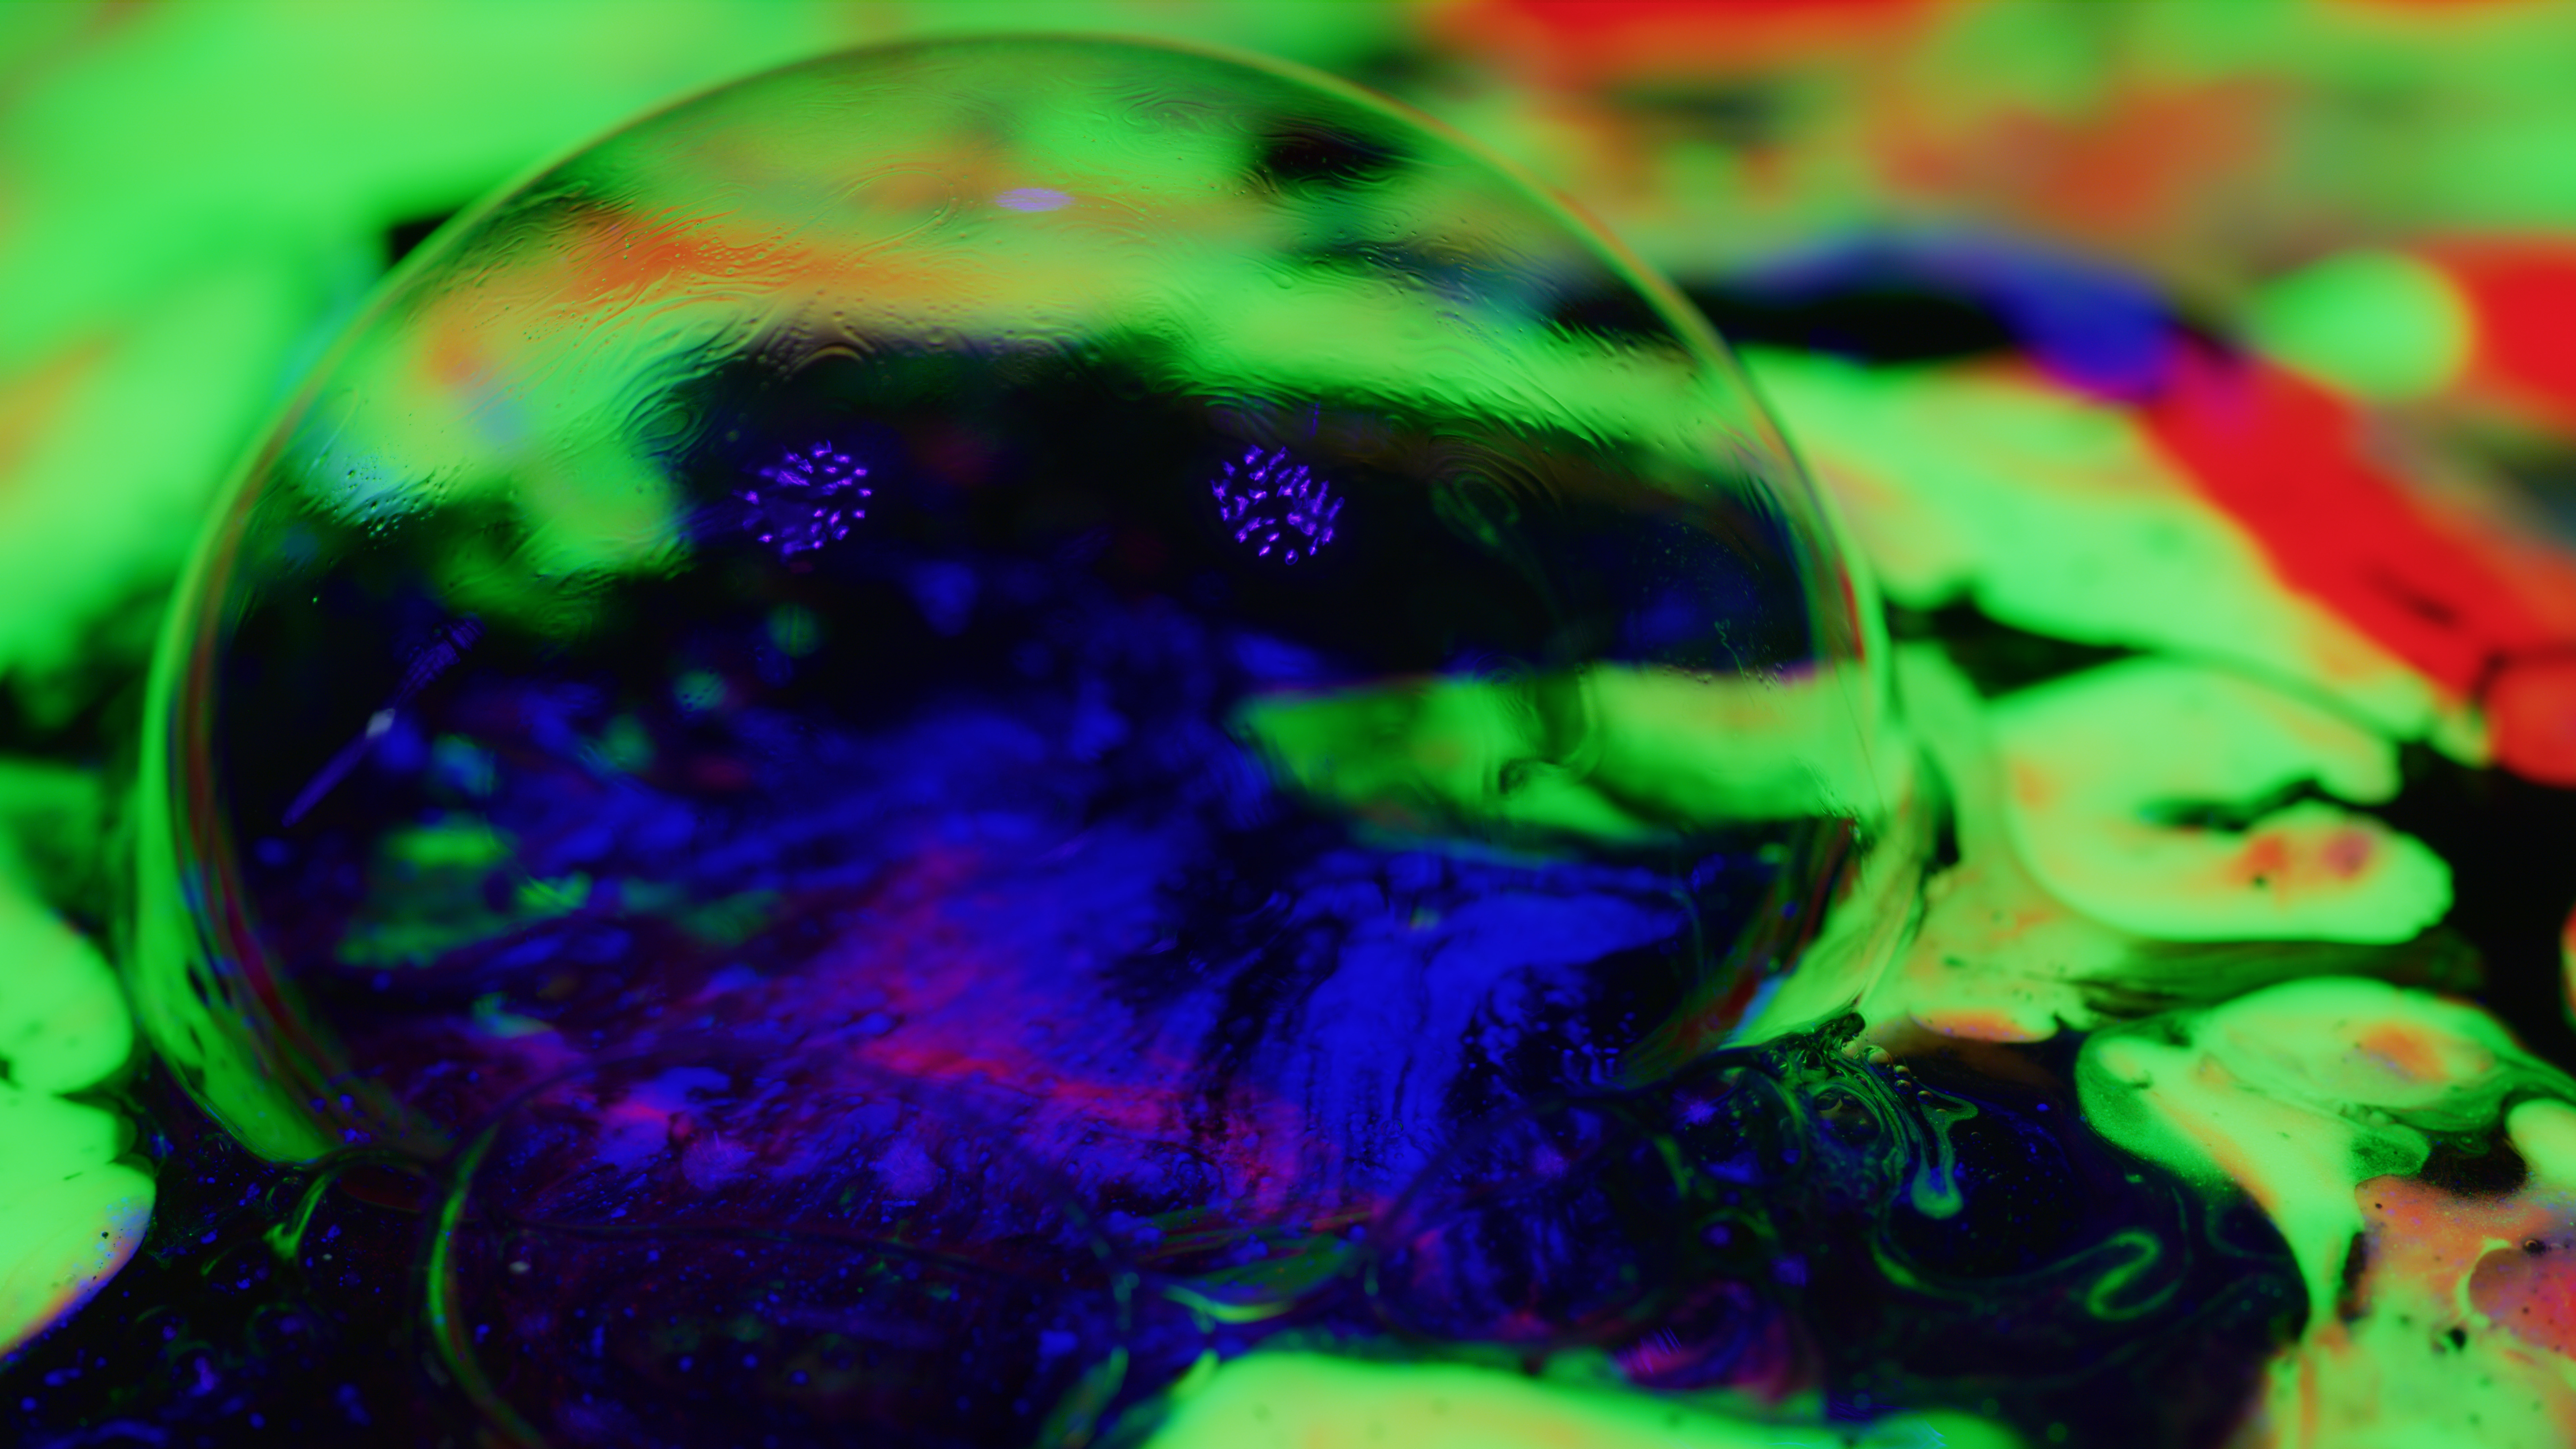
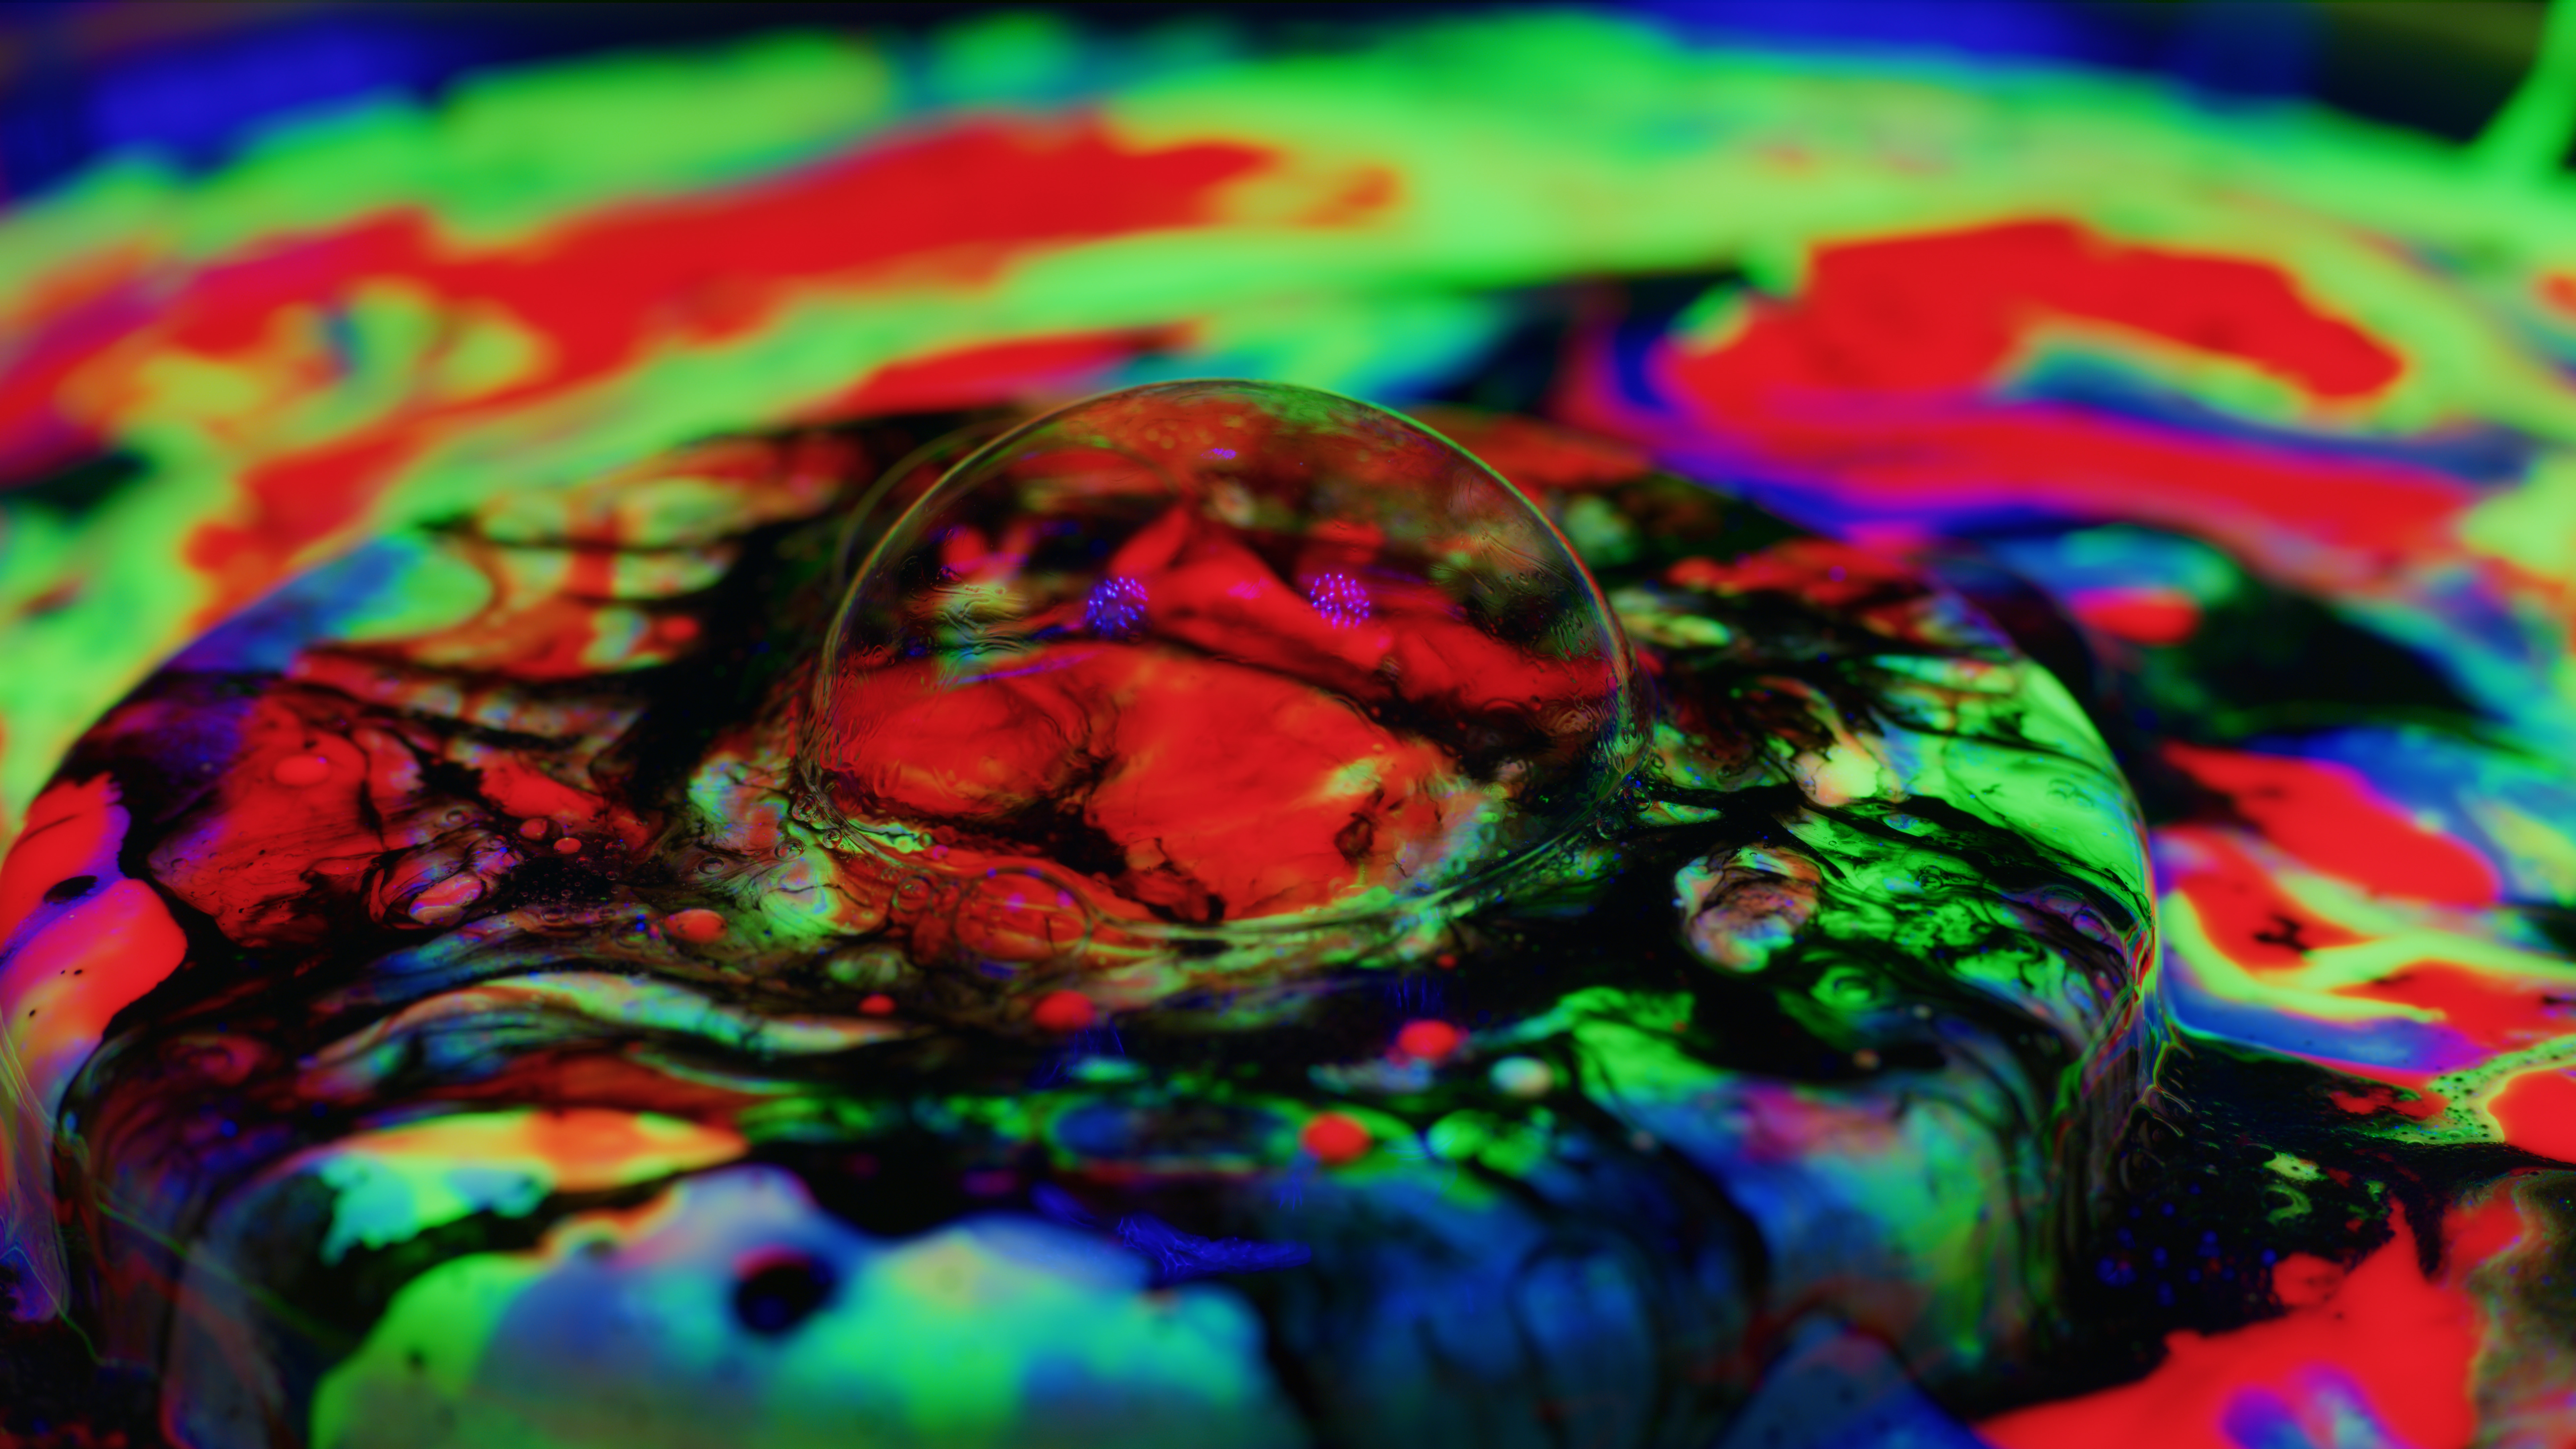
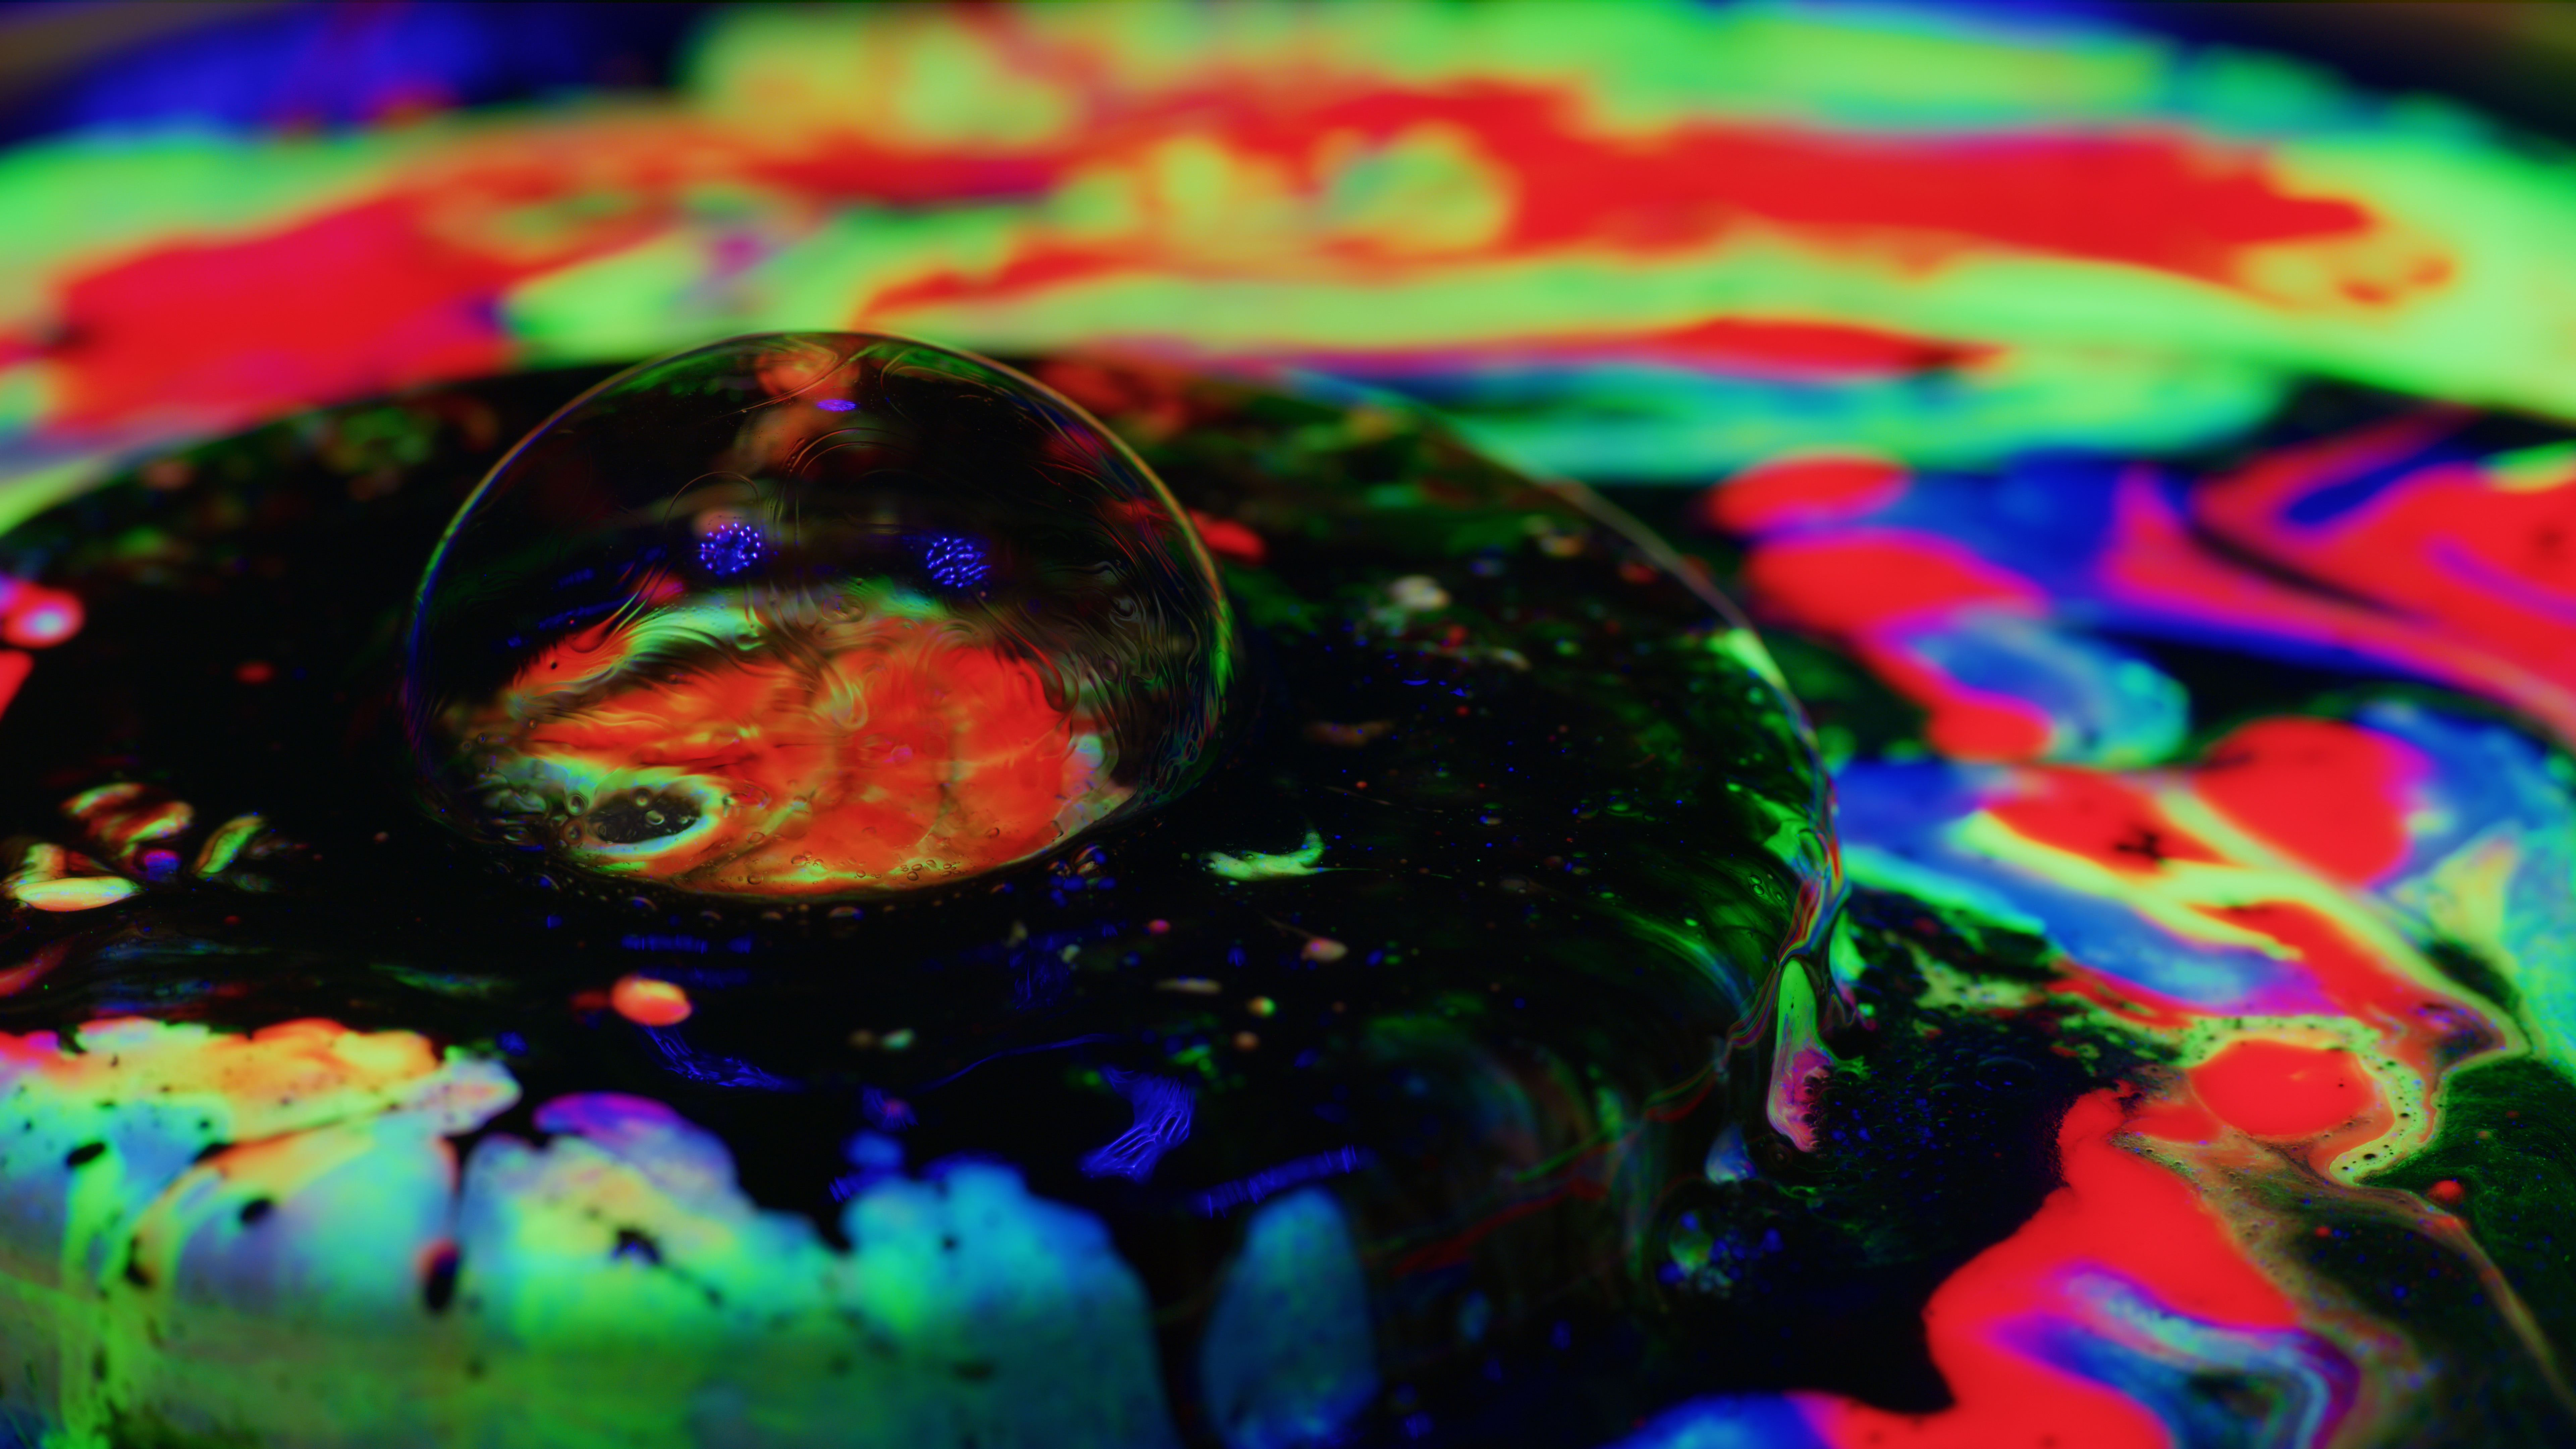
Filming the bubble sequences was a bit tricky as there was a level of chaos combining the motion control equipment yet again with a fairly unpredictable subject. I ended up actually making several mixtures of bubble making fluid and making a controlled air gun to blown them in place. The reason for the different bubble fluids was to provide a variety of striations that would move of the surface of the bubble to reflect and refract the light surrounding them. This was all occurring in a small lake of Quantum Fluid flowing out of a disc like a volcano essentially with a pigmented ink slowly taking over and darkening the scene. The last bubble mixture itself I actually suspended black pigment within the fluid and you'll see those little dots on the surface of the bubble in 4K and 8K.
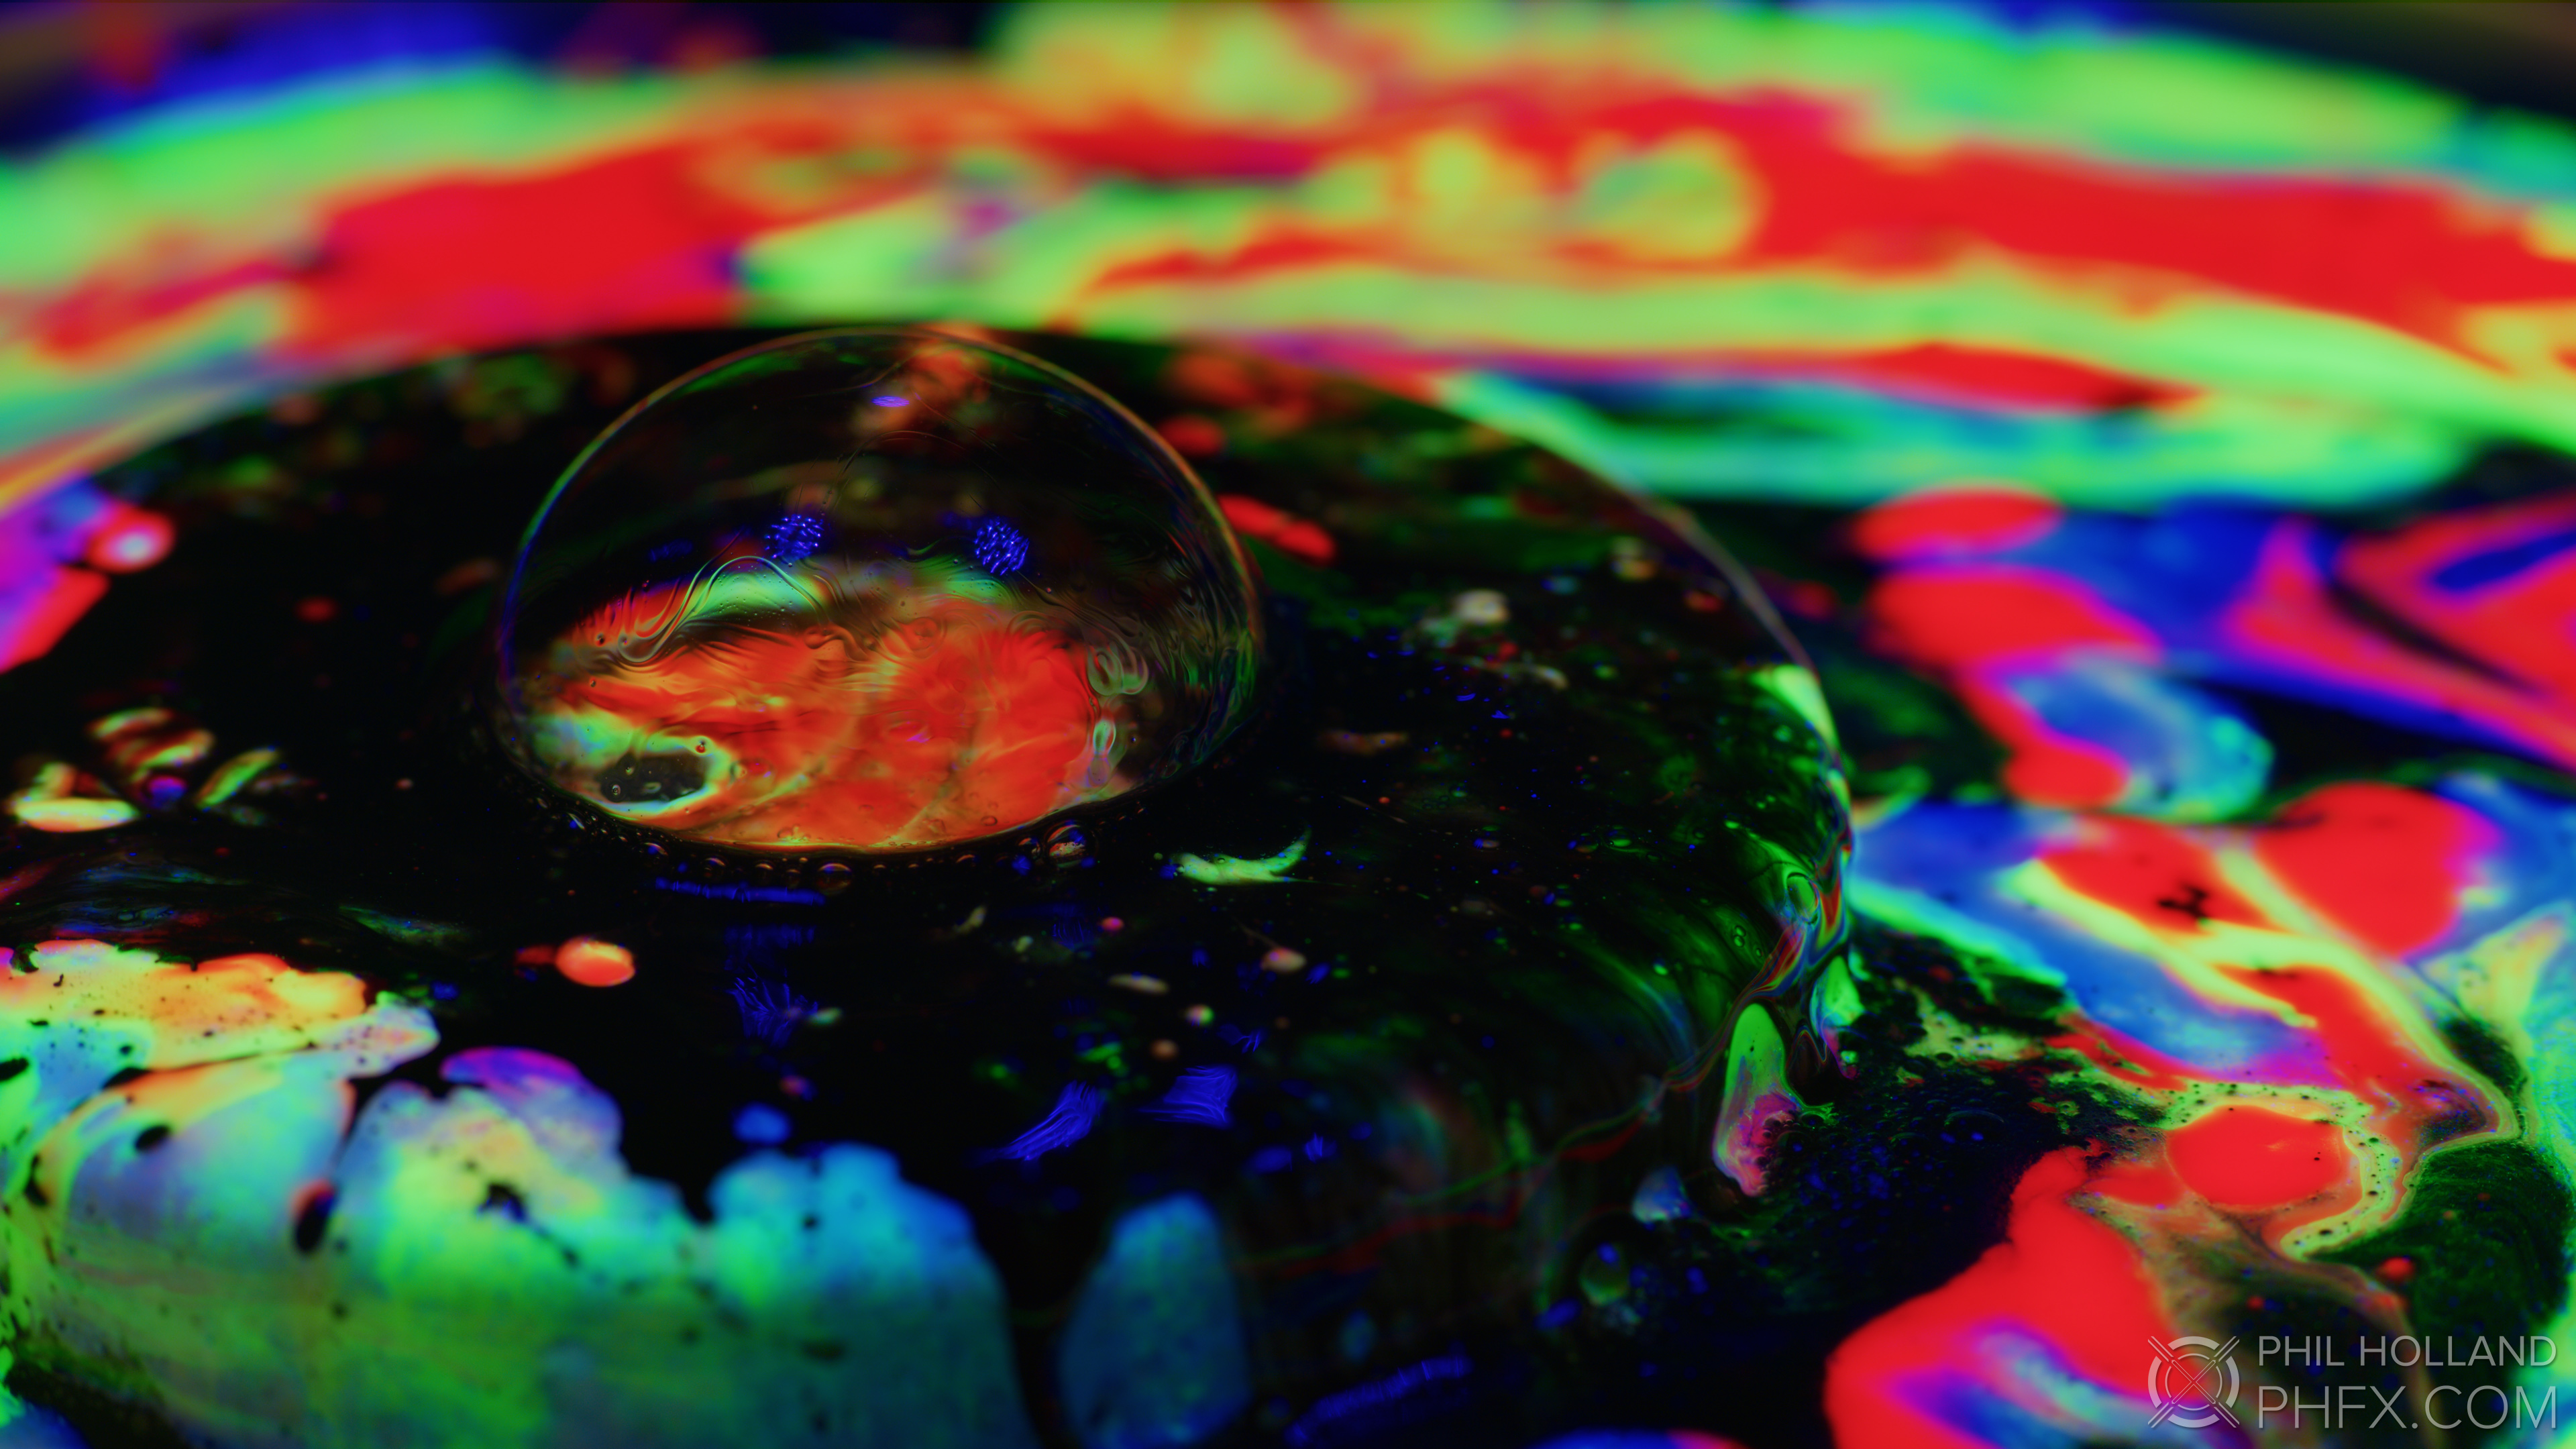
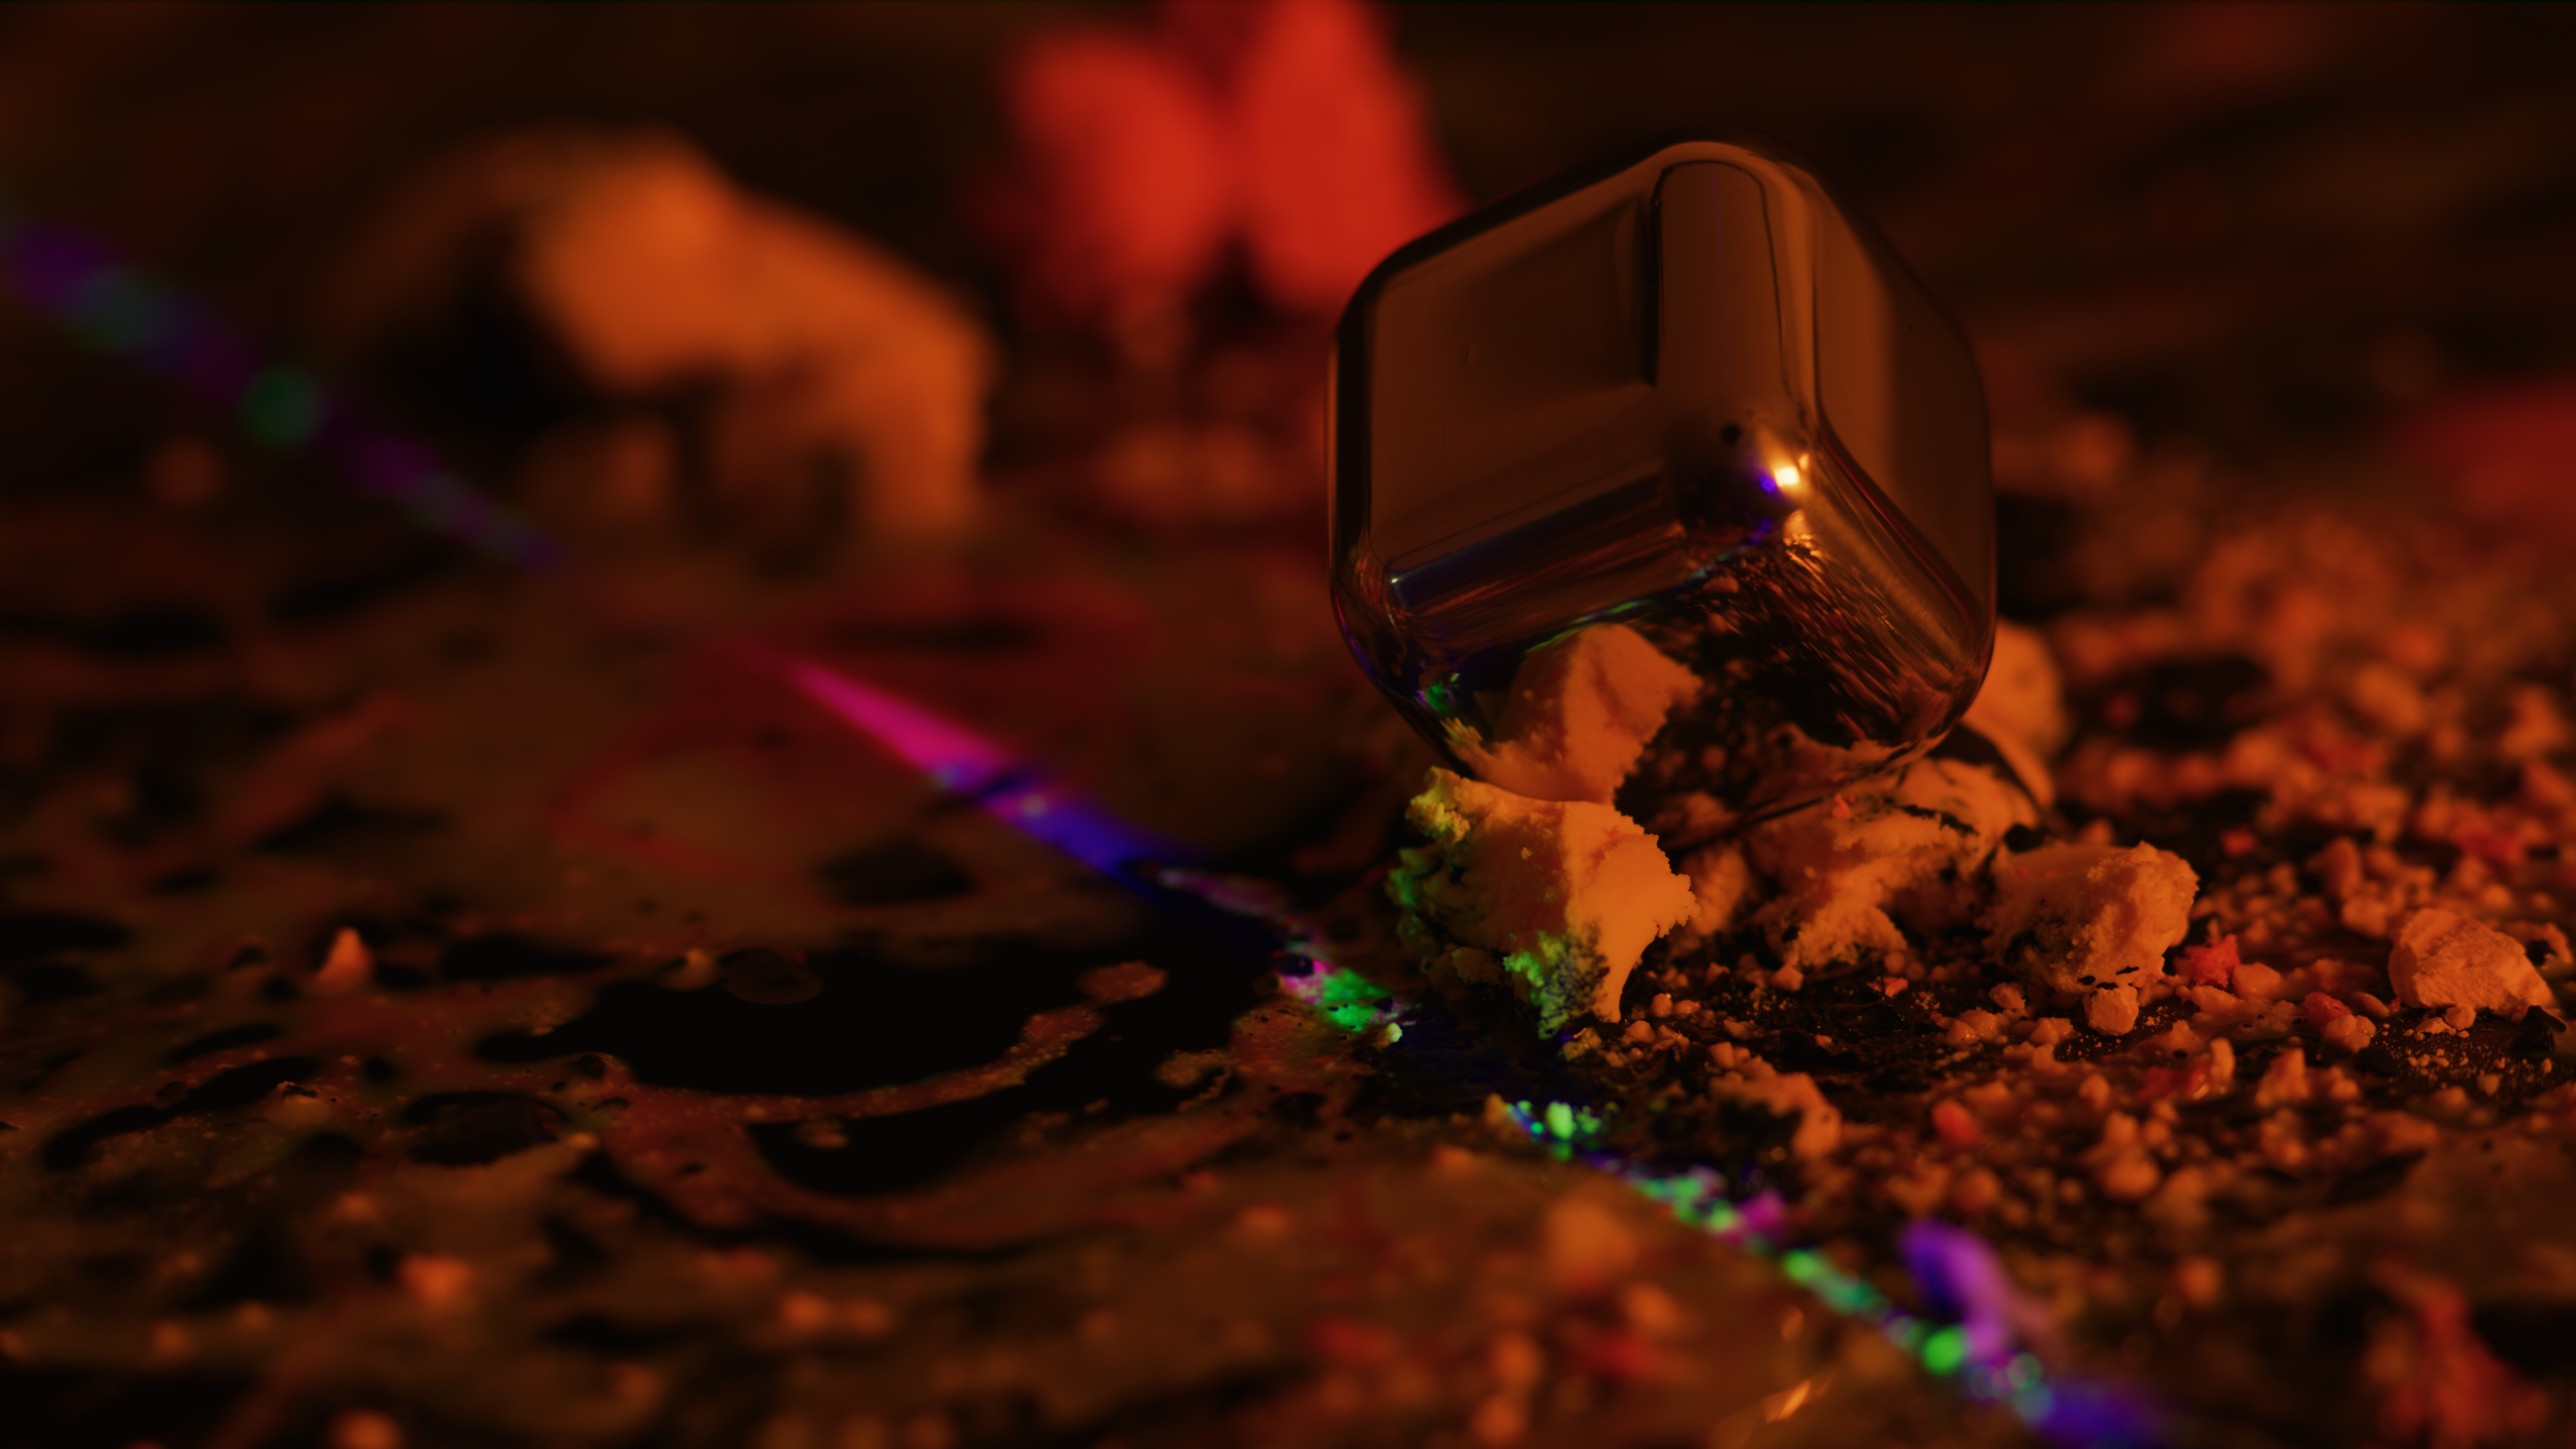
One of several bubble textures explored
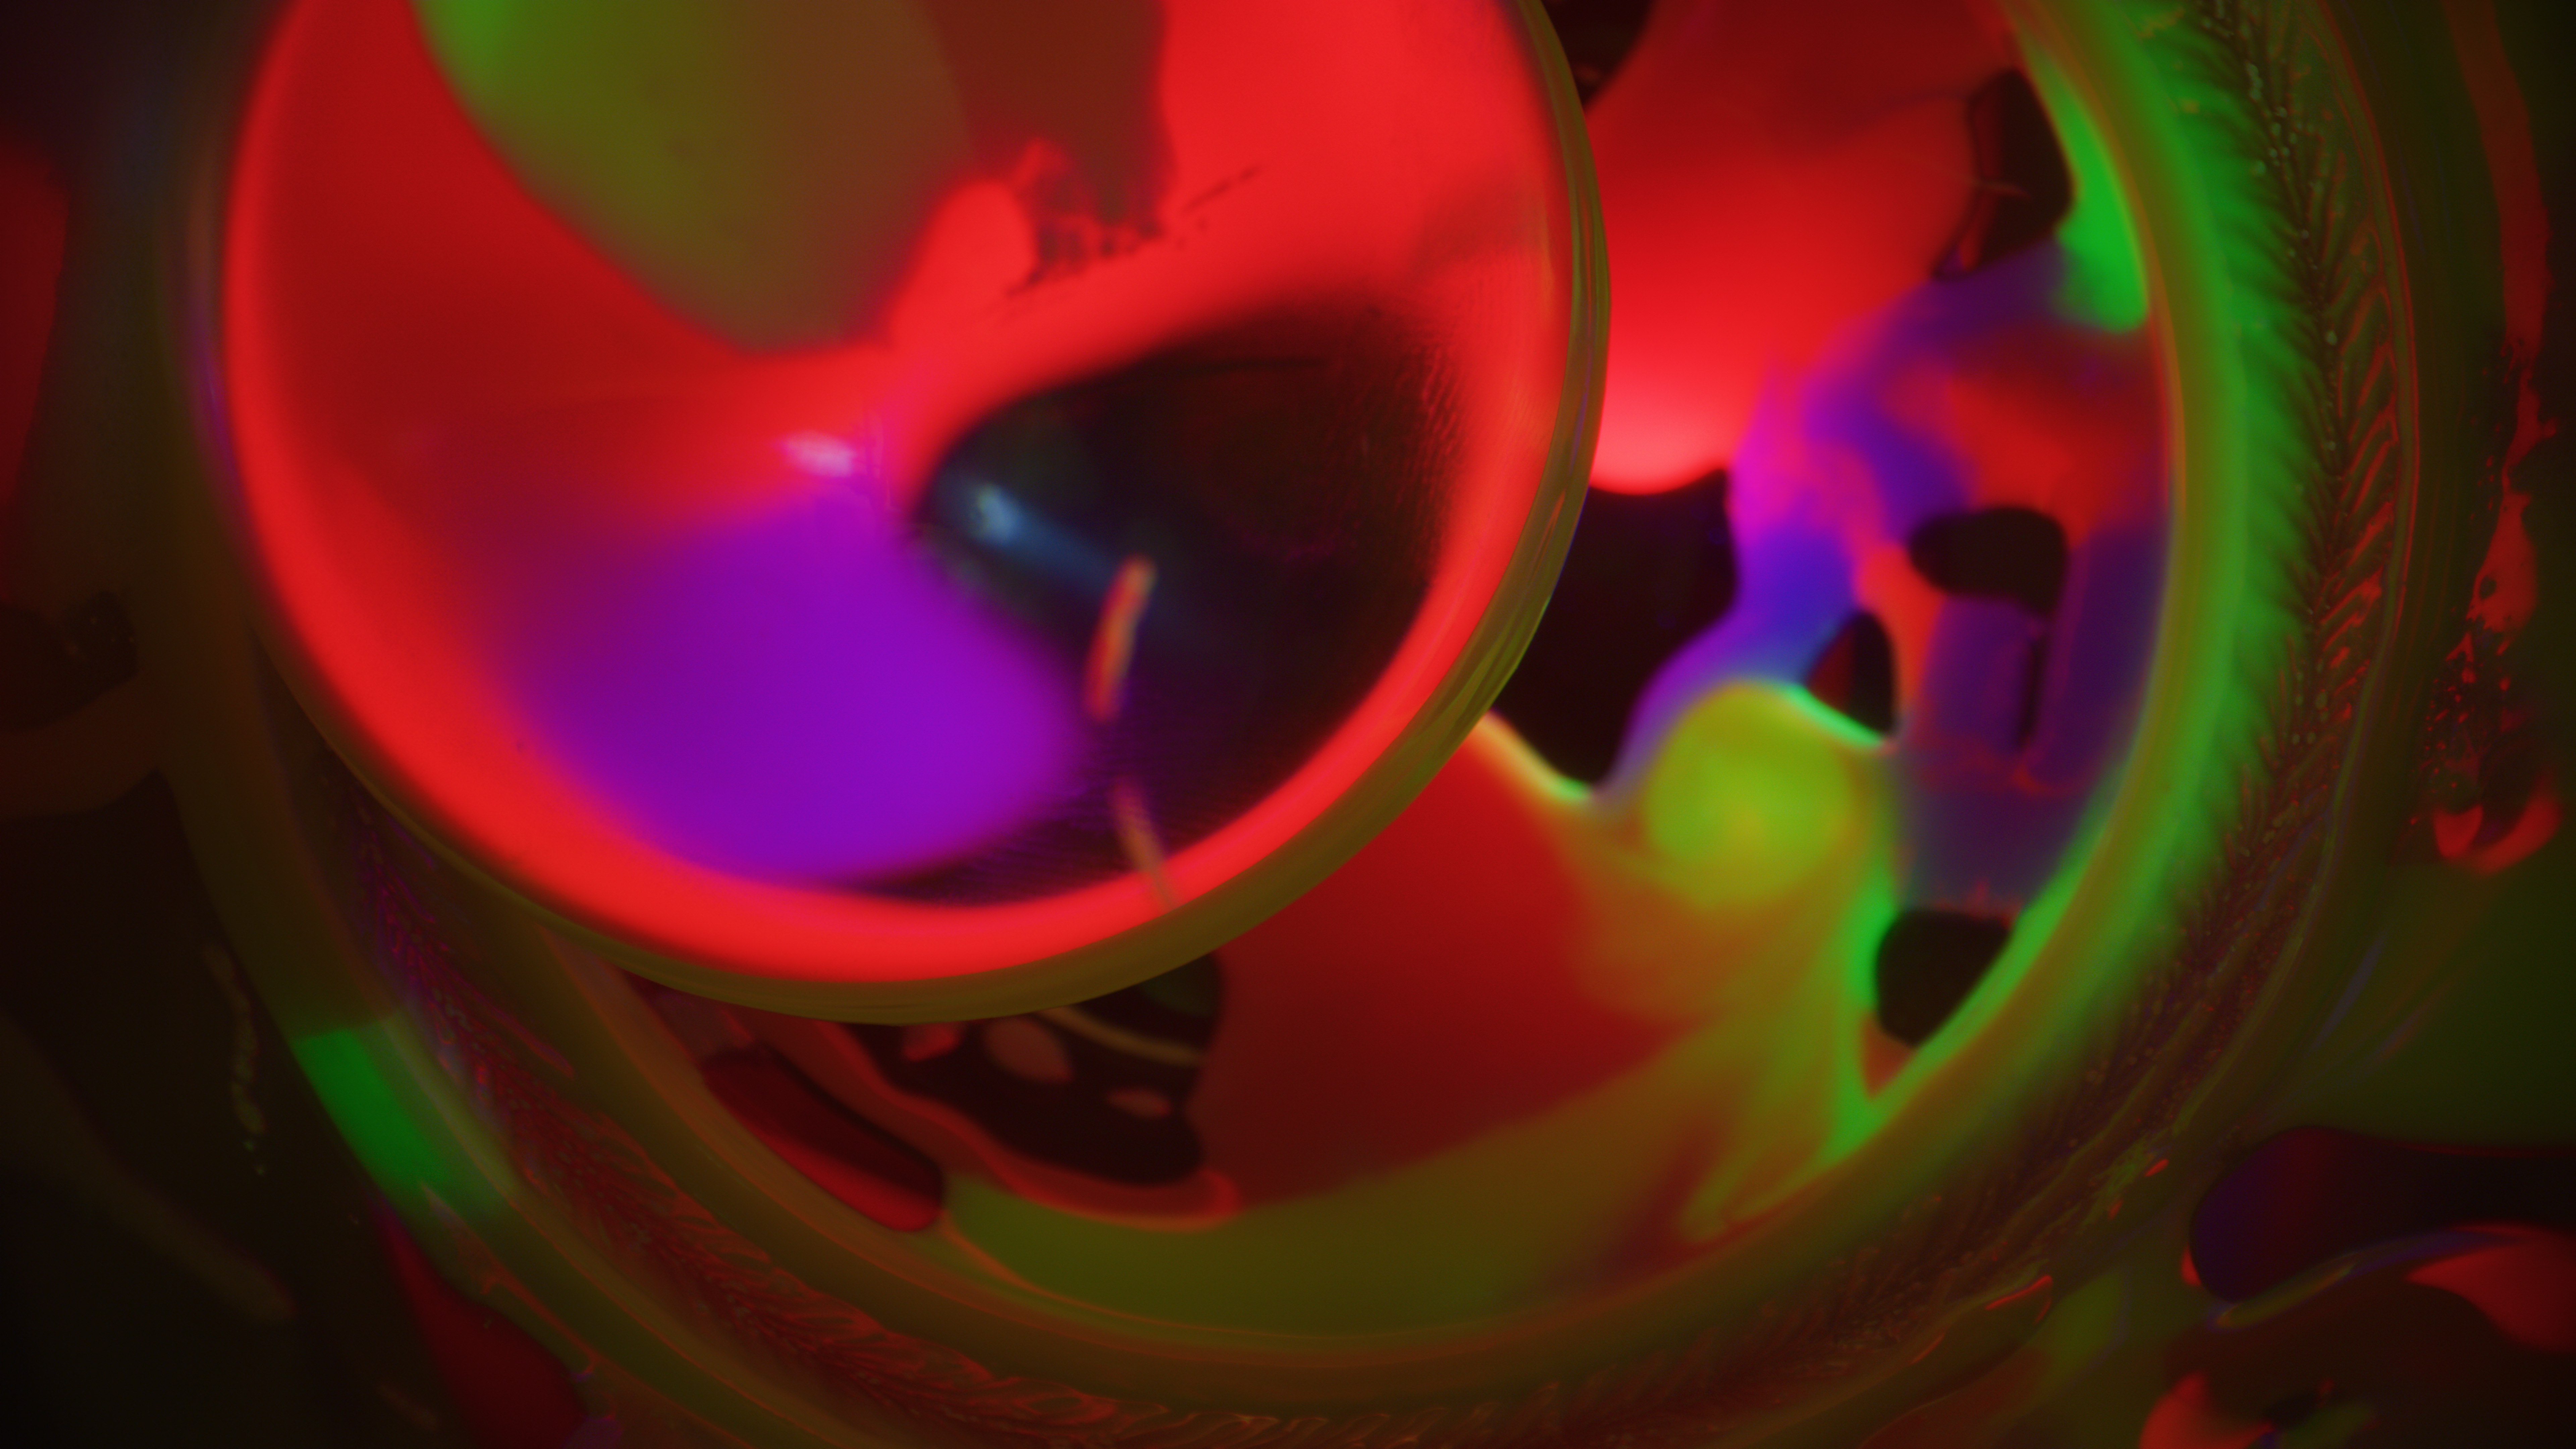
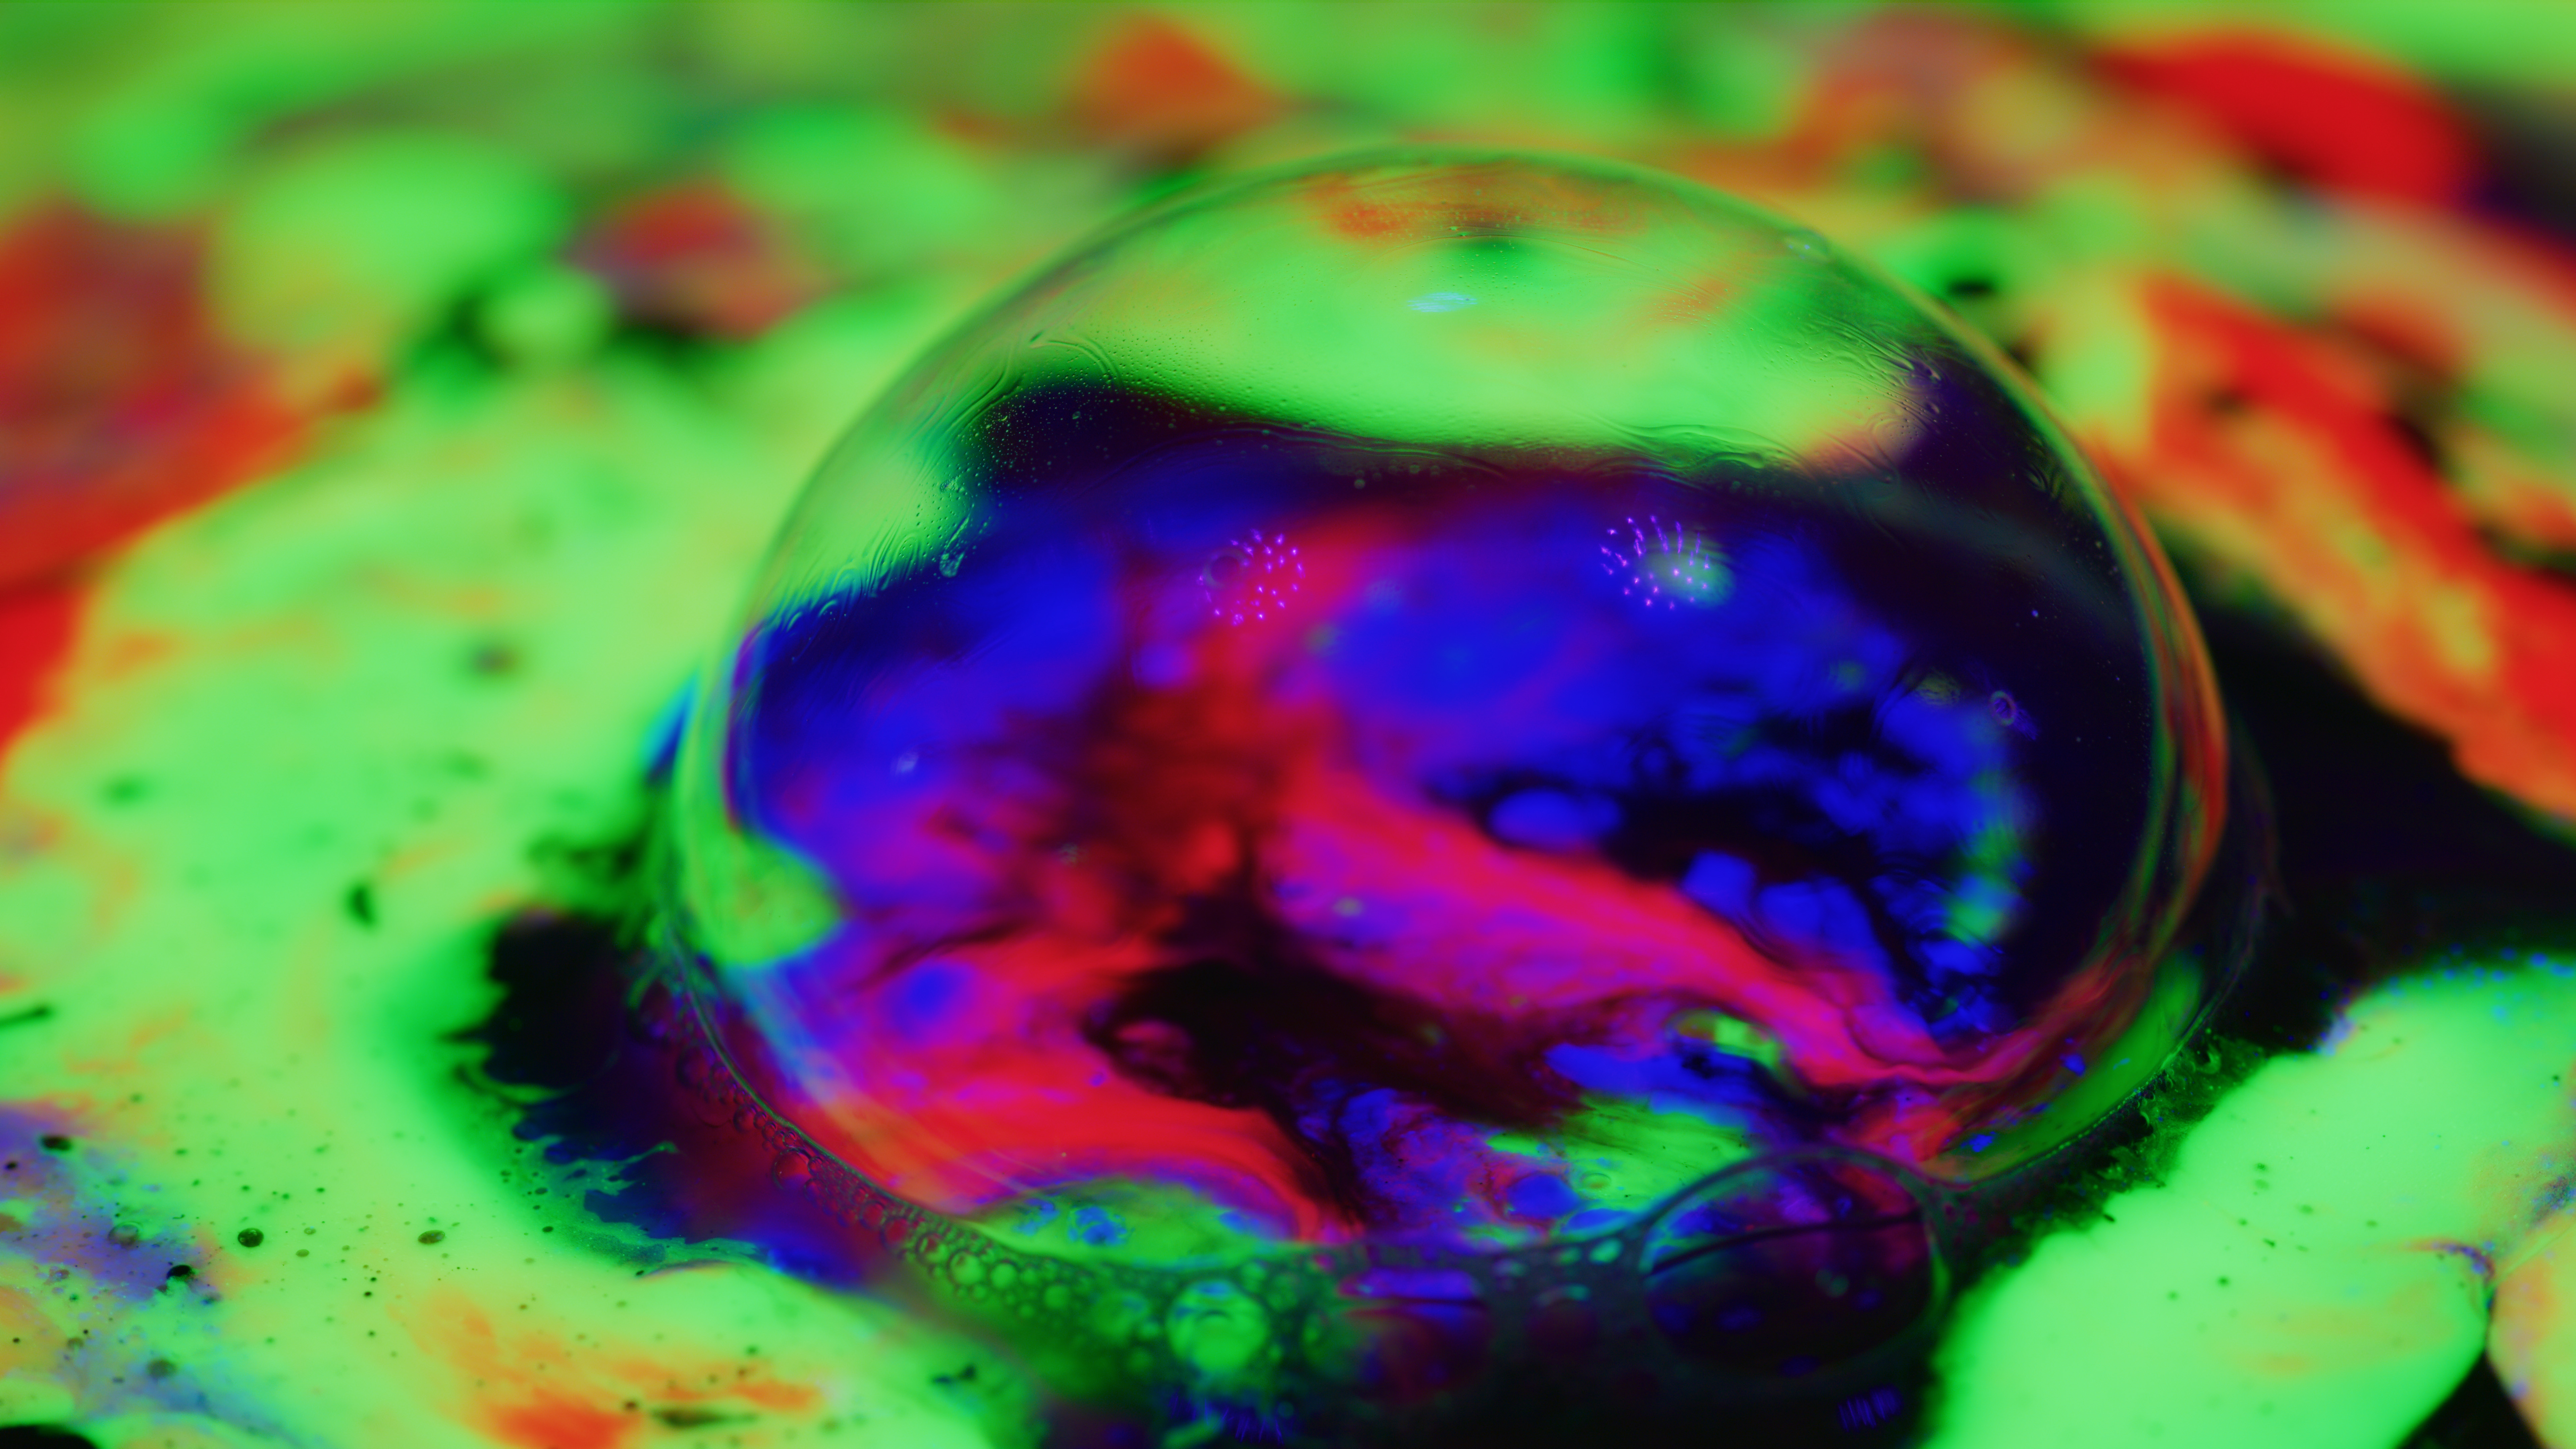
There were other tricky setups in there. The shots where the camera and sets are rotating/spinning as well as the lights moving and cued to the movements required a great deal of rigging. One full day to build essentially and then half day of rehearsing timings for the "UV lightning strikes" to pop with the music as well as doing the off speed switch within the Quantum Tunnel section, that setup indeed was 5 different MoCo rigs all performing together as well as stroboscopic lights happening in time with a shot that was destined to be sped up. There's also a shot that was dependent on the surface bonding properties of the Quantum Dot Fluid to a glass sphere while changing it's habitat's gravity that took a minute to figure out from a camera direction and prop movement perspective. The tricky bit there being providing the similar colors to dissolve to it on green and exit dissovle on violet/blue and then matching to the next vibrant Quantum Tunnel Shot. The anti-axis spinning planes was achieved with two steel plates rotating in opposite directions as the camera spun upside-down through about a 1 inch gap and the result is the reflecting drips appearing more as stalagmites on the surface above, which all had to be filmed rather quickly before the material dripped off.
Building the Quantum Tunnel Setup
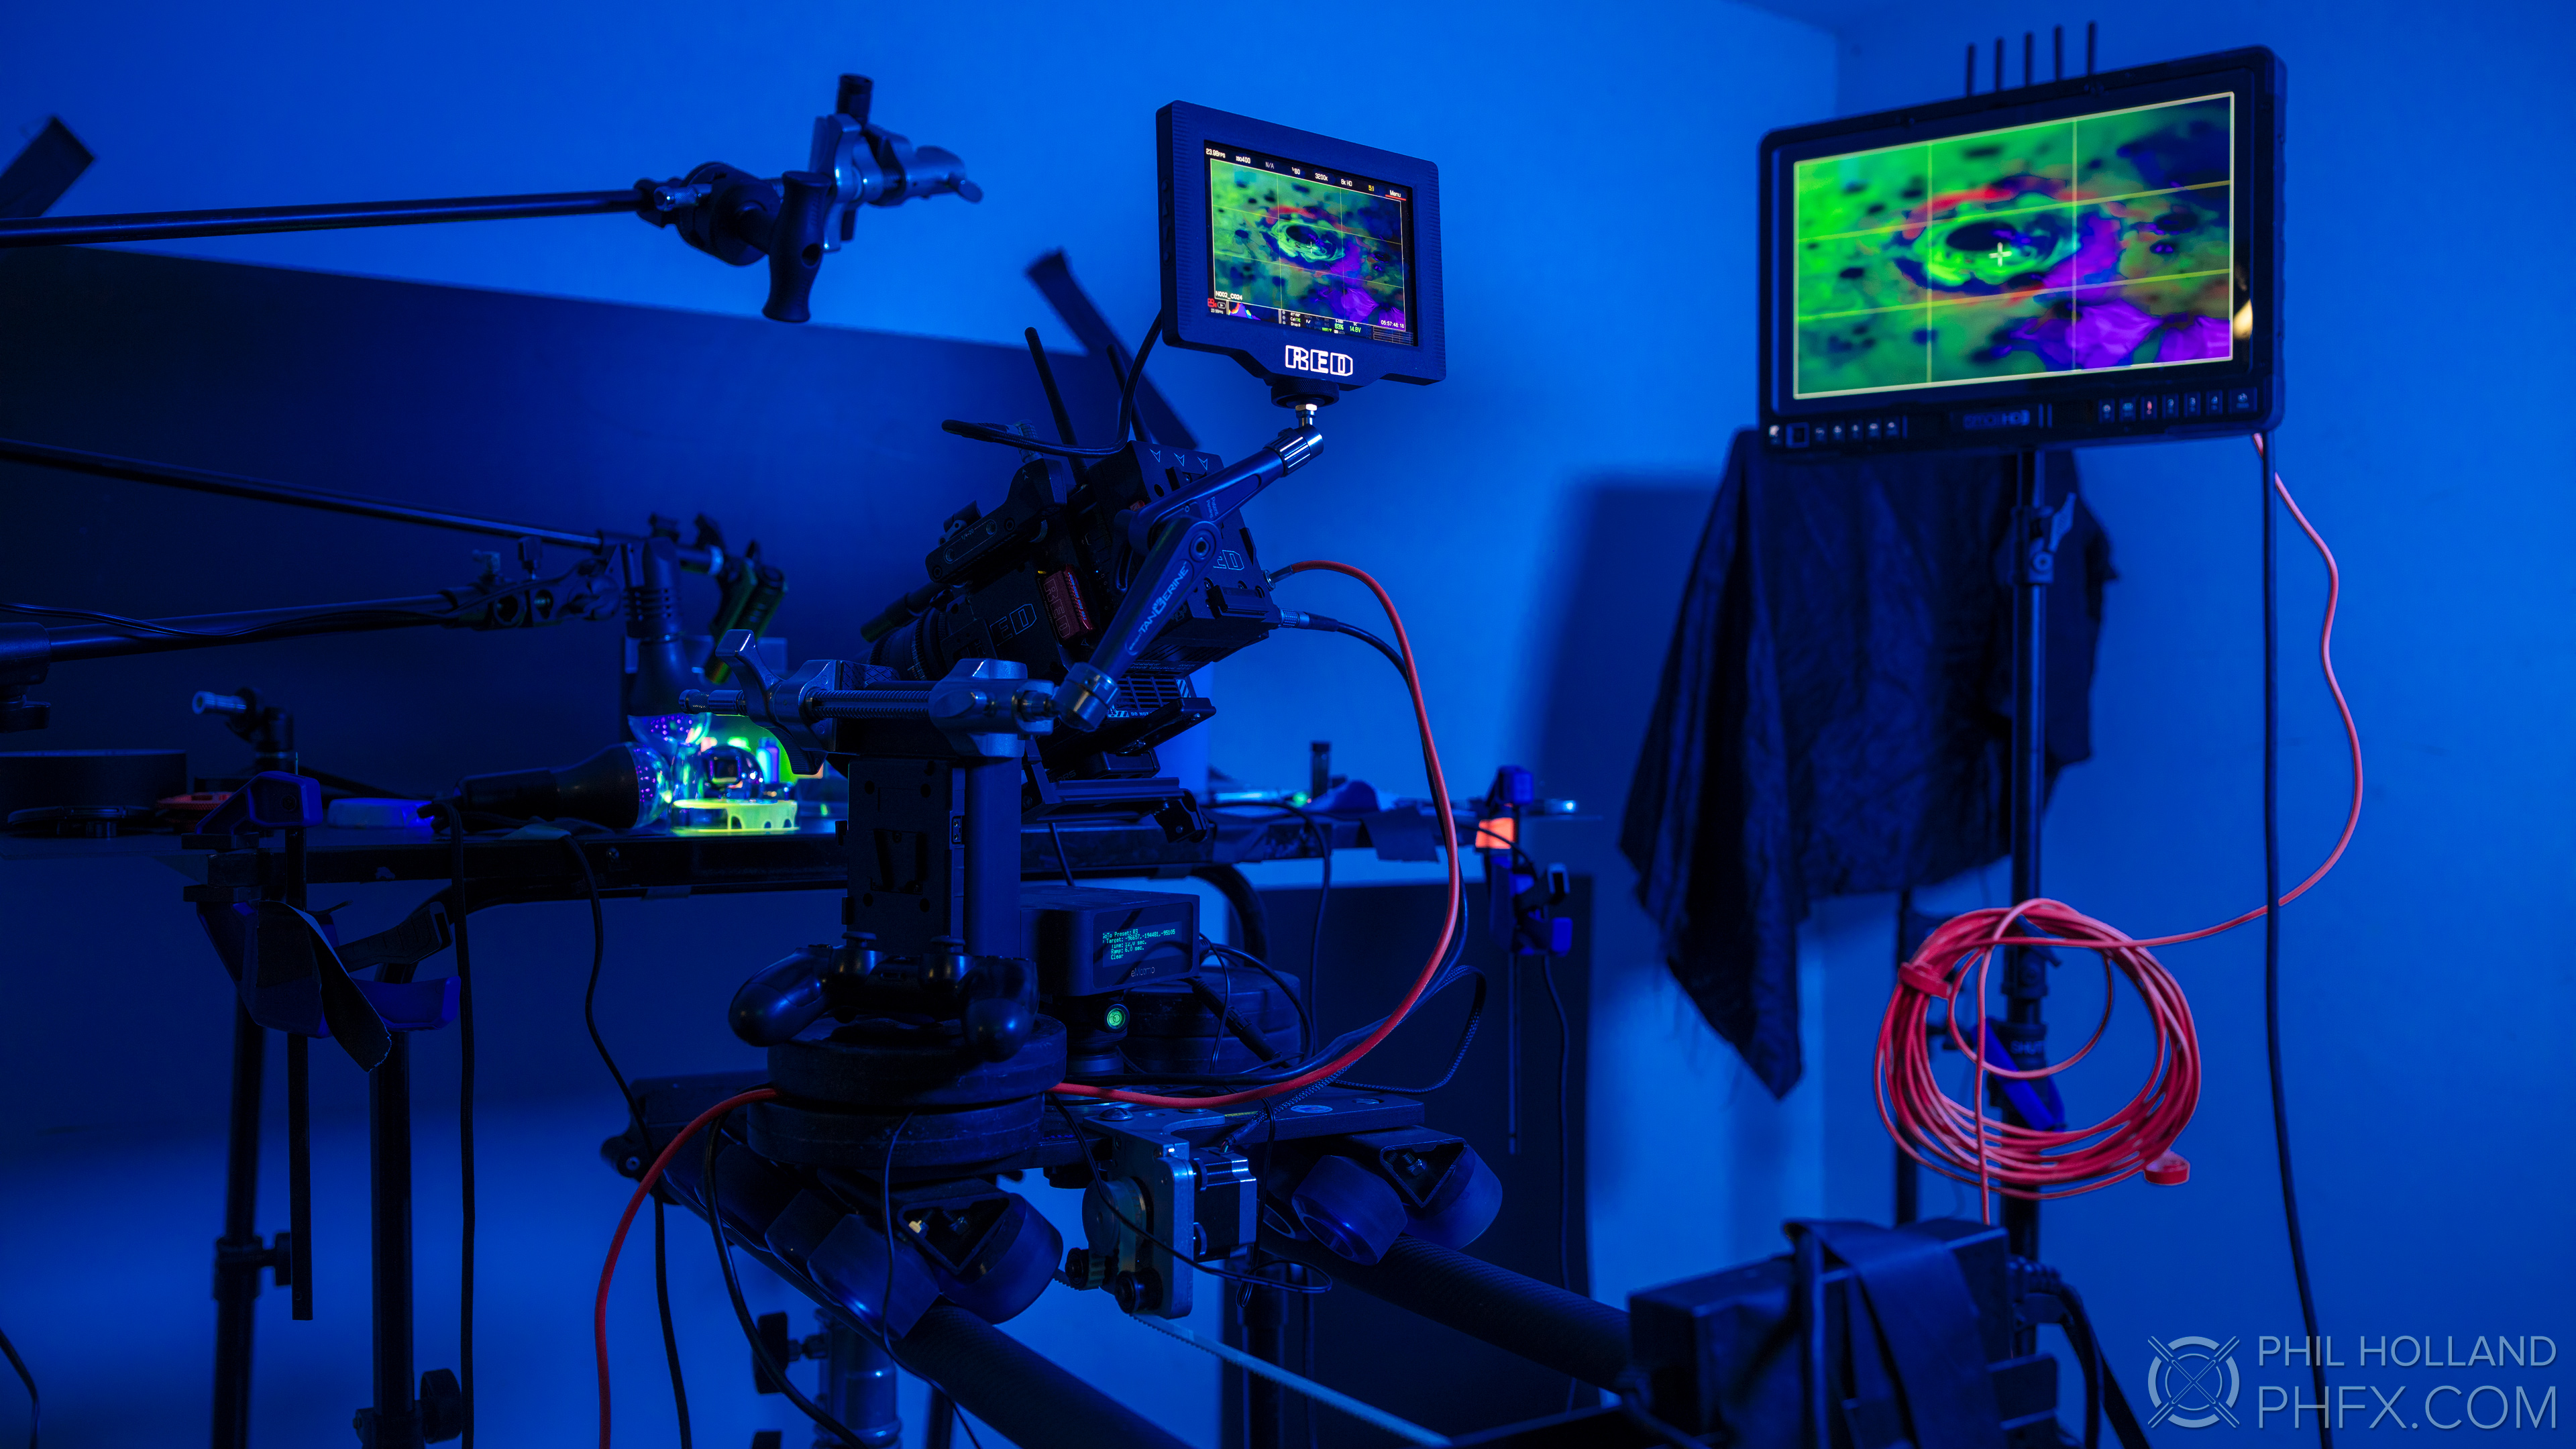
Just a quick detour back to the general process. The camera was used in a few ways on the eMotimo ST4/Dana Dolly combo. However, since this project was captured at very closeup distances, often longer lenses, pretty extreme macro, in 8K resolution it was important to not really touch the camera as it would have added vibration to shots. To tame that issue camera control was done via the Foolcontrol App running on an iPad Pro. This was convienent to quickly get into some of the In Camera Exposure and Focus Tools to pull up on the SmallHD 1703P3X you see in some of the BTS shots. Streaming to the SmallHD happened at times both with an SDI Cable, but also using the Teradek DSMC2 Bolt Wireless Transmitter was a very important tool on the shots where the camera was freely rotating and spinning. The SDI cable would have limited the camera movement and without wireless video transmission those shots honestly wouldn't have been able to even be monitored. Camera recording was generally trigged via Foolcontrol w/ about 5-10 second handles, but I also used the eMotimo ST4's start stop cable a fair amount of times when fluids needed to be setup. Trigging the other motion control units happened in a variety of ways from sound cueing all at once to syncing via Bluetooth Triggers, which was tricky in some cases. For shots where lighting was cueing to the music, since the camera movement was motion control, I had time during the take to manually trigger those to the beat via hands and feet.
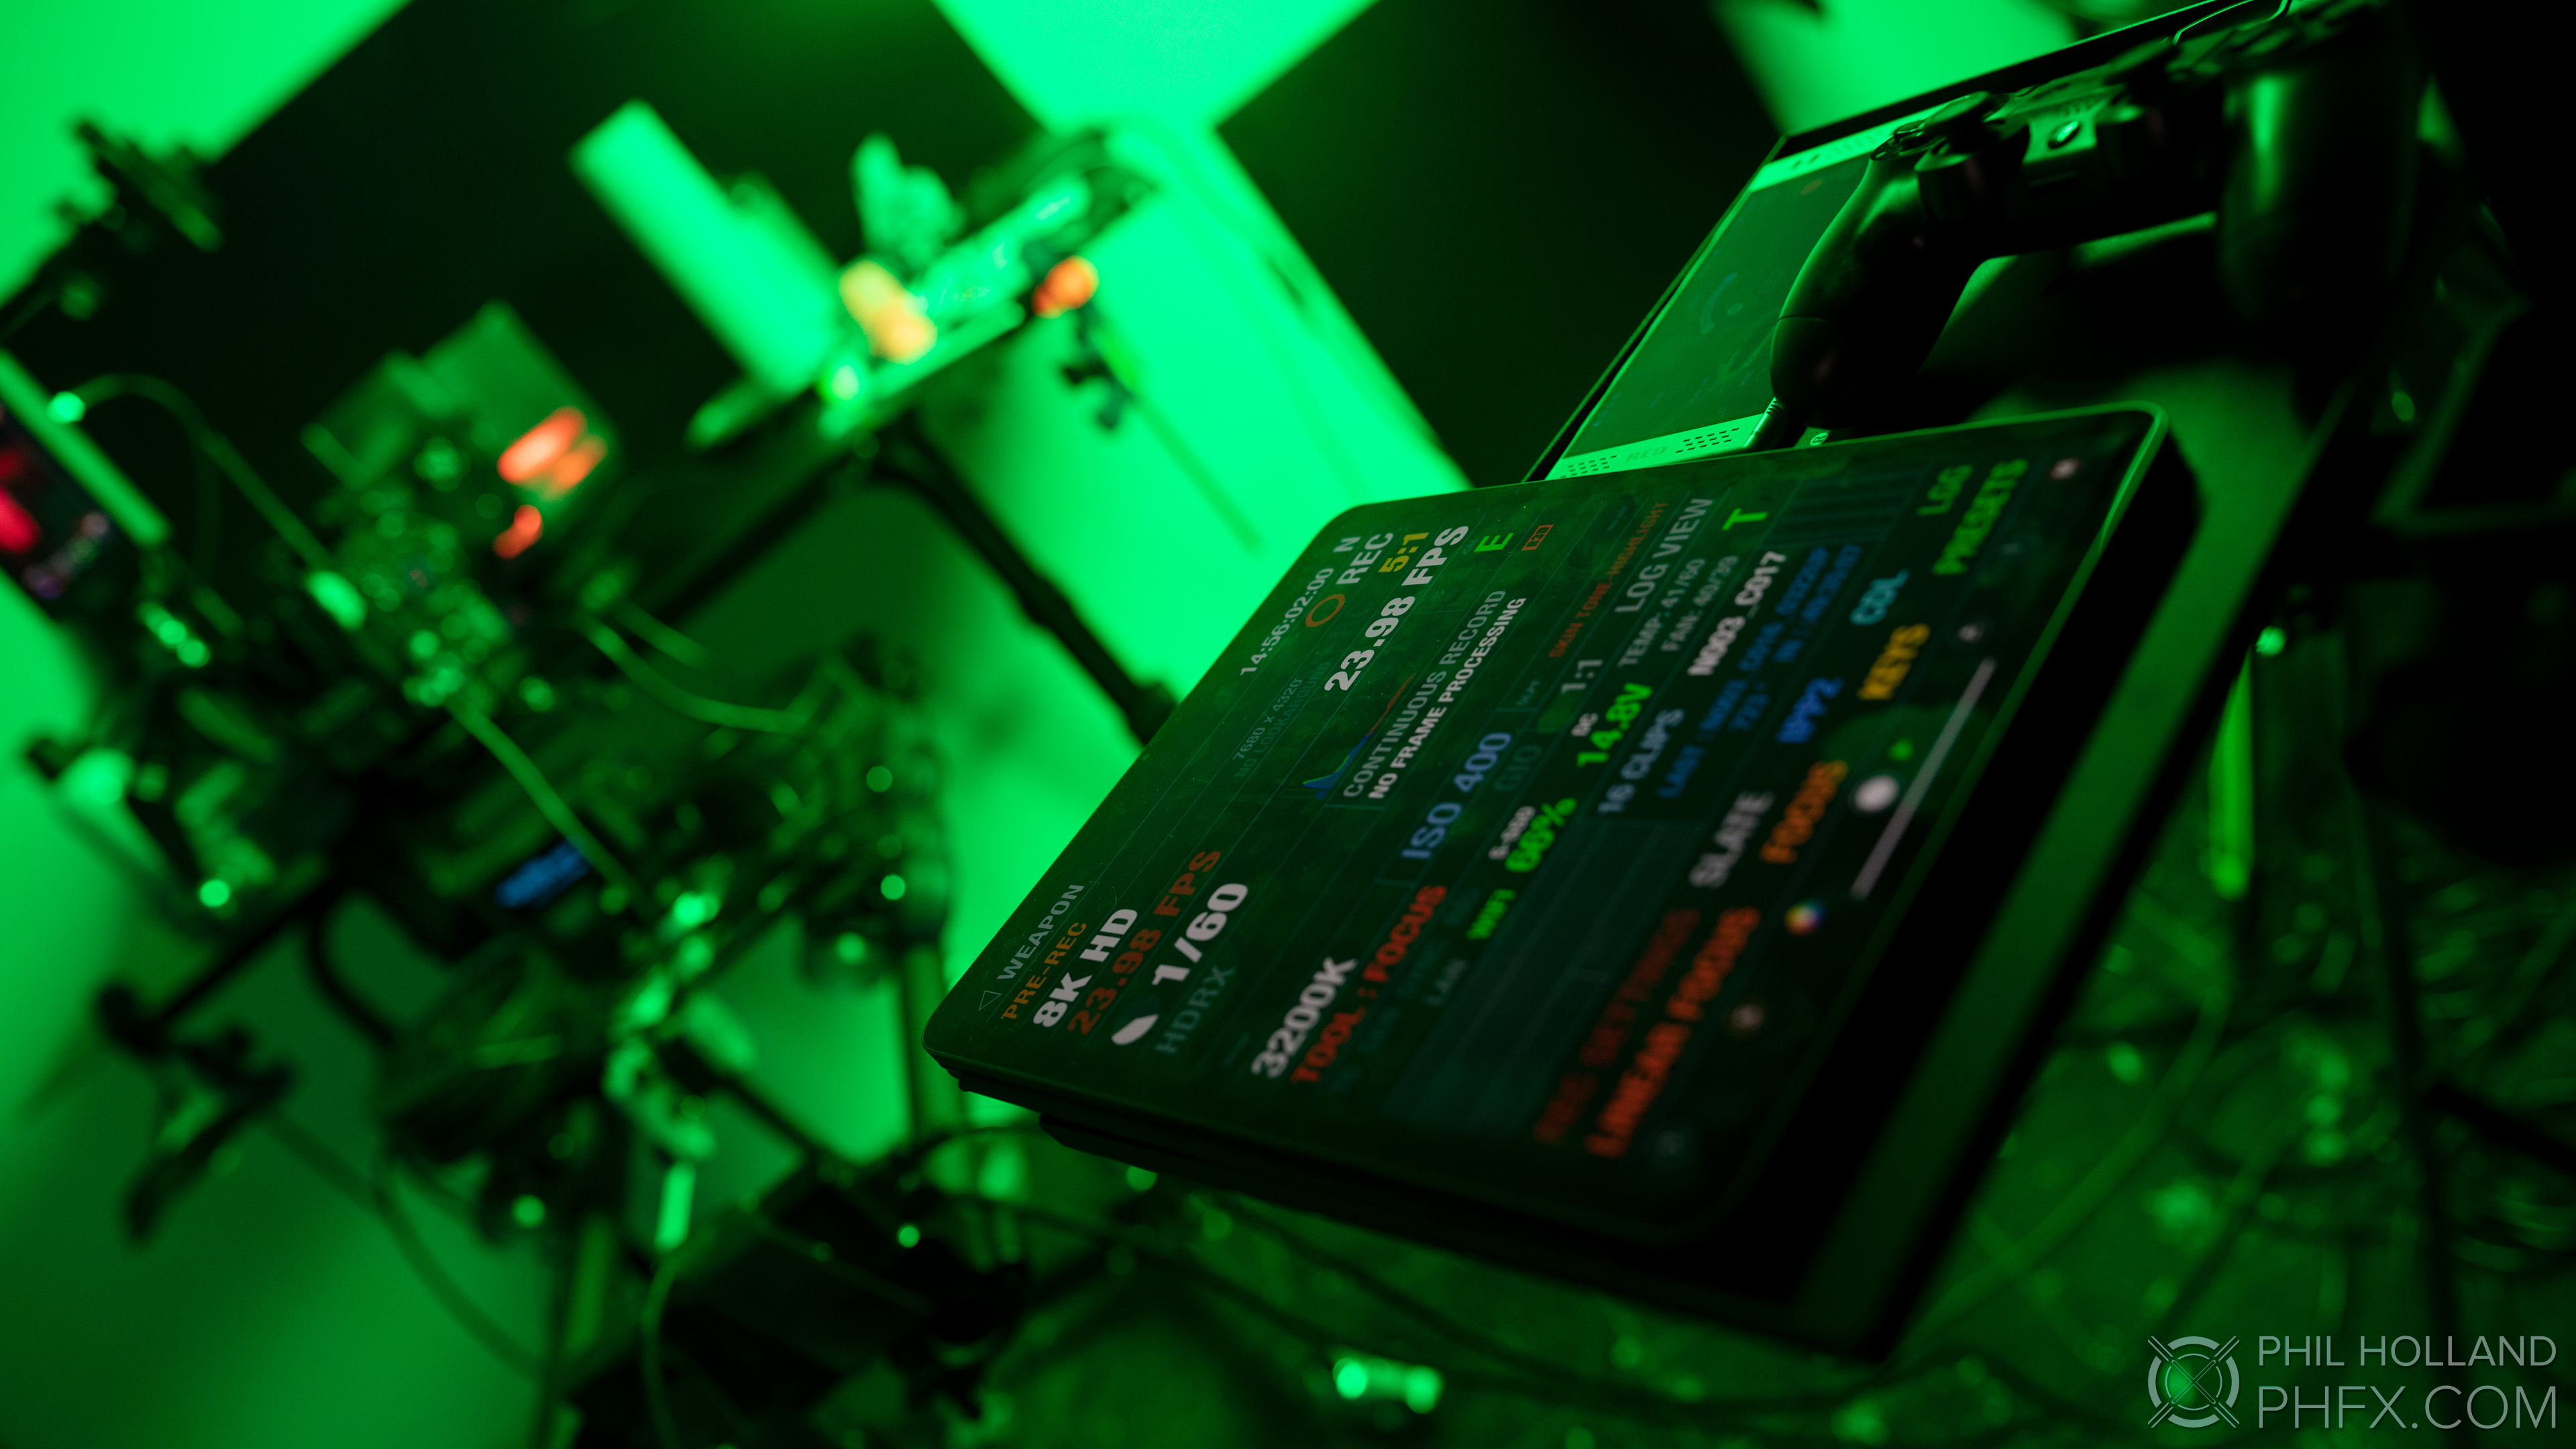
Wireless Camera Control via Foolcontrol
Just to quickly touch on the big hurdles here. Timing on the fluid's performance to work in combination with the motion control shot design and achieving critical focus was a notable one. Also building all the various contraptions to hold props, sets, fluilds, lights, etc. was also a time consuming task. However, and I touched on it earlier, the trickiest and very time consuming process of cleaning every set piece between takes added a good deal of time between take 1, take 2, etc. Not only due to the time cleaning, but anytime a set piece was reconstructed I had to reset the critical focus points because being off focus by a fraction of a millimeter would be noticeable at these long tight macro focal lengths. To help with that, as much as possible I put cleaning supplies and props nearby to each set to shave a few minutes off here and there. Most chapters were captured in a day, but there were several that took a couple of days to rig, clean, and nail.
Cleaning between takes was a time consuming challenge
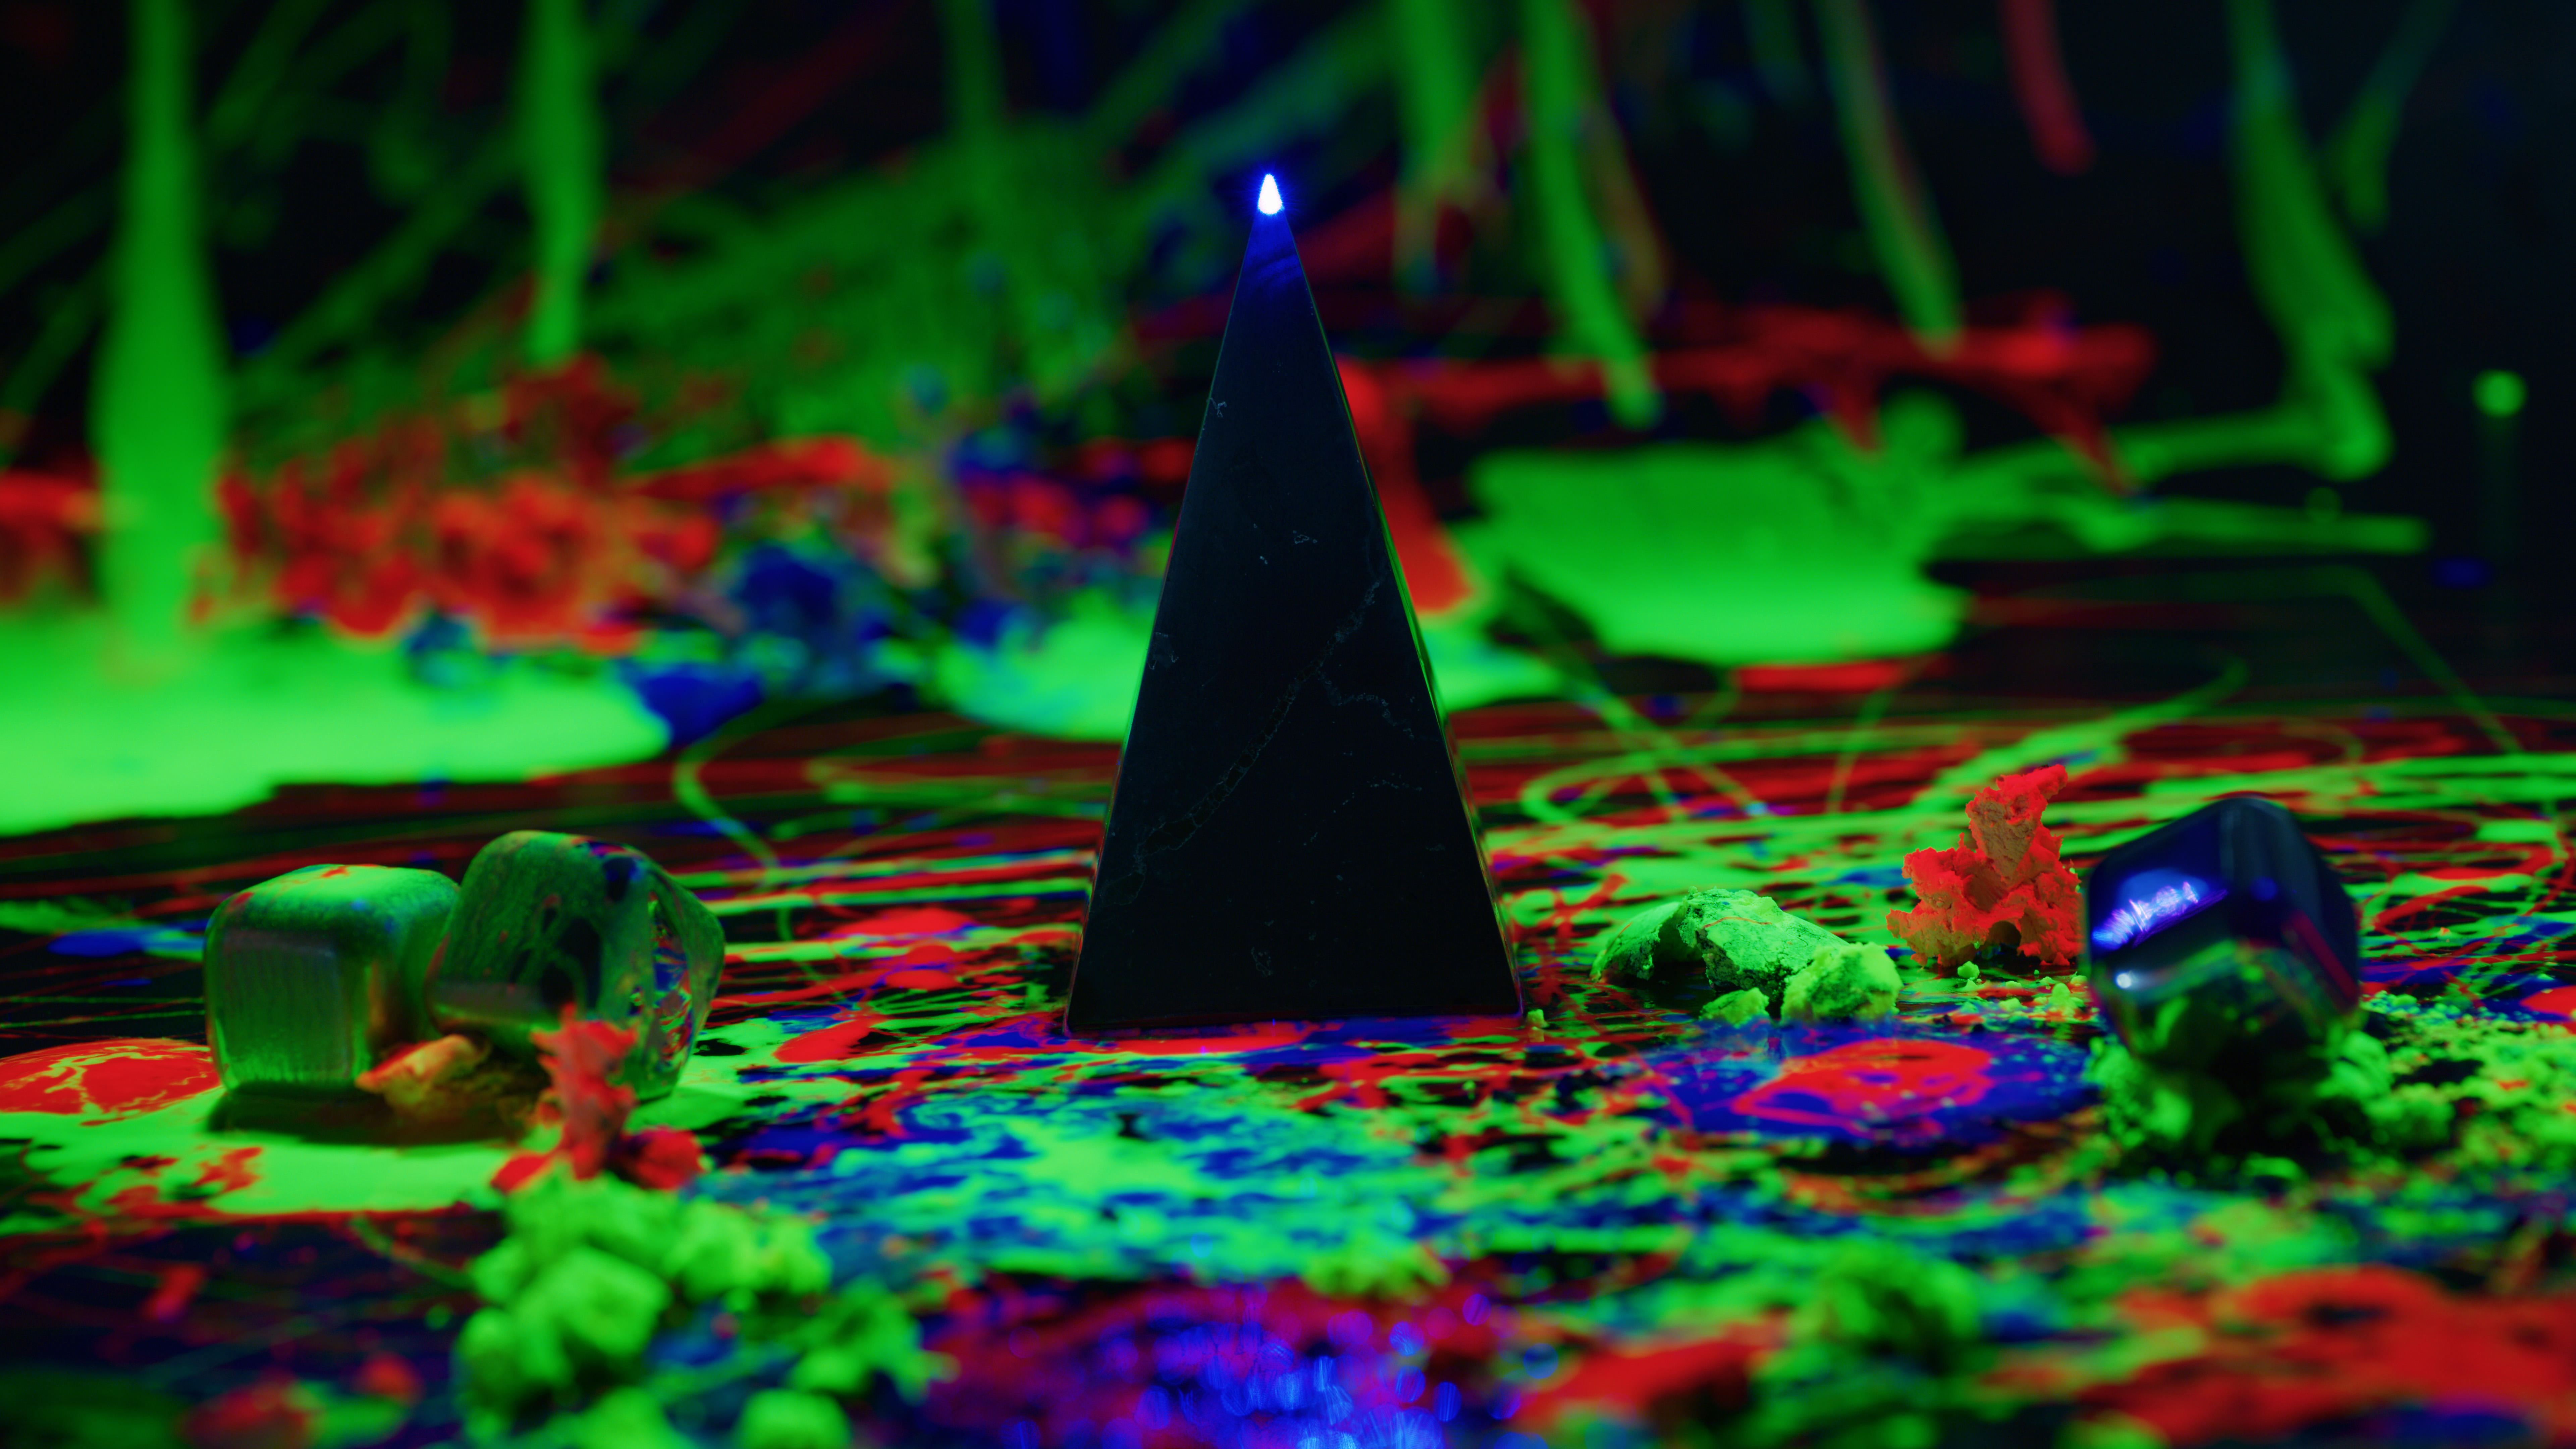
The last shot was a medley of the various textures of materials Nanosys created that were used along the way in a big reveal. Leading up to that I felt it was neat to have the UV Laser comb over the Quantum Dot Fluids to illustrate that they only illuminate when hit with the UV light, which led to a nice lead into the laser tracing light finding it's way to the peak of the dark stone pyramid, the only stone actually used in the entire piece. Which brings me to a couple of influences that I had when initially visualizing at the beginning. I would say there are a couple of nods to Stanley Kubrick's 2001: A Space Odyssey. Kubrick's Monolith was always a black rectangular slab and oddly my similar dark voids have always been a black pyramid and occasionally a bottomless abyssal hole. I looked to integrate both of those concepts in this piece. There's also a dash of "if Jackson Pollock did abstract motion" in there with the focus being on the artistry of working with colored light, color mixing, and blending in a more painterly fashion.

Building the Quantum Tunnel Setup
Color Grading
Quick tech details for the perversely curious. The general workflow was first light color in REDCINE-X PRO, edited natively in 8K REDCODE RAW in Adobe Premiere Pro CC, color grading and exports were done in DaVinci Resolve 16. Quality Control, Review, and Rendering happened on 3 of my workstations including my Road Warror (article coming soon) and a newer fairly maxed out Dell Precision 7920 Intel 28-Core Workstation driving various 4K and 8K SDR and HDR displays from Dell, Asus, Sharp, LG, and Samsung as well as notebooks w/ 4K screens from MSI, Dell, and Razer. HDR in some ways is still the Wild West and much like many of projects masters and QC need to occur sort of everywhere and anywhere. With this project being so high gamut it was so very important to test thoroughly to ensure the grade fit a broad viewing audience window of experience whether they were viewing in HDR or SDR.
This project was always about color and subtle detail and the color grade was both simple and extremely complicated. Simple in the sense that we know via the scopes where red, green, and blue should go. However, we did have to ask ourselves "what green is" in terms of how people would mostly identify it. For the SDR (Standard Dynamic Range) Color Grade, this was a simpler question to answer, however for the HDR (High Dynamic Range) Color Grade it was a bit trickier. During capture everything was controlled and I went to extreme lengths to light consistently and choose to fully clip sparingly. When clipping it was to really emphasize small areas of the frame or to grow color intensity and luminance within the shot in a nearly slow breathing manner. To contrast that we have some fairly deep shadows with subtle detail going on, which HDR excels at displaying.
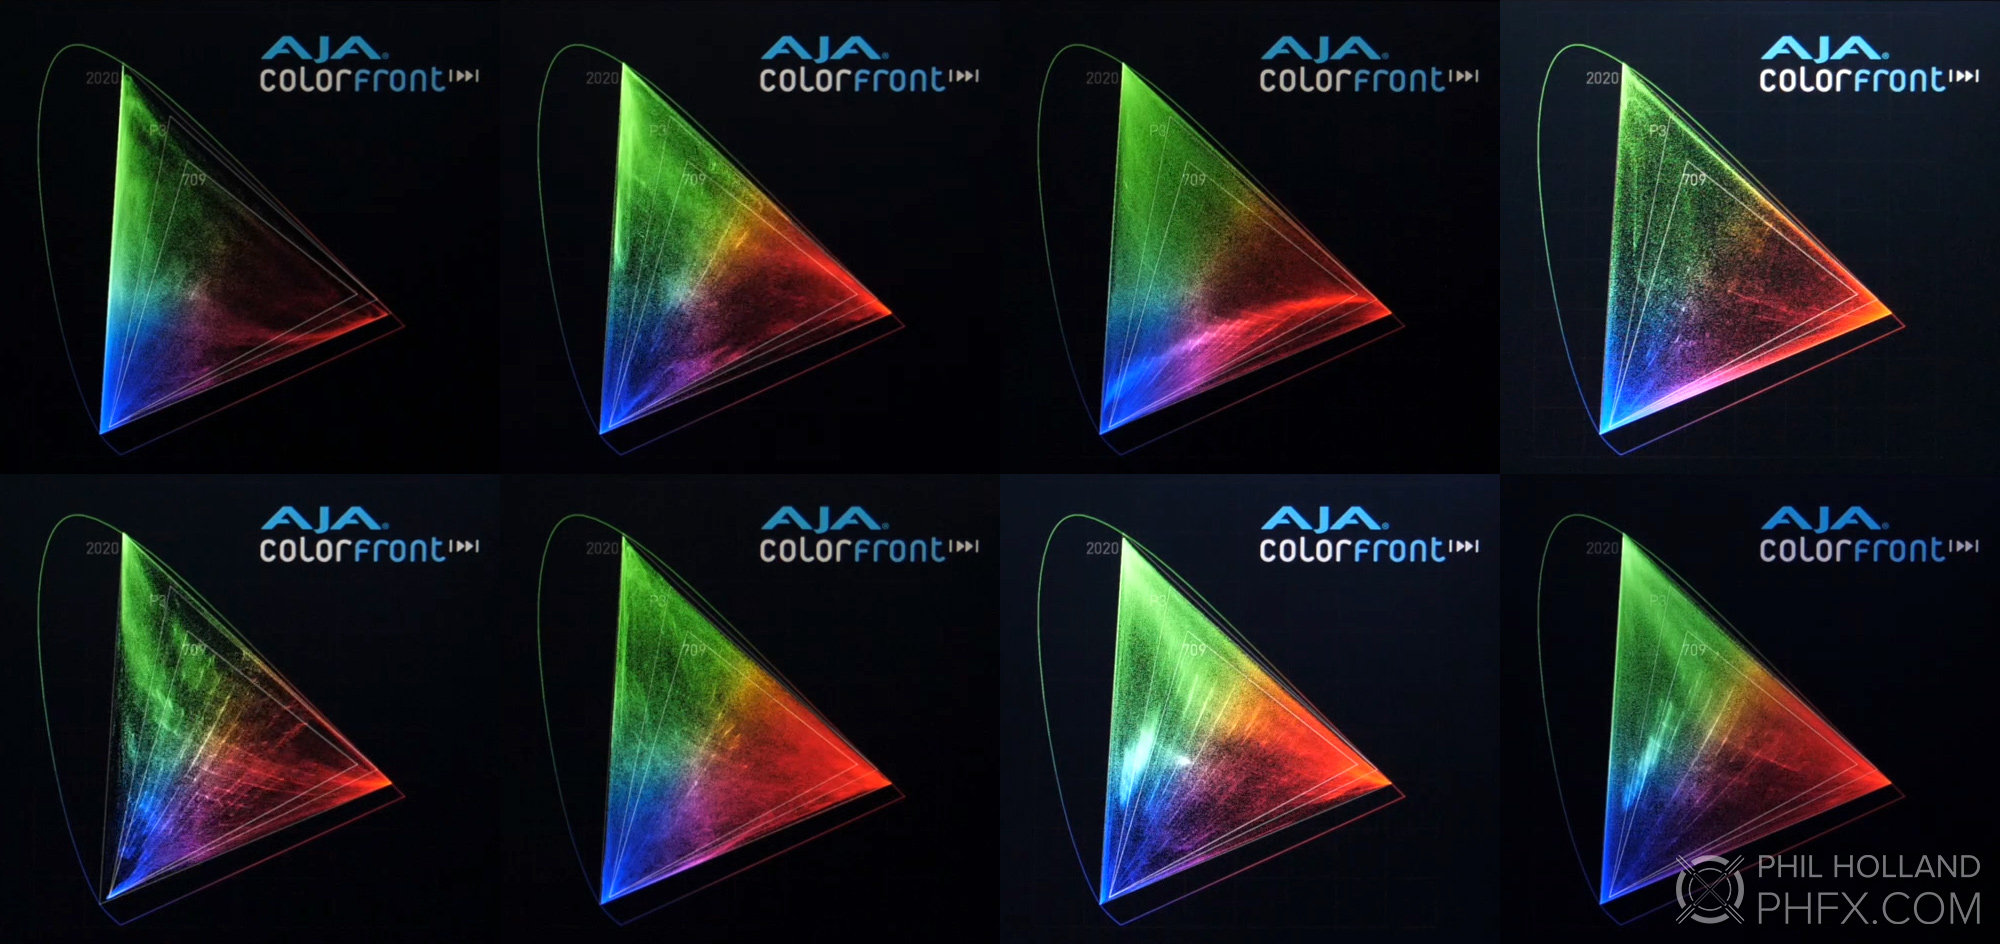
The Rec.2020 CIE Plot from via AJA's Colofront Engine, filling up the bucket several times during this short
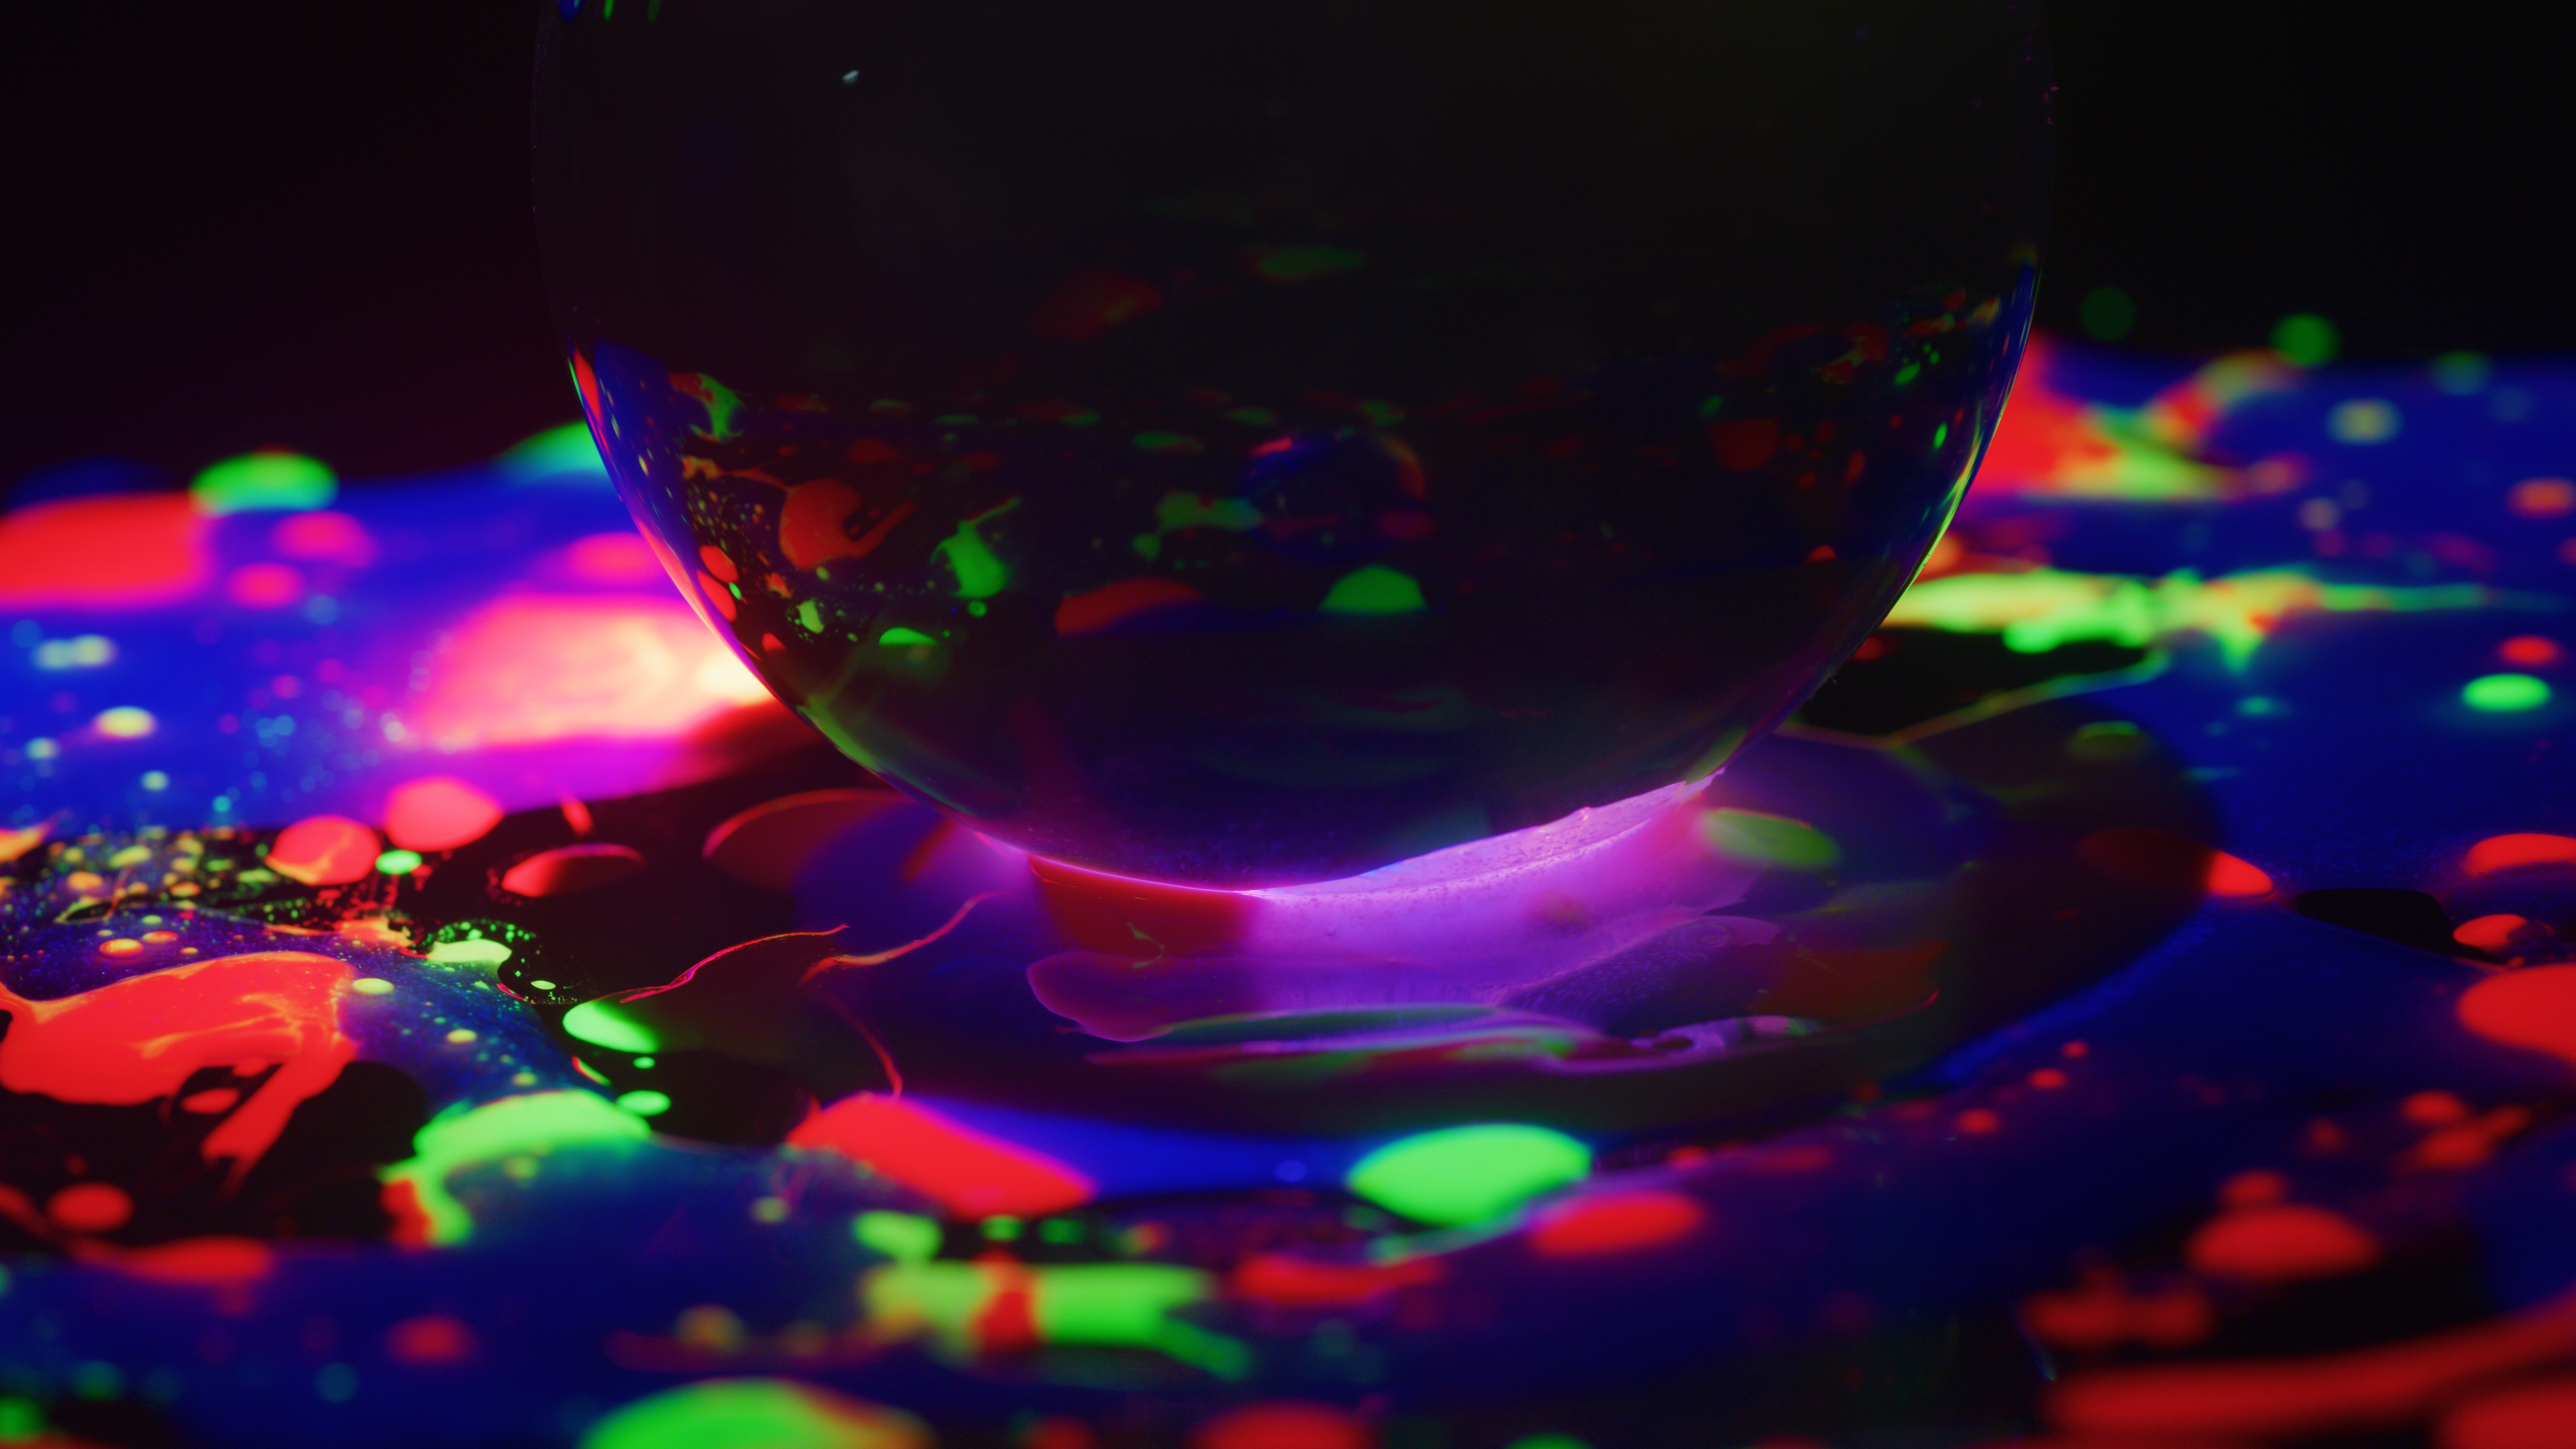
The goal for me was to really "fill up the bucket" of the RED Monstro 8K VV's Total Captured Dynamic Range and transform that to rather full Rec.709, P3, or Rec.2020 Color Spaces. To that point I am working within RED's IPP2 Color Pipeline and their REDWideGamutRGB and Log3G10 color space/gamma, which really is working wonders on this extremely high gamut and high dynamic range material. For the shots like the spinning glass orb, it features an internal reflection of itself which also reflects the scene around it. This really can only be seen on a larger screen and is a nice discovery center frame in the shadows. In the same shot there are highlights clipping as they emerge from behind the sphere growing in strength with a light tracking that movement as well as increasing the intensity of the Quantum Fluid below the sphere. This shot from a color perspective is just maxed out in every way and a joy to watch on the scopes. Color was done in Davinci Resolve and a great deal of masters were created. Mainly with the focus on HDR 1000, 1500, 2000, 3000, and 4000 nit grades as well as an SDR grade that I'm oddly really fond of. This project in the end is as much much as a stress test for modern display technology as well as abstract short film. I suspect Colorists might find some joy in the strangely hypnotic dance of the scopes below.
The Waveform and Vectorscope dancing around sped up 200%
Desktop Wallpapers
If you've read this far, firstly thank you. This is a weird and moderately nerdy project and a fun one for me. If you have a computer desktop that needs a background, I've created a few 8K high resolution frame grabs of key moments that might find a home on your workstations.


Special Thanks
I'd really like to Jeff, Brian, David, Jason and everybody at Nanosys for being so accommodating with my weird Quantum Fluid Desires and allowing me to produce this piece. This is far from an everyday project. I think it's tremendous that they are not only based in California, but also manufacturing Quantum Dots in the state as well. Also big thanks to Stacey Spears, Tyler Pruitt, and Colorfront for the various strange last minute assists on those sanity QC checks. One last thank you to Duclos Lenses for the speedy turnaround of the weird focus gear and front ring CineMods on a few off the oddball macro lenses. High fives and handshakes all around.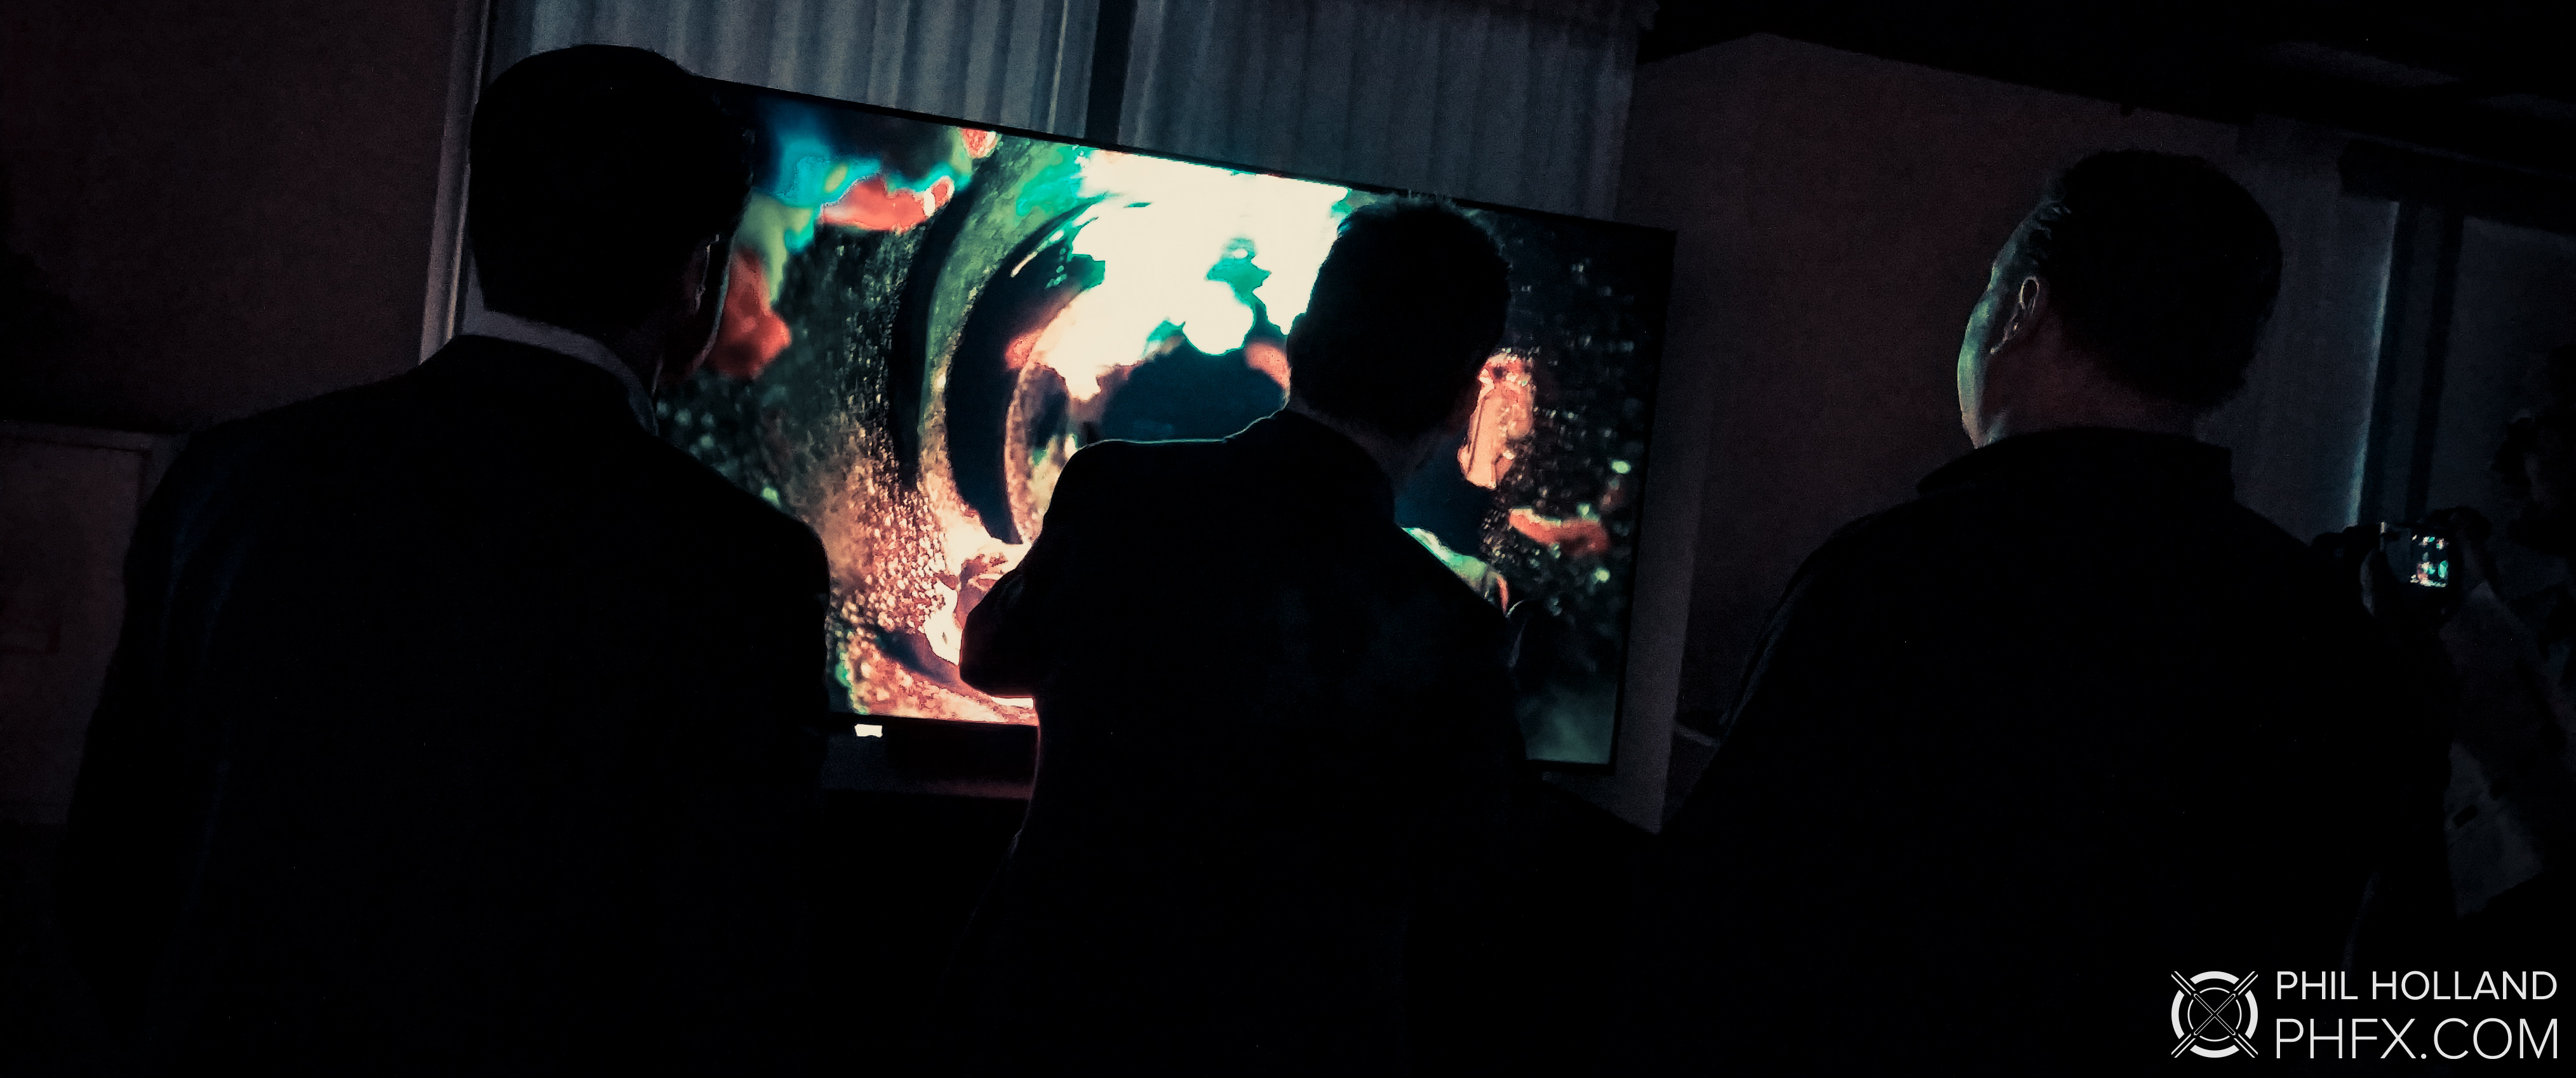 Media and Attendees watch Quantum Flows at the 8K Summit 2019Quantum Flows premiered not only online on June 11th 2019, but also truly was on display on one of many Samsung 8K Q900 82" televisions on dispaly at the 8K Summit 2019 in New York. This particular version was an HDR 10, 1000 nit grade in P3 space. This project truly is pushing color out of the screen and comments about the images feeling like moving Cibachrome pictures in motion jumping out of the screen were well received by myself, Nanosys, and Samsung. Also on display were other demonstrations of all sorts of 8K material mastered in HDR and even a few SDR pieces while the bulk of the event surrounded the emerging 8K ecosystem, best practices, a great deal of shared research and develop behind the allure of 8K displays as well as the technology that drives it. A special event for imaging professionals, media, and creators that went pretty deep into the technology with a focus on the creative fuel that drives it. It was an honor to present, speak, and share thoughts about working in 8K and also having something rather different to show to the attendees.